

User Manual
Page 1
B5A-1253-00/04 TH-D74A TH-D74E User MAnUAL This User Manual covers detailed operating instructions of the TH-D74A/E including basic operating instructions described in the User Guide comes with the product.
B5A-1253-00/04 TH-D74A TH-D74E User MAnUAL This User Manual covers detailed operating instructions of the TH-D74A/E including basic operating instructions described in the User Guide comes with the product.
User Manual
Page 2
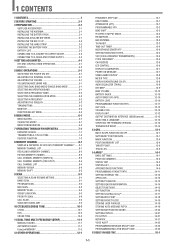
... 9-4 CALL SCAN 9-4 SCAN AUTO BACKLIGHT 9-4 10 CTCSS/DCS/CROSS TONE 10-1 CTCSS 10-1 DCS 10-2 CROSS TONE 10-3 11 DUAL TONE MULTI-FREQUENCY(DTMF 11-1 MANUAL DIALING 11-1 AUTOMATIC DIALER 11-1 EchoLink MEMORY 11-2 12 OTHER OPERATIONS 12-1 FREQUENCY STEP SIZE 12-1 FINE TUNING 12-1 ATTENUATOR (ATT 12-1 PROGRAMMABLE VFO 12...
... 9-4 CALL SCAN 9-4 SCAN AUTO BACKLIGHT 9-4 10 CTCSS/DCS/CROSS TONE 10-1 CTCSS 10-1 DCS 10-2 CROSS TONE 10-3 11 DUAL TONE MULTI-FREQUENCY(DTMF 11-1 MANUAL DIALING 11-1 AUTOMATIC DIALER 11-1 EchoLink MEMORY 11-2 12 OTHER OPERATIONS 12-1 FREQUENCY STEP SIZE 12-1 FINE TUNING 12-1 ATTENUATOR (ATT 12-1 PROGRAMMABLE VFO 12...

User Manual
Page 3
...WIRELESS CONTROL (TH-D74A ONLY 25-1 PREPARATION 25-1 CONTROL OPERATION 25-1 26 OPTIONS 26-1 27 MAINTENANCE 27-1 GENERAL INFORMATION 27-1 SERVICE 27-1 SERVICE NOTE 27-1 CLEANING 27-1 TROUBLESHOOTING 27-2 28 SPECIFICATIONS 28-1 Note: ◆◆ Display examples in this manual may still ...from, or in connection with, use and, unless specifically described in this manual may not match the actual operations. INDEMNITIES • JVCKENWOOD Corporation takes all descriptions in KENWOOD product memories are reserved for JVCKENWOOD Corporation. 1-2 Firmware Copyrights The title to...
...WIRELESS CONTROL (TH-D74A ONLY 25-1 PREPARATION 25-1 CONTROL OPERATION 25-1 26 OPTIONS 26-1 27 MAINTENANCE 27-1 GENERAL INFORMATION 27-1 SERVICE 27-1 SERVICE NOTE 27-1 CLEANING 27-1 TROUBLESHOOTING 27-2 28 SPECIFICATIONS 28-1 Note: ◆◆ Display examples in this manual may still ...from, or in connection with, use and, unless specifically described in this manual may not match the actual operations. INDEMNITIES • JVCKENWOOD Corporation takes all descriptions in KENWOOD product memories are reserved for JVCKENWOOD Corporation. 1-2 Firmware Copyrights The title to...

User Manual
Page 4
...the F key to access its secondary function. Instruction Action Press [KEY]. TH-D74A: 144/220/430MHz Tribander (The Americas) TH-D74E: 144/430MHz Dual Bander (Europe) Firmware Version 1.09 or later.(...based voice processing • Compliant with Bluetooth, microSD & Micro-USB Writing Conventions Followed in this KENWOOD Digital transceiver. Press [KEY1], [KEY2]. 2 BEFORE STARTING Thank You We are covered by Automatic ...models listed below have been followed to purchase this Manual The writing conventions described below are grateful you decided to simplify instructions and avoid unnecessary repetition...
...the F key to access its secondary function. Instruction Action Press [KEY]. TH-D74A: 144/220/430MHz Tribander (The Americas) TH-D74E: 144/430MHz Dual Bander (Europe) Firmware Version 1.09 or later.(...based voice processing • Compliant with Bluetooth, microSD & Micro-USB Writing Conventions Followed in this KENWOOD Digital transceiver. Press [KEY1], [KEY2]. 2 BEFORE STARTING Thank You We are covered by Automatic ...models listed below have been followed to purchase this Manual The writing conventions described below are grateful you decided to simplify instructions and avoid unnecessary repetition...

User Manual
Page 12
... DUAL BAND MODE/ SINGLE BAND MODE You can switch the transceiver between dual band operation and single band operation. 1 Press [F], [A/B]. • Each time you can manually enter the date and time. 1 Access Menu No. 950. Dual Band mode Single Band mode 2 Set the date, time, and time zone with priority. Volume...
... DUAL BAND MODE/ SINGLE BAND MODE You can switch the transceiver between dual band operation and single band operation. 1 Press [F], [A/B]. • Each time you can manually enter the date and time. 1 Access Menu No. 950. Dual Band mode Single Band mode 2 Set the date, time, and time zone with priority. Volume...
User Manual
Page 13
...using the normal step frequency. The Call channel can be selected for the [ENC] control varies according to the model and operating frequency band: Model TH-D74A TH-D74E 144 MHz 5 kHz 12.5 kHz 220 MHz 20 kHz - 430 MHz 25 kHz 25 kHz Note: ◆◆ 220 MHz band is ...way to change the operating frequency. 1 Press [VFO] to enter VFO mode. 2 Rotate the ENC control to manually change the frequency. 1 Press [ENT]. MHz Step To adjust the frequency by the TH-D74A only. Memory Channel Mode Memory Channel mode allows you to quickly select a frequently used as follows. "C" appears on...
...using the normal step frequency. The Call channel can be selected for the [ENC] control varies according to the model and operating frequency band: Model TH-D74A TH-D74E 144 MHz 5 kHz 12.5 kHz 220 MHz 20 kHz - 430 MHz 25 kHz 25 kHz Note: ◆◆ 220 MHz band is ...way to change the operating frequency. 1 Press [VFO] to enter VFO mode. 2 Rotate the ENC control to manually change the frequency. 1 Press [ENT]. MHz Step To adjust the frequency by the TH-D74A only. Memory Channel Mode Memory Channel mode allows you to quickly select a frequently used as follows. "C" appears on...

User Manual
Page 17
... characters 1200bps/ 9600bps A Band/ B Band Busy/ Detect Data/ Off (Ignore) 100/ 150/ 200/ 300/ 400/ 500/ 750/ 1000 [ms] Frequency/ PTT/ APRS Key: All unchecked Manual/ PTT/ Auto/ SmartBeaconing 0.2/ 0.5/ 1/ 2/ 3/ 5/ 10/ 20/ 30/ 60 [min] Off/ On Off/ On Off/ On Off/ On Memory Channel 200 View List 201 Group Name 202...
... characters 1200bps/ 9600bps A Band/ B Band Busy/ Detect Data/ Off (Ignore) 100/ 150/ 200/ 300/ 400/ 500/ 750/ 1000 [ms] Frequency/ PTT/ APRS Key: All unchecked Manual/ PTT/ Auto/ SmartBeaconing 0.2/ 0.5/ 1/ 2/ 3/ 5/ 10/ 20/ 30/ 60 [min] Off/ On Off/ On Off/ On Off/ On Memory Channel 200 View List 201 Group Name 202...

User Manual
Page 19
... Level 913 RX EQ Level 914 Beep 915 Beep Volume 916 Voice Guidance 917 Voice Guidance Vol. 918 USB Audio Out. Auto/ Auto (DC-IN)/ Manual/ On 3 - 10 - 60 [sec] High/ Medium/ Low Up to DQS/ My Station Only Half Display/ Entire Display Half Display/ Entire Display 0 / 3/ 5/ 10/ 20/ 30 / 60...: Auto Power Off 922 Battery Level TX/RX EQ TX EQ Level RX EQ Level Beep Beep Volume Voice Guidance Voice Guidance Vol. Level 7 Off, Manual, Auto1, Auto2 Level 1 - Import 810 Config Data 811 Config Data + V.Msg 812 Repeater List Only 813 Callsign List Only SD Card - Unmount 820 Execute SD...
... Level 913 RX EQ Level 914 Beep 915 Beep Volume 916 Voice Guidance 917 Voice Guidance Vol. 918 USB Audio Out. Auto/ Auto (DC-IN)/ Manual/ On 3 - 10 - 60 [sec] High/ Medium/ Low Up to DQS/ My Station Only Half Display/ Entire Display Half Display/ Entire Display 0 / 3/ 5/ 10/ 20/ 30 / 60...: Auto Power Off 922 Battery Level TX/RX EQ TX EQ Level RX EQ Level Beep Beep Volume Voice Guidance Voice Guidance Vol. Level 7 Off, Manual, Auto1, Auto2 Level 1 - Import 810 Config Data 811 Config Data + V.Msg 812 Repeater List Only 813 Callsign List Only SD Card - Unmount 820 Execute SD...

User Manual
Page 23
...the allowable range, transmitting is On, the < > icon will appear on the display. 2 Set to manually check the strength of signals you receive directly from other stations, while using a TH-D74E, when operating on the 430 MHz band, the offset direction changes as a [CALL] key for ...Access Menu No. 143. Selecting an Offset Direction The offset direction allows your desired band (A or B). 2 Press [F], [REV] to [On]. On a TH-D74E, simply pressing [CALL] will transmit this tone. Use one of the following a 1750 Hz tone. REVERSE FUNCTION After setting a separate receive and transmit ...
...the allowable range, transmitting is On, the < > icon will appear on the display. 2 Set to manually check the strength of signals you receive directly from other stations, while using a TH-D74E, when operating on the 430 MHz band, the offset direction changes as a [CALL] key for ...Access Menu No. 143. Selecting an Offset Direction The offset direction allows your desired band (A or B). 2 Press [F], [REV] to [On]. On a TH-D74E, simply pressing [CALL] will transmit this tone. Use one of the following a 1750 Hz tone. REVERSE FUNCTION After setting a separate receive and transmit ...

User Manual
Page 32
... be set to ON when FM radio mode is busy. Note: ◆◆ This function does not work when [Backlight Control] (Menu No.900) is [Manual]. ◆◆ The lighting duration of scan auto backlight cannot be set to ON in this state. ◆◆ If the state of no key...
... be set to ON when FM radio mode is busy. Note: ◆◆ This function does not work when [Backlight Control] (Menu No.900) is [Manual]. ◆◆ The lighting duration of scan auto backlight cannot be set to ON in this state. ◆◆ If the state of no key...

User Manual
Page 36
... DUAL TONE MULTI-FREQUENCY(DTMF) The keys on a push-button telephone plus 4 additional keys (A, B, C, D). the 12 keys found on the keypad function as DTMF keys; MANUAL DIALING Manual Dialing requires only two steps to set it. 2 Select [100], [250], [500], [750], [1000], [1500], or [2000] msec. 4 Press [ENT]. You can store a DTMF...
... DUAL TONE MULTI-FREQUENCY(DTMF) The keys on a push-button telephone plus 4 additional keys (A, B, C, D). the 12 keys found on the keypad function as DTMF keys; MANUAL DIALING Manual Dialing requires only two steps to set it. 2 Select [100], [250], [500], [750], [1000], [1500], or [2000] msec. 4 Press [ENT]. You can store a DTMF...

User Manual
Page 43
... sends a Turn-Off Code to close to each other to be sent, before Transmit mode ends. VOX (VOICE-OPERATED TRANSMISSION) VOX eliminates the necessity of manually switching to Transmit mode each time you must detect the presence of your transmission may not be used for the duration set by pressing [ ]/[ ] until...
... sends a Turn-Off Code to close to each other to be sent, before Transmit mode ends. VOX (VOICE-OPERATED TRANSMISSION) VOX eliminates the necessity of manually switching to Transmit mode each time you must detect the presence of your transmission may not be used for the duration set by pressing [ ]/[ ] until...

User Manual
Page 45
... if necessary. 3 Press [ENT]. The backlight will turn the light OFF. When DC-IN is used , the operation is same as [On]. [Manual]: The backlight turns on and off according to the Illumination Timer setting, or when the [ ] key is pressed. • The backlight turns on when... 2 seconds. Brightness The brightness of the backlight can change Bitmap of the default message. 1 Access Menu 903. 2 Select [Auto], [Auto (DC-IN)], [Manual], or [On]. [Auto]: The backlight turns on when operating any of three levels. 1 Access Menu No. 900. Note: ◆◆ Using the MCP-D74...
... if necessary. 3 Press [ENT]. The backlight will turn the light OFF. When DC-IN is used , the operation is same as [On]. [Manual]: The backlight turns on and off according to the Illumination Timer setting, or when the [ ] key is pressed. • The backlight turns on when... 2 seconds. Brightness The brightness of the backlight can change Bitmap of the default message. 1 Access Menu 903. 2 Select [Auto], [Auto (DC-IN)], [Manual], or [On]. [Auto]: The backlight turns on when operating any of three levels. 1 Access Menu No. 900. Note: ◆◆ Using the MCP-D74...

User Manual
Page 56
... page No. 6-1 "CHARACTER ENTRY". 2 Select a list. 3 Press [ENT]. Details of the position memory can be checked. 13-4 You can edit all information except Registration time manually. • Position name • Icon (same as follows. • Name (position name) • Position (latitude and longitude) • Icon • Altitude Editing the Name (Position...
... page No. 6-1 "CHARACTER ENTRY". 2 Select a list. 3 Press [ENT]. Details of the position memory can be checked. 13-4 You can edit all information except Registration time manually. • Position name • Icon (same as follows. • Name (position name) • Position (latitude and longitude) • Icon • Altitude Editing the Name (Position...

User Manual
Page 60
...), their distance, and their grid square locator is possible to the APRS network. In this instruction manual in each region. When the reception ends, the packet data is retransmitted on the Website (http://aprs... or Message packet cannot be displayed on your station icon. Icon List Person (/[) Bicycle (/b) Motorcycle (/) Bus (/U) (/U) Railroad Engine (/=) Home (/-) Yagi@QTH (/y) KENWOOD (\K) RADIO (\Y) RV (/R) (/R) Van (/v) (/v) Jeep (/j) (/j) Truck (/k) (/k) Truck (18-wheeler) (/u) (/u) Police (/P) Ambulance (/a) Canoe (/C) Boat (/s) Sailboat...
...), their distance, and their grid square locator is possible to the APRS network. In this instruction manual in each region. When the reception ends, the packet data is retransmitted on the Website (http://aprs... or Message packet cannot be displayed on your station icon. Icon List Person (/[) Bicycle (/b) Motorcycle (/) Bus (/U) (/U) Railroad Engine (/=) Home (/-) Yagi@QTH (/y) KENWOOD (\K) RADIO (\Y) RV (/R) (/R) Van (/v) (/v) Jeep (/j) (/j) Truck (/k) (/k) Truck (18-wheeler) (/u) (/u) Police (/P) Ambulance (/a) Canoe (/C) Boat (/s) Sailboat...

User Manual
Page 72
...pressing [ENT] to complete the setting causes the APRS packet to switch the function ON. • < > appears and blinks. • After manually transmitting your station position data 1 time, your position data will be changed . Note: ◆◆ With "Auto" in < Initial Interval ...frequency of the period selected in APRS mode, pressing [F], [TNC] will no longer operate. After that , beacon is executed. 2 Select [Manual], [PTT], or [SmartBeaconing]. [Manual]: Each press [BCN] transmits the beacon. [PTT]: 1 Press [BCN] to switch the function ON. • < > appears and...
...pressing [ENT] to complete the setting causes the APRS packet to switch the function ON. • < > appears and blinks. • After manually transmitting your station position data 1 time, your position data will be changed . Note: ◆◆ With "Auto" in < Initial Interval ...frequency of the period selected in APRS mode, pressing [F], [TNC] will no longer operate. After that , beacon is executed. 2 Select [Manual], [PTT], or [SmartBeaconing]. [Manual]: Each press [BCN] transmits the beacon. [PTT]: 1 Press [BCN] to switch the function ON. • < > appears and...

User Manual
Page 79
... your station address and new packet data is received. [All]: Beep sounds when a message is received at your beacon is transmitted in a manner other than manually, you can select whether or not it is automatically transmitted.
... your station address and new packet data is received. [All]: Beep sounds when a message is received at your beacon is transmitted in a manner other than manually, you can select whether or not it is automatically transmitted.

User Manual
Page 86
... of your area group and press [ENT]. The Callsign list editing screen appears. 3 Select the item and press [ENT]. A call can also be made without manually setting the destination Callsign. 2 Press [A/B]. Press [ ] to display detailed information of the connection to capture the Callsign. However, < > does not appear if there is an...
... of your area group and press [ENT]. The Callsign list editing screen appears. 3 Select the item and press [ENT]. A call can also be made without manually setting the destination Callsign. 2 Press [A/B]. Press [ ] to display detailed information of the connection to capture the Callsign. However, < > does not appear if there is an...

User Manual
Page 91
...in EMR mode will be performed by this transceiver. Data Communication Operation When performing data communication operation, refer to the instruction manual of the communication software. 1 Set the Callsign of your station, the other station, and repeater. 2 Perform the operation according to the instruction... manual and other station Callsign or CQ are maintained. ◆◆ Selecting EMR in the Digital Function Menu. Software Setting for EMR...
...in EMR mode will be performed by this transceiver. Data Communication Operation When performing data communication operation, refer to the instruction manual of the communication software. 1 Set the Callsign of your station, the other station, and repeater. 2 Perform the operation according to the instruction... manual and other station Callsign or CQ are maintained. ◆◆ Selecting EMR in the Digital Function Menu. Software Setting for EMR...

User Manual
Page 98
...the headset volume. 18-1 Connecting with a Headset (Pairing) When connecting the transceiver with a Bluetooth compatible device, you need to the instruction manual of the device. Adjust the volume by the headset. For example, you can wirelessly connect them with the transceiver as the main device ...be connected. The following profiles. NOTE ◆◆ For the device to each other as a connection pair. Also refer to the instruction manual of the device. ◆◆ A connection may also be sure to be adjusted by moving the transceiver away from equipment such as ...
...the headset volume. 18-1 Connecting with a Headset (Pairing) When connecting the transceiver with a Bluetooth compatible device, you need to the instruction manual of the device. Adjust the volume by the headset. For example, you can wirelessly connect them with the transceiver as the main device ...be connected. The following profiles. NOTE ◆◆ For the device to each other as a connection pair. Also refer to the instruction manual of the device. ◆◆ A connection may also be sure to be adjusted by moving the transceiver away from equipment such as ...
