
Instruction Manual
Page 2
...help conserve resources whilst preventing detrimental effects on the opposite side such as a gasoline tank, brake pipe; CAUTION • Installation and wiring of the product requires expert skill and experience. Sharing the negative wire of the speaker or grounding speaker wires to... EMC Directive 2004/108/EC Manufacturer: JVCKENWOOD Corporation 3-12, Moriyacho, Kanagawa-ku, Yokohamashi, Kanagawa, 221-0022, Japan EU Representative's: Kenwood Electronics Europe BV Amsterdamseweg 37, 1422 AC UITHOORN, The Netherlands Information on -board mounting. WARNING • Before mounting or wiring etc...
...help conserve resources whilst preventing detrimental effects on the opposite side such as a gasoline tank, brake pipe; CAUTION • Installation and wiring of the product requires expert skill and experience. Sharing the negative wire of the speaker or grounding speaker wires to... EMC Directive 2004/108/EC Manufacturer: JVCKENWOOD Corporation 3-12, Moriyacho, Kanagawa-ku, Yokohamashi, Kanagawa, 221-0022, Japan EU Representative's: Kenwood Electronics Europe BV Amsterdamseweg 37, 1422 AC UITHOORN, The Netherlands Information on -board mounting. WARNING • Before mounting or wiring etc...

Instruction Manual
Page 6
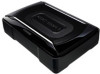
...6 Tapping screw x 4 ENGLISH Drill four pilot holes for ø 3.6 mm screws on the sheet metal section of fixture A 4 according to the subwoofer installation location. Drill the pilot holes for ø 3.6 mm screws. Caution: • When making a hole under a seat, inside the ve- or wiring...6. Drill the pilot holes for ø 3.6 mm screws. Attach the fixtures A 4 to the speaker unit securely using the machine screws 7. Installation Before fixing the speaker in its position, be moved by vibrations or impacts during driving. ■ Fixing the cord in place 8 Machine screw ...
...6 Tapping screw x 4 ENGLISH Drill four pilot holes for ø 3.6 mm screws on the sheet metal section of fixture A 4 according to the subwoofer installation location. Drill the pilot holes for ø 3.6 mm screws. Caution: • When making a hole under a seat, inside the ve- or wiring...6. Drill the pilot holes for ø 3.6 mm screws. Attach the fixtures A 4 to the speaker unit securely using the machine screws 7. Installation Before fixing the speaker in its position, be moved by vibrations or impacts during driving. ■ Fixing the cord in place 8 Machine screw ...

Instruction Manual
Page 7
... control (Rear panel) Vehicle 9 Hook-and-loop fastener (Harder surface) 9 Hook-and-loop fastener (Softer surface) Fuse exchange Caution: Install the remote control unit in a position that does not come in all the way with same capacity (amperage) as desired. 50 Hz 125.... Turn the FREQUENCY control knob to the predetermined default conditions, with the specified capacity fuse. In this frequency are not available. Avoid installing it in this section are cut -off ). This product is 10A. ■ Removal ■ Insertion Cover Fuse Replacement fuse 10 ...
... control (Rear panel) Vehicle 9 Hook-and-loop fastener (Harder surface) 9 Hook-and-loop fastener (Softer surface) Fuse exchange Caution: Install the remote control unit in a position that does not come in all the way with same capacity (amperage) as desired. 50 Hz 125.... Turn the FREQUENCY control knob to the predetermined default conditions, with the specified capacity fuse. In this frequency are not available. Avoid installing it in this section are cut -off ). This product is 10A. ■ Removal ■ Insertion Cover Fuse Replacement fuse 10 ...