
Use and Care Guide
Page 1
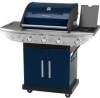
... be sure your gas grill is not intended to Installer Leave this Owner's Manual in serious injury and/or property damage. Customer Service Helpline: For parts ordering, call: 1-800-4-MY-HOME ® For assembly questions, call: 1-800-913-8999 MFG No: 720-0679R(B) Date: ...0 1 00 F5 0 5 1 50 0 C 40 0 50 0 2 50 6 3 50 0 70 0 • Parts • Assembly • Safety Rules • Use and Care • Troubleshooting ! Failure to Consumer Leave this Owner's Manual with the customer after delivery and/or installation. This gas grill is intended for future reference.
... be sure your gas grill is not intended to Installer Leave this Owner's Manual in serious injury and/or property damage. Customer Service Helpline: For parts ordering, call: 1-800-4-MY-HOME ® For assembly questions, call: 1-800-913-8999 MFG No: 720-0679R(B) Date: ...0 1 00 F5 0 5 1 50 0 C 40 0 50 0 2 50 6 3 50 0 70 0 • Parts • Assembly • Safety Rules • Use and Care • Troubleshooting ! Failure to Consumer Leave this Owner's Manual with the customer after delivery and/or installation. This gas grill is intended for future reference.

Use and Care Guide
Page 2
...5 Parts Diagram 6 Parts List 7 Assembly Instructions 8~11 Lighting Instructions 12~13 Cleaning and Maintenance 14~15 Troubleshooting 15 Cooking Instruction 16 Cooking Chart 17 Kenmore Grill Warranty One-Year Full Warranty on Stainless Steel Burners For five years from the date of purchase, any stainless steel burner that...A 119.2, and CSA Z240 RV series recreational vehicle code, as applicable. Never connect your gas grill to cause cancer, birth defects, or other appliance. 2. Shut off gas to the State of this capacity. An LP cylinder not connected for use shall not be...
...5 Parts Diagram 6 Parts List 7 Assembly Instructions 8~11 Lighting Instructions 12~13 Cleaning and Maintenance 14~15 Troubleshooting 15 Cooking Instruction 16 Cooking Chart 17 Kenmore Grill Warranty One-Year Full Warranty on Stainless Steel Burners For five years from the date of purchase, any stainless steel burner that...A 119.2, and CSA Z240 RV series recreational vehicle code, as applicable. Never connect your gas grill to cause cancer, birth defects, or other appliance. 2. Shut off gas to the State of this capacity. An LP cylinder not connected for use shall not be...

Use and Care Guide
Page 4
...unsafe operating condition for parts and labor on some items. For Full details call your covered product can cause serious damage to each use. You can lead to gas flow obstruction which could cause serious bodily injury, death, or property damage. • Shut off gas supply to the gas grill. • Turn ... refer to page 13, Item 4 of "If Grill Still Fails To Light", or call it may need to purge air from the LP gas tank. • Do not try to time. See Cleaning Burner Tubes and Ports on making a smart purchase. Your new Kenmore product is known as a "talking owner's manual"...
...unsafe operating condition for parts and labor on some items. For Full details call your covered product can cause serious damage to each use. You can lead to gas flow obstruction which could cause serious bodily injury, death, or property damage. • Shut off gas supply to the gas grill. • Turn ... refer to page 13, Item 4 of "If Grill Still Fails To Light", or call it may need to purge air from the LP gas tank. • Do not try to time. See Cleaning Burner Tubes and Ports on making a smart purchase. Your new Kenmore product is known as a "talking owner's manual"...

Use and Care Guide
Page 7
Important: Use only parts listed above. Part Number (see PART# in chart) 3. Part Description 4. Important: Keep this page. Model # 2. Quantity of parts needed You can purchase the Kenmore rotisserie kit, item # 15803 at your Kenmore gas grill, please refer to the part numbers on this Owner's Manual for convenient ... 679-040 Back Panel, Top 679-041 Side Burner Front Panel 679-042 Side Gas Valve 679-043 Side Burner Igniter Wire 679-044 Side Burner Pipe Assembly 679-045 Side Burner Bow l Assembly 679-046 Side Burner Cooking Grid 679-047 Side Burner Lid 679-048 Grease Slide Panel, Bottom...
Important: Use only parts listed above. Part Number (see PART# in chart) 3. Part Description 4. Important: Keep this page. Model # 2. Quantity of parts needed You can purchase the Kenmore rotisserie kit, item # 15803 at your Kenmore gas grill, please refer to the part numbers on this Owner's Manual for convenient ... 679-040 Back Panel, Top 679-041 Side Burner Front Panel 679-042 Side Gas Valve 679-043 Side Burner Igniter Wire 679-044 Side Burner Pipe Assembly 679-045 Side Burner Bow l Assembly 679-046 Side Burner Cooking Grid 679-047 Side Burner Lid 679-048 Grease Slide Panel, Bottom...

Use and Care Guide
Page 8
... 1 A D Figure 3 Figure 4 Figure 5 B C 8 Attach door handles to protect floor and grill parts from shipping carton. 3. Do not assemble or operate the grill if it is Swivel with a utility knife to side panels using (4) 5/32 x 8mm Phillips head screws and (4)5/32 flat washers & lock washers. (Fig.4)... & lock washers. (Fig.3) 4. Attach left & right side panel to assemble this grill, obtain assistance from tray. 4. Open lid of shipping carton and remove top sheet of grill head and remove all parts have questions during the assembly process, call: For Assembly Questions...
... 1 A D Figure 3 Figure 4 Figure 5 B C 8 Attach door handles to protect floor and grill parts from shipping carton. 3. Do not assemble or operate the grill if it is Swivel with a utility knife to side panels using (4) 5/32 x 8mm Phillips head screws and (4)5/32 flat washers & lock washers. (Fig.4)... & lock washers. (Fig.3) 4. Attach left & right side panel to assemble this grill, obtain assistance from tray. 4. Open lid of shipping carton and remove top sheet of grill head and remove all parts have questions during the assembly process, call: For Assembly Questions...

Use and Care Guide
Page 14
... gas source and observe burner flame for safe operation. Remove cooking grids, heat diffusers, and grease tray from your gas grill. 3. Step 1. Cleaning Exterior Surface •We suggest you wash your grill has not been used in bottom of grease tray to remove any damage and replace as necessary with manufacturer replacement part number found on parts...
... gas source and observe burner flame for safe operation. Remove cooking grids, heat diffusers, and grease tray from your gas grill. 3. Step 1. Cleaning Exterior Surface •We suggest you wash your grill has not been used in bottom of grease tray to remove any damage and replace as necessary with manufacturer replacement part number found on parts...

Use and Care Guide
Page 16
... settings will restrict the flow of your gas grill for burning food residue off Before cooking on your grill with the Lid down after cooking is ideal for extended cooking. Deep frying and smoking are also best cooked in place when operating the Searing burner. ! Since flare-ups impart a favorably... first time, you want to "burn off" the grill to 5 minutes. Grill Lid or any other grill parts while the grill is in serious bodily injury. Indirect Cooking To cook indirectly, the food should be placed on the left or right side of grease into the grease tray. WARNING Do not...
... settings will restrict the flow of your gas grill for burning food residue off Before cooking on your grill with the Lid down after cooking is ideal for extended cooking. Deep frying and smoking are also best cooked in place when operating the Searing burner. ! Since flare-ups impart a favorably... first time, you want to "burn off" the grill to 5 minutes. Grill Lid or any other grill parts while the grill is in serious bodily injury. Indirect Cooking To cook indirectly, the food should be placed on the left or right side of grease into the grease tray. WARNING Do not...

