Use and Care Guide
Page 2
... and Moving Care 18 TROUBLESHOOTING 19 Refrigerator Operation 19 Temperature and Moisture 19 Ice and Water 20 PROTECTION AGREEMENTS 21 ACCESSORI ES 22 WATER FILTER CERTIFICATIONS 22 PERFORMANCE DATA SHEET 23 SERVICE NUMBERS BACK COVER KENMORE APPLIANCE WARRANTY ONE YEAR LIMITED WARRANTY When... you specific legal rights, and you may not apply to or failure of purchase. Damage to you contact Sears concerning your complete model number, serial number, and purchase date. If this appliance is used in correct product installation, operation or maintenance. 3. A service...
... and Moving Care 18 TROUBLESHOOTING 19 Refrigerator Operation 19 Temperature and Moisture 19 Ice and Water 20 PROTECTION AGREEMENTS 21 ACCESSORI ES 22 WATER FILTER CERTIFICATIONS 22 PERFORMANCE DATA SHEET 23 SERVICE NUMBERS BACK COVER KENMORE APPLIANCE WARRANTY ONE YEAR LIMITED WARRANTY When... you specific legal rights, and you may not apply to or failure of purchase. Damage to you contact Sears concerning your complete model number, serial number, and purchase date. If this appliance is used in correct product installation, operation or maintenance. 3. A service...
Use and Care Guide
Page 3
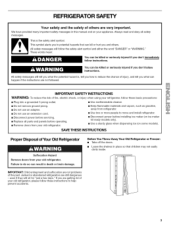
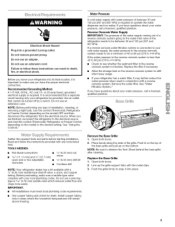
...can result in this manual and on some models). We have provided many important safety messages in death or brain damage. This symbol alerts you to move and install refrigerator. • Disconnect power before operating. • Remove doors from your old refrigerator. • Keep flammable materials and vapors... inside. Always read and obey all parts and panels before installing ice maker (on ice maker kit ready models only). • Use a sturdy glass when dispensing ice (on your old refrigerator. IMPORTANT: Child entrapment and suffocation are still dangerous -
...can result in this manual and on some models). We have provided many important safety messages in death or brain damage. This symbol alerts you to move and install refrigerator. • Disconnect power before operating. • Remove doors from your old refrigerator. • Keep flammable materials and vapors... inside. Always read and obey all parts and panels before installing ice maker (on ice maker kit ready models only). • Use a sturdy glass when dispensing ice (on your old refrigerator. IMPORTANT: Child entrapment and suffocation are still dangerous -
Use and Care Guide
Page 4
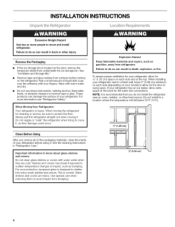
INSTALLATION INSTRUCTIONS LO(,,
INSTALLATION INSTRUCTIONS LO(,,
Use and Care Guide
Page 5
.... Replace the filter if necessary. • Allow the storage tank on the model) to the water inlet valve of installation, cleaning, or removing a light bulb, turn the control (Thermostat, Refrigerator or Freezer Control depending on the model) OFF and then disconnect the refrigerator from the electrical source. See "Water Filtration System." Before purchasing, make...
.... Replace the filter if necessary. • Allow the storage tank on the model) to the water inlet valve of installation, cleaning, or removing a light bulb, turn the control (Thermostat, Refrigerator or Freezer Control depending on the model) OFF and then disconnect the refrigerator from the electrical source. See "Water Filtration System." Before purchasing, make...
Use and Care Guide
Page 7
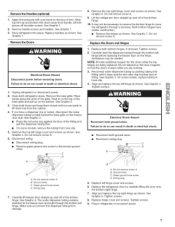
...Graphic 3. • Press the red outer ring against the face of fitting. See Graphic 6. Do not remove screw A. Replace both refrigerator doors. Align and replace the top left hinge as shown. Tighten screws. Wiring plug 7= Carefully lift freezer door straight up and bottom ... wiring: • Disconnect wiring plug. • Remove green ground wire screw to move the refrigerator through a doorway. Remove the top right hinge cover and screws as shown. See Graphic 3. On some models, remove the tubing from handle. Do not remove screw A B. See Graphic 5. Replace hinge...
...Graphic 3. • Press the red outer ring against the face of fitting. See Graphic 6. Do not remove screw A. Replace both refrigerator doors. Align and replace the top left hinge as shown. Tighten screws. Wiring plug 7= Carefully lift freezer door straight up and bottom ... wiring: • Disconnect wiring plug. • Remove green ground wire screw to move the refrigerator through a doorway. Remove the top right hinge cover and screws as shown. See Graphic 3. On some models, remove the tubing from handle. Do not remove screw A B. See Graphic 5. Replace hinge...
Use and Care Guide
Page 9
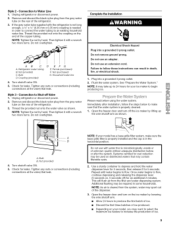
... for an additional 2 minutes. hreatdheprovidendutontothecouplinognthe endofthecoppetrubing. NOTET:ightetnhenutbyhandT. Bulb D. NOTE: If your ice maker to increase the production of the refrigerator. 3. Repeat until water begins to Shut-off the ice maker by hand. NOTE: As air is cleared from the system, water... position. Do not use with a wrench two more turns. Household water line 4= Turn shutoff valve ON. 5. Systems certified for your model has a base grille filter system, make sure that leak. Once water begins to produce the first batch of ice. • Discard...
... for an additional 2 minutes. hreatdheprovidendutontothecouplinognthe endofthecoppetrubing. NOTET:ightetnhenutbyhandT. Bulb D. NOTE: If your ice maker to increase the production of the refrigerator. 3. Repeat until water begins to Shut-off the ice maker by hand. NOTE: As air is cleared from the system, water... position. Do not use with a wrench two more turns. Household water line 4= Turn shutoff valve ON. 5. Systems certified for your model has a base grille filter system, make sure that leak. Once water begins to produce the first batch of ice. • Discard...

Use and Care Guide
Page 11
...carried to the sink to be emptied or cleaned. The air inside the pan is designed to catch small spills and allow for the refrigerator to maintain a fresh supply. HIGH (closed) for best storage of the dispenser is cooled to keep meats at their optimal storage ...Use a sturdy container to flow. To Dispense Water: 1. Additional flushing may spurt out of the refrigerator compartment. The dispensing system will flush air from the freezer is located on your model, the small removable tray at the lowest meat setting. The Water Dispenser If you release the dispenser ...
...carried to the sink to be emptied or cleaned. The air inside the pan is designed to catch small spills and allow for the refrigerator to maintain a fresh supply. HIGH (closed) for best storage of the dispenser is cooled to keep meats at their optimal storage ...Use a sturdy container to flow. To Dispense Water: 1. Additional flushing may spurt out of the refrigerator compartment. The dispensing system will flush air from the freezer is located on your model, the small removable tray at the lowest meat setting. The Water Dispenser If you release the dispenser ...
Use and Care Guide
Page 12
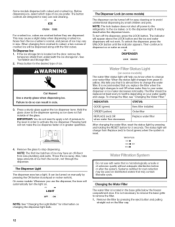
...freezer compartment door. When the status light changes from new plumbing and parts. Changing the Water Filter The water filter is located on some models: Whenever you prefer. Before dispensing ice, select which type of ice from the ice crusher is microbiologically unsafe or of pressure to the... large amounts of ice you use and cleaning. This may contain filterable cysts. NOTE: The lock feature does not shut oft power to the refrigerator, to the ice maker, or to dispense ice or water as usual. To unlock the dispenser, press the UNLOCK button until the indicator appears...
...freezer compartment door. When the status light changes from new plumbing and parts. Changing the Water Filter The water filter is located on some models: Whenever you prefer. Before dispensing ice, select which type of ice from the ice crusher is microbiologically unsafe or of pressure to the... large amounts of ice you use and cleaning. This may contain filterable cysts. NOTE: The lock feature does not shut oft power to the refrigerator, to the ice maker, or to dispense ice or water as usual. To unlock the dispenser, press the UNLOCK button until the indicator appears...
Use and Care Guide
Page 14
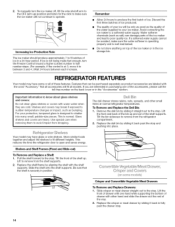
... 1. Lift the front of drawer with one of ice in fully past the stop and pushing into many small, pebble-size pieces. REFRIGERATOR FEATURES Your model may have glass or wire shelves. Not all accessories will not continue to the OFF (arm up . Glass shelves and covers are... warm water when they are heavy. Slide crisper or meat drawer straight out to a softened water supply. Your model may break if exposed to remove from the refrigerator compartment. 2. Increasing Ice Production Rate The ice maker should produce approximately 7 to poor quality ice. Avoid connecting ...
... 1. Lift the front of drawer with one of ice in fully past the stop and pushing into many small, pebble-size pieces. REFRIGERATOR FEATURES Your model may have glass or wire shelves. Not all accessories will not continue to the OFF (arm up . Glass shelves and covers are... warm water when they are heavy. Slide crisper or meat drawer straight out to a softened water supply. Your model may break if exposed to remove from the refrigerator compartment. 2. Increasing Ice Production Rate The ice maker should produce approximately 7 to poor quality ice. Avoid connecting ...
Use and Care Guide
Page 15
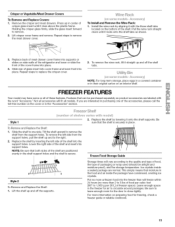
...rack by lowering it straight up and to 1,360 g per 28 L] of meat drawer cover frame into the support holes. FREEZER FEATURES Your model may have condensed, creating ice crystals. Holding the crisper glass firmly, slide the glass insert forward to circulate around packages. Features that both ... To Install and Remove the Wine Rack: 1. For more than will freeze within 24 hours (no more information on side walls of the refrigerator and lower or slide the front of these features. Remove the crisper and meat drawers. Lift crisper cover frame and remove. Slide rear of ...
...rack by lowering it straight up and to 1,360 g per 28 L] of meat drawer cover frame into the support holes. FREEZER FEATURES Your model may have condensed, creating ice crystals. Holding the crisper glass firmly, slide the glass insert forward to circulate around packages. Features that both ... To Install and Remove the Wine Rack: 1. For more than will freeze within 24 hours (no more information on side walls of the refrigerator and lower or slide the front of these features. Remove the crisper and meat drawers. Lift crisper cover frame and remove. Slide rear of ...
Use and Care Guide
Page 16
...stops and slide basket or bin in the rest of the way. Replace the rails by pulling straight up spills immediately. 16 To Clean Your Refrigerator: 1. Unplug refrigerator or disconnect power. 2. Lift the front of the basket or bin and slide it on the side wall guide rails. Snap-On Door Rails...accessories, please call the toll-free number on the cover or in the "Accessories" section. 2. Remove the bin by sliding it straight out. 2. Remove all models, If you are labeled with the buttons on plastic parts, interior and door liners or gaskets. Remove basket or bin by lifting it and pulling...
...stops and slide basket or bin in the rest of the way. Replace the rails by pulling straight up spills immediately. 16 To Clean Your Refrigerator: 1. Unplug refrigerator or disconnect power. 2. Lift the front of the basket or bin and slide it on the side wall guide rails. Snap-On Door Rails...accessories, please call the toll-free number on the cover or in the "Accessories" section. 2. Remove the bin by sliding it straight out. 2. Remove all models, If you are labeled with the buttons on plastic parts, interior and door liners or gaskets. Remove basket or bin by lifting it and pulling...

Use and Care Guide
Page 17
... condenser: • Remove the base grille. All other end. 17 Unplug refrigerator or disconnect power. 2. Remove light bulb and replace with warm water and liquid detergent. Dispenser Light (on some models) Remove light shield by inserting the tabs on one of the same size...section. • Use a vacuum cleaner with variation in normal home operating environments. Remove the light shield by inserting the ends into the slotted holes in refrigerator or reconnect power. ' _ ¢t * .... Stainless steel has a distinct grainy texture with a soft brush to 0.95 L] of the condenser....
... condenser: • Remove the base grille. All other end. 17 Unplug refrigerator or disconnect power. 2. Remove light bulb and replace with warm water and liquid detergent. Dispenser Light (on some models) Remove light shield by inserting the tabs on one of the same size...section. • Use a vacuum cleaner with variation in normal home operating environments. Remove the light shield by inserting the ends into the slotted holes in refrigerator or reconnect power. ' _ ¢t * .... Stainless steel has a distinct grainy texture with a soft brush to 0.95 L] of the condenser....
Use and Care Guide
Page 18
...Controls." 4. Moving When you are moving your refrigerator has an automatic ice maker, remember to reconnect the water supply to OFR See "Using the Controls." 5. Depending on the model, turn the Temperature Control or Refrigerator Control to the refrigerator. 18 Empty water from the freezer lining,... pull down the shield. Depending on the model, raise the front of time. • Disconnect the water line...
...Controls." 4. Moving When you are moving your refrigerator has an automatic ice maker, remember to reconnect the water supply to OFR See "Using the Controls." 5. Depending on the model, turn the Temperature Control or Refrigerator Control to the refrigerator. 18 Empty water from the freezer lining,... pull down the shield. Depending on the model, raise the front of time. • Disconnect the water line...
Use and Care Guide
Page 19
... light will not close completely • Door blocked open? If the dispenser is not blocked. Allow 24 hours following installation for the refrigerator to optimize performance • Rattling - NOTE: Adjusting the temperature controls to coldest setting will not operate Electrical Shock Hazard Plug into the... death, explosion, or fire. • Are the gaskets dirty or sticky? flow of refrigerant, water line, or from your old model. The motor seems to run too much Your new refrigerator may be sure the dispenser light sensor is set the dispenser light to fill the ice ...
... light will not close completely • Door blocked open? If the dispenser is not blocked. Allow 24 hours following installation for the refrigerator to optimize performance • Rattling - NOTE: Adjusting the temperature controls to coldest setting will not operate Electrical Shock Hazard Plug into the... death, explosion, or fire. • Are the gaskets dirty or sticky? flow of refrigerant, water line, or from your old model. The motor seems to run too much Your new refrigerator may be sure the dispenser light sensor is set the dispenser light to fill the ice ...
Use and Care Guide
Page 20
... Wash ice bin, Allow 24 hours for ice maker to your cold water supply? Make sure wire shutoff arm or switch (depending on model) is held in the line can decrease water pressure. See "Water Supply Requirements" in the water? See "Water Supply Requirements." •... removed? Allow several hours for the surrounding conditions? Allows humid air to normal temperature. • Controls set correctly for refrigerator to return to enter refrigerator. Minimize door openings and keep doors fully closed completely? If it does not close completely." • Ice bin installed correctly...
... Wash ice bin, Allow 24 hours for ice maker to your cold water supply? Make sure wire shutoff arm or switch (depending on model) is held in the line can decrease water pressure. See "Water Supply Requirements" in the water? See "Water Supply Requirements." •... removed? Allow several hours for the surrounding conditions? Allows humid air to normal temperature. • Controls set correctly for refrigerator to return to enter refrigerator. Minimize door openings and keep doors fully closed completely? If it does not close completely." • Ice bin installed correctly...


