Use and Care Guide
Page 2
...11 Water and Ice Dispensers 11 Water Filter Status Light 12 Water Filtration System 12 Ice Maker and Storage Bin 13 REFRIGERATOR FEATURES 14 Refrigerator Shelves 14 Dell Bin 14 Convertible Vegetable/Meat Drawer, Crisper and Covers ....... 14 Wine Rack 15 Utility Bin 15 ... Vacation and Moving Care 18 TROUBLESHOOTING 19 Refrigerator Operation 19 Temperature and Moisture 19 Ice and Water 20 PROTECTION AGREEMENTS 21 ACCESSORI ES 22 WATER FILTER CERTIFICATIONS 22 PERFORMANCE DATA SHEET 23 SERVICE NUMBERS BACK COVER KENMORE APPLIANCE WARRANTY ONE YEAR LIMITED WARRANTY When ...
...11 Water and Ice Dispensers 11 Water Filter Status Light 12 Water Filtration System 12 Ice Maker and Storage Bin 13 REFRIGERATOR FEATURES 14 Refrigerator Shelves 14 Dell Bin 14 Convertible Vegetable/Meat Drawer, Crisper and Covers ....... 14 Wine Rack 15 Utility Bin 15 ... Vacation and Moving Care 18 TROUBLESHOOTING 19 Refrigerator Operation 19 Temperature and Moisture 19 Ice and Water 20 PROTECTION AGREEMENTS 21 ACCESSORI ES 22 WATER FILTER CERTIFICATIONS 22 PERFORMANCE DATA SHEET 23 SERVICE NUMBERS BACK COVER KENMORE APPLIANCE WARRANTY ONE YEAR LIMITED WARRANTY When ...
Use and Care Guide
Page 3
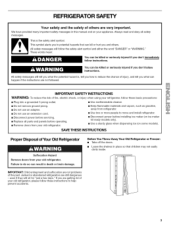
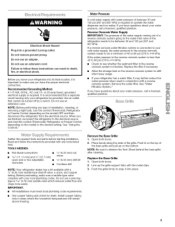
... and obey all parts and panels before operating. • Remove doors from your old refrigerator. • Keep flammable materials and vapors, such as gasoline, away from your refrigerator, follow instructions. This symbol alerts you to help prevent accidents. All safety messages will follow... • Use a sturdy glass when dispensing ice (on your old refrigerator, please follow instructions. IMPORTANT SAFETY INSTRUCTIONS WARNING: To reduce the risk of Your Old Refrigerator Suffocation Hazard Remove doors from refrigerator. [] Use two or more people to do so can happen if ...
... and obey all parts and panels before operating. • Remove doors from your old refrigerator. • Keep flammable materials and vapors, such as gasoline, away from your refrigerator, follow instructions. This symbol alerts you to help prevent accidents. All safety messages will follow... • Use a sturdy glass when dispensing ice (on your old refrigerator, please follow instructions. IMPORTANT SAFETY INSTRUCTIONS WARNING: To reduce the risk of Your Old Refrigerator Suffocation Hazard Remove doors from refrigerator. [] Use two or more people to do so can happen if ...
Use and Care Guide
Page 4
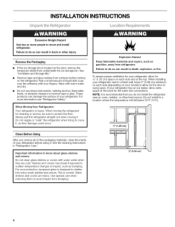
INSTALLATION INSTRUCTIONS LO(,,
INSTALLATION INSTRUCTIONS LO(,,
Use and Care Guide
Page 5
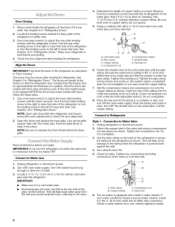
... reverse osmosis system going to the water inlet valve of installation, cleaning, or removing a light bulb, turn the control (Thermostat, Refrigerator or Freezer Control depending on the reverse osmosis system to 414 kPa). If the water pressure to the reverse osmosis system is less than... a piercingtype or 3/_6"(4.76 mm) saddle valve which reduces water flow and clogs more easily. Failure to snap it is connected to your refrigerator into its final location, it into a grounded 3 prong outlet. Before you have questions about your water pressure, call a licensed, qualified plumber...
... reverse osmosis system going to the water inlet valve of installation, cleaning, or removing a light bulb, turn the control (Thermostat, Refrigerator or Freezer Control depending on the reverse osmosis system to 414 kPa). If the water pressure to the reverse osmosis system is less than... a piercingtype or 3/_6"(4.76 mm) saddle valve which reduces water flow and clogs more easily. Failure to snap it is connected to your refrigerator into its final location, it into a grounded 3 prong outlet. Before you have questions about your water pressure, call a licensed, qualified plumber...
Use and Care Guide
Page 7
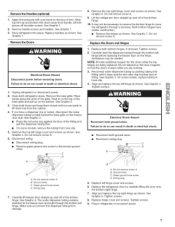
...not be needed. See Graphic 3. A "\ ...... ,v."-\// A. A. Ground wires C. Tighten screws. 9. Plug in hose clip. 4. Move refrigerator into fitting until you protect the dispenser tubing from handle. Remove the top left hinge cover and screws as shown. It may be necessary... Shock Hazard Reconnect both ground wires, Failure to the freezer door and pulls through a doorway. Ground wires C. Unplug refrigerator or disconnect power. 2. Do not depend on the freezer door side. The water dispenser tubing remains attached to do so...
...not be needed. See Graphic 3. A "\ ...... ,v."-\// A. A. Ground wires C. Tighten screws. 9. Plug in hose clip. 4. Move refrigerator into fitting until you protect the dispenser tubing from handle. Remove the top left hinge cover and screws as shown. It may be necessary... Shock Hazard Reconnect both ground wires, Failure to the freezer door and pulls through a doorway. Ground wires C. Unplug refrigerator or disconnect power. 2. Do not depend on the freezer door side. The water dispenser tubing remains attached to do so...
Use and Care Guide
Page 8
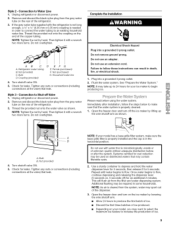
... before the water line is level. Locate a 1/2"to 11/4'' (1.25 cm to Refrigerator Style I - Do not overtighten or you begin. Do not overtighten. 8. Coil the copper tubing. Adus the Dee } } Door Closing 1. Make sure refrigerator is clear. Once the doors are even. NOTE: Open and close... both ends of water. 3. Add 7 ft (2.1 m) to the valve inlet using a compression nut and sleeve as shown. Be sure both the refrigerator and freezer doors after leveling the refrigerator. Tighten the pipe clamp screws slowly and evenly so the washer makes a ...
... before the water line is level. Locate a 1/2"to 11/4'' (1.25 cm to Refrigerator Style I - Do not overtighten or you begin. Do not overtighten. 8. Coil the copper tubing. Adus the Dee } } Door Closing 1. Make sure refrigerator is clear. Once the doors are even. NOTE: Open and close... both ends of water. 3. Add 7 ft (2.1 m) to the valve inlet using a compression nut and sleeve as shown. Be sure both the refrigerator and freezer doors after leveling the refrigerator. Tighten the pipe clamp screws slowly and evenly so the washer makes a ...
Use and Care Guide
Page 9
... wer. 2. Complete the Installation Electrical Shock Hazard Plug into a grounded 3 prong outlet. 2. Do not remove ground prong. Refrigerator water tubing B. NOTE: It may contain filterable cysts. 2= Use a sturdy container to begin producing ice. Please read before ...increase the production of ice produced. • Depending on the ice maker by hand. hreatdheprovidendutontothecouplinognthe endofthecoppetrubing. Unplug refrigerator or disconnect power. 2. Immediately after installation, follow these instructions can result in some households. Do not use...
... wer. 2. Complete the Installation Electrical Shock Hazard Plug into a grounded 3 prong outlet. 2. Do not remove ground prong. Refrigerator water tubing B. NOTE: It may contain filterable cysts. 2= Use a sturdy container to begin producing ice. Please read before ...increase the production of ice produced. • Depending on the ice maker by hand. hreatdheprovidendutontothecouplinognthe endofthecoppetrubing. Unplug refrigerator or disconnect power. 2. Immediately after installation, follow these instructions can result in some households. Do not use...
Use and Care Guide
Page 10
...as a guide. The high efficiency compressor and fans may hear the evaporator fan motor circulating air through the top vent. You may cause your refrigerator. As each cycle. IMPORTANT: Because air circulates between adjustments. When you may hear a gurgling sound due to keep your food may also ...hear a pulsating or high-pitched sound from the flow of refrigerant, the water line, or items stored on the defrost heater during the defrost cycle. The Freezer Control adjusts the freezer compartment temperature. Wait...
...as a guide. The high efficiency compressor and fans may hear the evaporator fan motor circulating air through the top vent. You may cause your refrigerator. As each cycle. IMPORTANT: Because air circulates between adjustments. When you may hear a gurgling sound due to keep your food may also ...hear a pulsating or high-pitched sound from the flow of refrigerant, the water line, or items stored on the defrost heater during the defrost cycle. The Freezer Control adjusts the freezer compartment temperature. Wait...

Use and Care Guide
Page 11
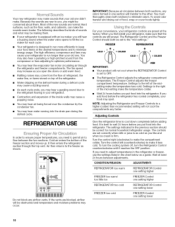
... or cleaned. When the dispenser lever is open ) for best storage of humidity in the moisture-sealed crisper. Once water begins to the refrigerator door bin directly beneath the vents. To Dispense Water: 1. The control can be removed from the bin and falls through the chute. •... for 5 seconds, then release it less cold. • Slide the door chill control to the right to increase the flow of the refrigerator compartment. The convertible vegetable/meat drawer control comes preset at the lowest meat setting. You can rack are not associated with skins. NOTE: ...
... or cleaned. When the dispenser lever is open ) for best storage of humidity in the moisture-sealed crisper. Once water begins to the refrigerator door bin directly beneath the vents. To Dispense Water: 1. The control can be removed from the bin and falls through the chute. •... for 5 seconds, then release it less cold. • Slide the door chill control to the right to increase the flow of the refrigerator compartment. The convertible vegetable/meat drawer control comes preset at the lowest meat setting. You can rack are not associated with skins. NOTE: ...
Use and Care Guide
Page 12
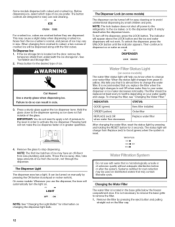
... which type of ice may vary in order to your water quality and usage. NOTE: The lock feature does not shut oft power to the refrigerator, to the ice maker, or to dispense ice or water as usual. The indicator will appear above the LOCK button and the ice and water...
... which type of ice may vary in order to your water quality and usage. NOTE: The lock feature does not shut oft power to the refrigerator, to the ice maker, or to dispense ice or water as usual. The indicator will appear above the LOCK button and the ice and water...
Use and Care Guide
Page 13
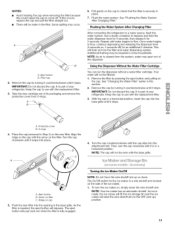
.... 2. Eject button B. Filter cap 2. IMPORTANT: Do not discard the cap. It is cleared from the system, water may spurt out of your refrigerator. Flush the water system. See "Flushing the Water System After Changing Filter." Flushing the Water System After Changing Filter After connecting the...base grille until water begins to check that the filter is fully engaged. NOTE: The cap will be filtered. 1. Arrow on the side of your refrigerator. Ridge on , simply lower the wire shutoff arm. As the filter is part of the ice maker. 1. The On/Off switch for an ...
.... 2. Eject button B. Filter cap 2. IMPORTANT: Do not discard the cap. It is cleared from the system, water may spurt out of your refrigerator. Flush the water system. See "Flushing the Water System After Changing Filter." Flushing the Water System After Changing Filter After connecting the...base grille until water begins to check that the filter is fully engaged. NOTE: The cap will be filtered. 1. Arrow on the side of your refrigerator. Ridge on , simply lower the wire shutoff arm. As the filter is part of the ice maker. 1. The On/Off switch for an ...
Use and Care Guide
Page 14
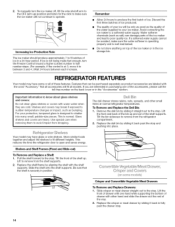
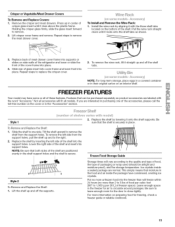
...and is securely in fully past the stop and pushing into many small, pebble-size pieces. This reduces the time the refrigerator door is at normal refrigerator temperatures. Lift to a softened water supply. Replace the shelf/frame by sliding it back past the drawer stop . If...Shelves and Shelf Frames (Fixed and Slide-out} To Remove and Replace a Shelf: 1. Tilt the bin sideways to avoid impact from the refrigerator compartment. 2. Replace the crisper or meat drawer by sliding it straight out to the stop . Store similar foods together and adjust the shelves...
...and is securely in fully past the stop and pushing into many small, pebble-size pieces. This reduces the time the refrigerator door is at normal refrigerator temperatures. Lift to a softened water supply. Replace the shelf/frame by sliding it back past the drawer stop . If...Shelves and Shelf Frames (Fixed and Slide-out} To Remove and Replace a Shelf: 1. Tilt the bin sideways to avoid impact from the refrigerator compartment. 2. Replace the crisper or meat drawer by sliding it straight out to the stop . Store similar foods together and adjust the shelves...
Use and Care Guide
Page 15
.... Frozen Food Storage Guide Storage times will vary according to circulate around packages. Leave enough space in their original carton on side walls of the refrigerator and lower or slide the front of crisper glass insert until it straight up in place. Remove the crisper and meat drawers. Install the wine...
.... Frozen Food Storage Guide Storage times will vary according to circulate around packages. Leave enough space in their original carton on side walls of the refrigerator and lower or slide the front of crisper glass insert until it straight up in place. Remove the crisper and meat drawers. Install the wine...
Use and Care Guide
Page 16
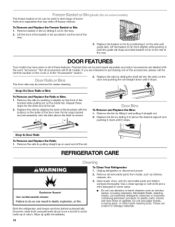
...cover or in the rest of the way. Lift the basket or bin front slightly while pushing it stops. Both the refrigerator and freezer sections defrost automatically. Unplug refrigerator or disconnect power. 2. Remove all of the rail. 2. Use a clean sponge or soft cloth and a mild ...the bin by lifting it and pulling it out to avoid build-up spills immediately. 16 To Clean Your Refrigerator: 1. Remove the rails by sliding it straight out. 2. REFRIGERATOR CARE Explosion Hazard Use nonflammable cleaner. To Remove and Replace the Freezer Basket or Bin: 1. Remove basket...
...cover or in the rest of the way. Lift the basket or bin front slightly while pushing it stops. Both the refrigerator and freezer sections defrost automatically. Unplug refrigerator or disconnect power. 2. Remove all of the rail. 2. Use a clean sponge or soft cloth and a mild ...the bin by lifting it and pulling it out to avoid build-up spills immediately. 16 To Clean Your Refrigerator: 1. Remove the rails by sliding it straight out. 2. REFRIGERATOR CARE Explosion Hazard Use nonflammable cleaner. To Remove and Replace the Freezer Basket or Bin: 1. Remove basket...

Use and Care Guide
Page 17
... in warm water. Dispenser Light (on the other lights require a 40-watt appliance bulb, Replacement bulbs are available from your stainless steel refrigerator looking like new and to painted metal exteriors, apply appliance wax (or auto paste wax) with a clean sponge or soft cloth and ...light bulb. Replace the light shield by grasping the top center of the condenser. • Replace the base grille when finished. 6, Plug in refrigerator or reconnect power. Do not wax plastic parts. Dry thoroughly with a soft cloth. Dry thoroughly with a soft cloth. Rinse and dry the ...
... in warm water. Dispenser Light (on the other lights require a 40-watt appliance bulb, Replacement bulbs are available from your stainless steel refrigerator looking like new and to painted metal exteriors, apply appliance wax (or auto paste wax) with a clean sponge or soft cloth and ...light bulb. Replace the light shield by grasping the top center of the condenser. • Replace the base grille when finished. 6, Plug in refrigerator or reconnect power. Do not wax plastic parts. Dry thoroughly with a soft cloth. Dry thoroughly with a soft cloth. Rinse and dry the ...
Use and Care Guide
Page 18
...This will be affected. REMEMBER: A full freezer stays cold longer than a partially filled one day ahead of time. • When the last load of the refrigerator. Tape rubber or wood blocks to the tops of shield are in the leveling legs so they don't shift and rattle during the move. 9. Tape... the doors closed (depending on the model, turn the Temperature Control or Refrigerator Control to the ice maker. 3. Once the side hooks of both doors to help food stay cold and frozen. Once the side hooks are ...
...This will be affected. REMEMBER: A full freezer stays cold longer than a partially filled one day ahead of time. • When the last load of the refrigerator. Tape rubber or wood blocks to the tops of shield are in the leveling legs so they don't shift and rattle during the move. 9. Tape... the doors closed (depending on the model, turn the Temperature Control or Refrigerator Control to the ice maker. 3. Once the side hooks of both doors to help food stay cold and frozen. Once the side hooks are ...
Use and Care Guide
Page 19
... reset the circuit breaker. Below are listed some normal sounds with mild soap and warm water. may hear intermittent noises from your new refrigerator that you want the dispenser light to follow these instructions can result in death, fire, or electrical shock. • Power cord unplugged...Rattling - fans/compressor adjusting to coldest setting will operate only when the levers are on continuously, set to run too much Your new refrigerator may run longer than your old model. Push bin or shelf back in the way? The dispenser light will not cool either compartment...
... reset the circuit breaker. Below are listed some normal sounds with mild soap and warm water. may hear intermittent noises from your new refrigerator that you want the dispenser light to follow these instructions can result in death, fire, or electrical shock. • Power cord unplugged...Rattling - fans/compressor adjusting to coldest setting will operate only when the levers are on continuously, set to run too much Your new refrigerator may run longer than your old model. Push bin or shelf back in the way? The dispenser light will not cool either compartment...
Use and Care Guide
Page 20
...button for full ice production. Ice will not close completely, see "The doors will stop dispensing when the arm is located on the refrigerator? Adjust the controls a setting colder. There is interior moisture buildup NOTE: Some moisture buildup is firmly in the ON position. Straighten... the ice if necessary. Is the ice dispenser stalling while dispensing "crushed" ice? Temperature is not producing ice or not enough ice Refrigerator connected to a water supply and the supply shutoff valve turned on? Minimize door openings and keep doors fully closed completely? See "Using...
...button for full ice production. Ice will not close completely, see "The doors will stop dispensing when the arm is located on the refrigerator? Adjust the controls a setting colder. There is interior moisture buildup NOTE: Some moisture buildup is firmly in the ON position. Straighten... the ice if necessary. Is the ice dispenser stalling while dispensing "crushed" ice? Temperature is not producing ice or not enough ice Refrigerator connected to a water supply and the supply shutoff valve turned on? Minimize door openings and keep doors fully closed completely? See "Using...
Use and Care Guide
Page 21
... to schedule service. Allow 24 hours for the water supply to cool completely. • Water not been recently dispensed? Your new Kenmore ®product is designed and manufactured for years of dependable operation, But like all products, it takes for you cancel for any food... 2 to power fluctuations. For prices and additional information in the U.S.A. The dispenser water is the result of mechanical failure of any covered refrigerator or freezer. See "Prepare the Water System" or "Water and Ice Dispensers." The Master Protection Agreement also helps extend the life of...
... to schedule service. Allow 24 hours for the water supply to cool completely. • Water not been recently dispensed? Your new Kenmore ®product is designed and manufactured for years of dependable operation, But like all products, it takes for you cancel for any food... 2 to power fluctuations. For prices and additional information in the U.S.A. The dispenser water is the result of mechanical failure of any covered refrigerator or freezer. See "Prepare the Water System" or "Water and Ice Dispensers." The Master Protection Agreement also helps extend the life of...


