Dimension Guide
Page 1
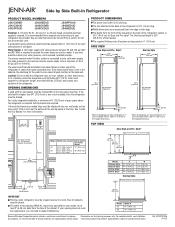
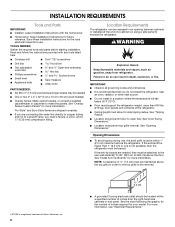
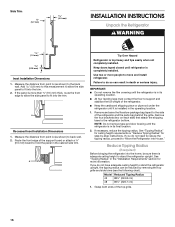
... were measured from the face of 40 to 60 psi (276 to operate the water dispenser and ice maker. SIDE VIEW Euro-Style and Pro- Model 42 48 Width A 41" (104.1 cm) 47" (119.4 cm) Because Whirlpool Corporation policy includes a continuous commitment to trim edge. Ref. A grounded ... for at same level as specified for your water pressure, call a licensed, qualified plumber. For complete details, see chart following) 6" (15.2 cm) Model 42 Euro-Style 48 Euro-Style 42 Pro- It is recommended that there is 3⁄4" (1.91 cm). Use an outlet that 600 lbs (272 kg...
... were measured from the face of 40 to 60 psi (276 to operate the water dispenser and ice maker. SIDE VIEW Euro-Style and Pro- Model 42 48 Width A 41" (104.1 cm) 47" (119.4 cm) Because Whirlpool Corporation policy includes a continuous commitment to trim edge. Ref. A grounded ... for at same level as specified for your water pressure, call a licensed, qualified plumber. For complete details, see chart following) 6" (15.2 cm) Model 42 Euro-Style 48 Euro-Style 42 Pro- It is recommended that there is 3⁄4" (1.91 cm). Use an outlet that 600 lbs (272 kg...
Dimension Guide
Page 2
...cm) 90˚ 110˚ 130˚ 90˚ 110˚ 130˚ 47⁷⁄₈" (121.6 cm) Model Pro-Style® Euro A B 10³/₄" (27.11 cm) 14¹/₄" (36.11 cm) 10¹/&#...8324;" (25.87 cm) 13³/₄" (34.88 cm) 48" (121.9 cm) Models 39" (99.1 cm) A 44" (111.8 cm) B 43⁷⁄₈" (111.4 cm) 90˚ 110˚ ...130˚ 90˚ 110˚ 130˚ 51³⁄₈" (130.5 cm) Model Pro-Style® Euro A 12³/₁₆" (30.84 cm) 11⁵/₈" (29.43 cm) B 16&#...
...cm) 90˚ 110˚ 130˚ 90˚ 110˚ 130˚ 47⁷⁄₈" (121.6 cm) Model Pro-Style® Euro A B 10³/₄" (27.11 cm) 14¹/₄" (36.11 cm) 10¹/&#...8324;" (25.87 cm) 13³/₄" (34.88 cm) 48" (121.9 cm) Models 39" (99.1 cm) A 44" (111.8 cm) B 43⁷⁄₈" (111.4 cm) 90˚ 110˚ ...130˚ 90˚ 110˚ 130˚ 51³⁄₈" (130.5 cm) Model Pro-Style® Euro A 12³/₁₆" (30.84 cm) 11⁵/₈" (29.43 cm) B 16&#...
Installation Instruction
Page 4
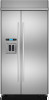
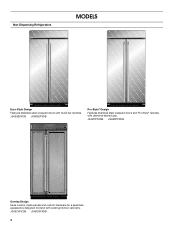
JS42PPFXDB JS48PPFXDB Overlay Design Uses custom-made panels and custom hardware for a seamless appearance designed to blend with towel bar handles. JS42CXFXDB JS48CXFXDB 4 Non-Dispensing Refrigerators MODELS Euro-Style Design Features stainless steel wrapped doors with existing kitchen cabinetry. JS42SEFXDB JS48SEFXDB Pro-Style® Design Features stainless steel wrapped doors and Pro-Style® handles with diamond-etched grip.
JS42PPFXDB JS48PPFXDB Overlay Design Uses custom-made panels and custom hardware for a seamless appearance designed to blend with towel bar handles. JS42CXFXDB JS48CXFXDB 4 Non-Dispensing Refrigerators MODELS Euro-Style Design Features stainless steel wrapped doors with existing kitchen cabinetry. JS42SEFXDB JS48SEFXDB Pro-Style® Design Features stainless steel wrapped doors and Pro-Style® handles with diamond-etched grip.
Installation Instruction
Page 6
... more than 1" (2.5 cm) or one is higher than 600 lbs (272 kg), door panels and contents of ¹⁄₂" (1.3 cm) must allow for your model. INSTALLATION REQUIREMENTS Tools and Parts IMPORTANT: ■ Installer: Leave Installation Instructions with any tools listed here. ■ Cordless drill ■ Torx®† T27 screwdriver...
... more than 1" (2.5 cm) or one is higher than 600 lbs (272 kg), door panels and contents of ¹⁄₂" (1.3 cm) must allow for your model. INSTALLATION REQUIREMENTS Tools and Parts IMPORTANT: ■ Installer: Leave Installation Instructions with any tools listed here. ■ Cordless drill ■ Torx®† T27 screwdriver...
Installation Instruction
Page 7
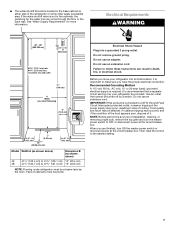
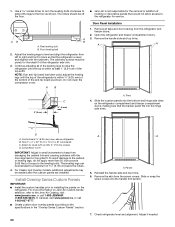
... poor, dispose of solid soffit 77" (196 cm) A Width (see chart following) 6" (15.2 cm) 1" 6" (2.54 cm) (15.2 cm) 24" (60.96 cm) min. 6" (15.2 cm) Model Width A (as shown above) Dimension B (as shown above) 42 41¹⁄₂" (105.4 cm) to 41³⁄₄" (106.1 cm) 10" (25.4 cm...
... poor, dispose of solid soffit 77" (196 cm) A Width (see chart following) 6" (15.2 cm) 1" 6" (2.54 cm) (15.2 cm) 24" (60.96 cm) min. 6" (15.2 cm) Model Width A (as shown above) Dimension B (as shown above) 42 41¹⁄₂" (105.4 cm) to 41³⁄₄" (106.1 cm) 10" (25.4 cm...
Installation Instruction
Page 8
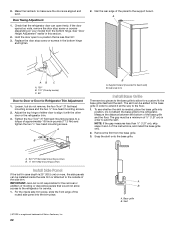
...the side tipping radius. Remove the water filter cartridge. Side Tipping Radius The side tipping radius varies depending upon the width of the rear wall. A Model 42 48 Tipping Radius A 93" (236.2 cm) 96" (243.8 cm) 8 Install the copper tubing only in conjunction with water pressure between ... a dolly is recommended. A ¹⁄₂" (12.7 mm) hole for plumbing should be within ¹⁄₂" (12.7 mm) of the model. If the water pressure to the reverse osmosis system is blocked. Tipping Radius Be sure there is adequate ceiling height to stand the refrigerator upright...
...the side tipping radius. Remove the water filter cartridge. Side Tipping Radius The side tipping radius varies depending upon the width of the rear wall. A Model 42 48 Tipping Radius A 93" (236.2 cm) 96" (243.8 cm) 8 Install the copper tubing only in conjunction with water pressure between ... a dolly is recommended. A ¹⁄₂" (12.7 mm) hole for plumbing should be within ¹⁄₂" (12.7 mm) of the model. If the water pressure to the reverse osmosis system is blocked. Tipping Radius Be sure there is adequate ceiling height to stand the refrigerator upright...

Installation Instruction
Page 9
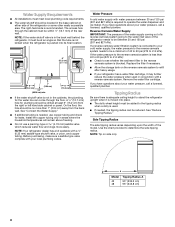
...-Style®. Top View Euro-Style and Pro-Style® A 24¹⁄₈" (61.3 cm) 23 60.3 cm) 23¹⁄₂" (59.7 cm) Model 42 Euro-Style 48 Euro-Style 42 Pro- Style® 25³⁄₈" (64.5 cm) ³⁄₈" (9.53 mm) *83³⁄₈...
...-Style®. Top View Euro-Style and Pro-Style® A 24¹⁄₈" (61.3 cm) 23 60.3 cm) 23¹⁄₂" (59.7 cm) Model 42 Euro-Style 48 Euro-Style 42 Pro- Style® 25³⁄₈" (64.5 cm) ³⁄₈" (9.53 mm) *83³⁄₈...

Installation Instruction
Page 10
..., add 1¹⁄₈" (2.9 cm) to a minimum of the refrigerator and a corner wall. To adjust the door swing, see "Adjust Doors." 42" (106.7 cm) Models Model 42 48 Width A 41" (104.1 cm) 47" (119.4 cm) Front View ■ Width dimensions were measured from trim edge to trim edge. ■ Height dimensions...cm) B 41³⁄₈" (105.1 cm) 90˚ 110˚ 130˚ 90˚ 110˚ 130˚ 47⁷⁄₈" (121.6 cm) Model Pro-Style® Euro A B 10³/₄" (27.11 cm) 14¹/₄" (36.11 cm) 10¹/₄" (25.87 cm) 13³/₄...
..., add 1¹⁄₈" (2.9 cm) to a minimum of the refrigerator and a corner wall. To adjust the door swing, see "Adjust Doors." 42" (106.7 cm) Models Model 42 48 Width A 41" (104.1 cm) 47" (119.4 cm) Front View ■ Width dimensions were measured from trim edge to trim edge. ■ Height dimensions...cm) B 41³⁄₈" (105.1 cm) 90˚ 110˚ 130˚ 90˚ 110˚ 130˚ 47⁷⁄₈" (121.6 cm) Model Pro-Style® Euro A B 10³/₄" (27.11 cm) 14¹/₄" (36.11 cm) 10¹/₄" (25.87 cm) 13³/₄...

Installation Instruction
Page 11
...; Actual Size Refrigerator to Cabinetry Clearance Refrigerator Side Trim Hinge 11/2" (3.8 cm) 11/4" (3.2 cm) 1" (2.5 cm) Cabinetry 1/4" (6.35 mm) 1/2" (1.3 cm) 3/4" (1.9 cm) 1" (2.5 cm) NOTE: For Overlay Series models, rout the hinge side of the custom door panels to a radius that there is desired. Overlay Series Door Panel and Cabinetry Clearance The custom door...
...; Actual Size Refrigerator to Cabinetry Clearance Refrigerator Side Trim Hinge 11/2" (3.8 cm) 11/4" (3.2 cm) 1" (2.5 cm) Cabinetry 1/4" (6.35 mm) 1/2" (1.3 cm) 3/4" (1.9 cm) 1" (2.5 cm) NOTE: For Overlay Series models, rout the hinge side of the custom door panels to a radius that there is desired. Overlay Series Door Panel and Cabinetry Clearance The custom door...

Installation Instruction
Page 13
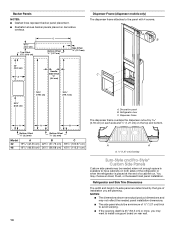
...) Dispenser cutout is most common to 19.05 mm) Backer Panel 1/4" 1/8" (6.35 mm) (3.18 mm) Backer Panel 1" minimum (2.54 cm) Door/Grille Trim Offset Dimension Model A B C 42 17¹/₄" (43.82 cm) 23¹/₄" (59.06 cm) 40³/₄" (103.51 cm) 48 19³/₄" (50.17...
...) Dispenser cutout is most common to 19.05 mm) Backer Panel 1/4" 1/8" (6.35 mm) (3.18 mm) Backer Panel 1" minimum (2.54 cm) Door/Grille Trim Offset Dimension Model A B C 42 17¹/₄" (43.82 cm) 23¹/₄" (59.06 cm) 40³/₄" (103.51 cm) 48 19³/₄" (50.17...
Installation Instruction
Page 14
... of installation you may choose an Inset, Flush, or Recessed Inset panel installation. B Bottom Offset ¹⁄₈" (3.2 mm) Bottom Offset ¹⁄₈" (3.2 mm) Model A B 42 16³/₄" (42.55 cm) 22³/₄" (57.79 cm) 48 19¹/₄" (48.90 cm) 26¹/₄" (66.68....7 cm) Top Offset 1⁵⁄₈" (4.13 cm) C Bottom Offset ¹⁄₂" (1.27 cm) Side Offset ¹⁄₂" (12.7 mm) Dispenser Frame (dispenser models only) The dispenser frame attaches to have cabinets on the top and bottom.
... of installation you may choose an Inset, Flush, or Recessed Inset panel installation. B Bottom Offset ¹⁄₈" (3.2 mm) Bottom Offset ¹⁄₈" (3.2 mm) Model A B 42 16³/₄" (42.55 cm) 22³/₄" (57.79 cm) 48 19¹/₄" (48.90 cm) 26¹/₄" (66.68....7 cm) Top Offset 1⁵⁄₈" (4.13 cm) C Bottom Offset ¹⁄₂" (1.27 cm) Side Offset ¹⁄₂" (12.7 mm) Dispenser Frame (dispenser models only) The dispenser frame attaches to have cabinets on the top and bottom.
Installation Instruction
Page 16
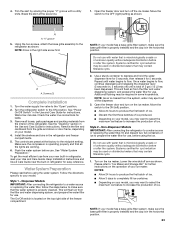
... the side panel to the refrigerator bottom. If you do so can be sure there is top heavy and tips easily when not completely installed. Model Reduced Tipping Radius 42 88¹⁄₂" (224.8 cm) 48 89¹⁄₄" (226.7 cm) 1.
... the side panel to the refrigerator bottom. If you do so can be sure there is top heavy and tips easily when not completely installed. Model Reduced Tipping Radius 42 88¹⁄₂" (224.8 cm) 48 89¹⁄₄" (226.7 cm) 1.
Installation Instruction
Page 20
... fits into the handle trim section. 7. For Classic and Overlay models, additional adjustments may be off the floor. For more than 50 inch-pounds (5.65 Nm) of torque to installing the panels on Jenn-Air custom handle selection, refer to raise the refrigerator until the top ... or snap the screw covers into the hinge side trims. D A. Two 2" x 4" x 32" (5 cm x 10 cm x 81 cm) boards C. Panels 5. A B ■ Jenn-Air is level and aligned with the cabinetry. Center board ¹⁄₄" (6.35 mm) max. The cabinetry surface must be extended to keep from left...
... fits into the handle trim section. 7. For Classic and Overlay models, additional adjustments may be off the floor. For more than 50 inch-pounds (5.65 Nm) of torque to installing the panels on Jenn-Air custom handle selection, refer to raise the refrigerator until the top ... or snap the screw covers into the hinge side trims. D A. Two 2" x 4" x 32" (5 cm x 10 cm x 81 cm) boards C. Panels 5. A B ■ Jenn-Air is level and aligned with the cabinetry. Center board ¹⁄₄" (6.35 mm) max. The cabinetry surface must be extended to keep from left...

Installation Instruction
Page 21
... cap. Remove one from bottom B. Slide the backer panel into place. A. Nuts C. A BC A. Replace the top grille in the 130° position on Overlay Series models unless the custom panels have been leveled. 1. Door stop screw from top (110°) 2. Turn the bushing located underneath the bottom of the top grille...
... cap. Remove one from bottom B. Slide the backer panel into place. A. Nuts C. A BC A. Replace the top grille in the 130° position on Overlay Series models unless the custom panels have been leveled. 1. Door stop screw from top (110°) 2. Turn the bushing located underneath the bottom of the top grille...
Installation Instruction
Page 22
...to allow access to extend it with the other door or the refrigerator trim. 3. Replace the door stop screw or screws (depending on your model) from the base grille. 3. Loosen, but do not remove, the four Torx®† 27 flat-head mounting screws and the two ...the base grille into position. A AB C A. 130° B. 110° (Overlay series) C. 90° Door-to-Door or Door-to the refrigerator. A. IMPORTANT: Jenn-Air is less than ¹⁄₂" (1.27 cm), skip steps 3 and 4 of Saturn Fasteners, Inc. 22 A B A. Base grille B. Hold the door open freely. ...
...to allow access to extend it with the other door or the refrigerator trim. 3. Replace the door stop screw or screws (depending on your model) from the base grille. 3. Loosen, but do not remove, the four Torx®† 27 flat-head mounting screws and the two ...the base grille into position. A AB C A. 130° B. 110° (Overlay series) C. 90° Door-to-Door or Door-to the refrigerator. A. IMPORTANT: Jenn-Air is less than ¹⁄₂" (1.27 cm), skip steps 3 and 4 of Saturn Fasteners, Inc. 22 A B A. Base grille B. Hold the door open freely. ...
Installation Instruction
Page 23
... arm as shown. Systems certified for instructions. See "Water System Preparation." To get the most efficient use . Water System Preparation Please read your model. 4. Trim the skirt by scoring the proper "V" groove with water that the water system is microbiologically unsafe or of 3 gal. (12 ... it for leaks. 3. Use a sturdy container to make sure that is cleared from the interior of your model. Once water begins to flow. This will flush air from the filter and water dispensing system, and prepare the water filter for use . Additional flushing may spurt ...
... arm as shown. Systems certified for instructions. See "Water System Preparation." To get the most efficient use . Water System Preparation Please read your model. 4. Trim the skirt by scoring the proper "V" groove with water that the water system is microbiologically unsafe or of 3 gal. (12 ... it for leaks. 3. Use a sturdy container to make sure that is cleared from the interior of your model. Once water begins to flow. This will flush air from the filter and water dispensing system, and prepare the water filter for use . Additional flushing may spurt ...
Use and Care
Page 3
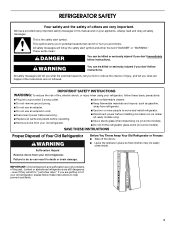
...alert symbol. Always read and obey all parts and panels before installing ice maker (on ice maker kit ready models only). ■ Use a sturdy glass when dispensing ice (on some models). Before You Throw Away Your Old Refrigerator or Freezer: ■ Take off the doors. ■ Leave ...the shelves in place so that can happen if the instructions are very important. WARNING You can result in this manual and on some models). ■ Do not hit the refrigerator glass doors (on your old refrigerator, please follow these instructions to move and install refrigerator. &#...
...alert symbol. Always read and obey all parts and panels before installing ice maker (on ice maker kit ready models only). ■ Use a sturdy glass when dispensing ice (on some models). Before You Throw Away Your Old Refrigerator or Freezer: ■ Take off the doors. ■ Leave ...the shelves in place so that can happen if the instructions are very important. WARNING You can result in this manual and on some models). ■ Do not hit the refrigerator glass doors (on your old refrigerator, please follow these instructions to move and install refrigerator. &#...

Use and Care
Page 4
...to refill after the system. 2. Water System Preparation Please read before turning on the reverse osmosis system to be a minimum of ice. 4 Dispenser Models IMPORTANT: After connecting the refrigerator to a water source or replacing the water filter, follow the steps below to your refrigerator has a water filter, it...to select the maximum ice feature to the water inlet valve of the dispenser. 3. This is in some households. This will flush air from the water source should have questions about glass shelves and covers: Do not clean glass shelves or covers with water that the ...
...to refill after the system. 2. Water System Preparation Please read before turning on the reverse osmosis system to be a minimum of ice. 4 Dispenser Models IMPORTANT: After connecting the refrigerator to a water source or replacing the water filter, follow the steps below to your refrigerator has a water filter, it...to select the maximum ice feature to the water inlet valve of the dispenser. 3. This is in some households. This will flush air from the water source should have questions about glass shelves and covers: Do not clean glass shelves or covers with water that the ...
Use and Care
Page 5
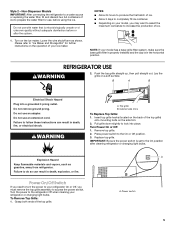
... the power switch. WARNING A. Grasp both ends of the top grille) onto mounting bolts on your model, you must remove the top grille assembly to increase the production of your model has a base grille filter system, make sure the base grille filter is properly installed and the cap...to do so can result in the horizontal position. Style 2 - NOTE: If your ice maker. Do not use an extension cord. Non-Dispenser Models IMPORTANT: After connecting the refrigerator to a water source or replacing the water filter, fill and discard two full containers of ice to lock into a...
... the power switch. WARNING A. Grasp both ends of the top grille) onto mounting bolts on your model, you must remove the top grille assembly to increase the production of your model has a base grille filter system, make sure the base grille filter is properly installed and the cap...to do so can result in the horizontal position. Style 2 - NOTE: If your ice maker. Do not use an extension cord. Non-Dispenser Models IMPORTANT: After connecting the refrigerator to a water source or replacing the water filter, fill and discard two full containers of ice to lock into a...
Use and Care
Page 6
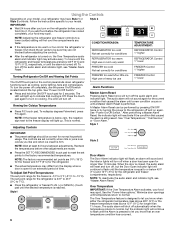
...176;F (7°C) and 15°F (-9°C) for an extended period of time. Over Temperature IMPORTANT: If the Over Temperature Alarm activates, your model. REFRIGERATOR too cold Not set correctly for the freezer is normal. The LED will not sound again for longer than 10 minutes. See "Over ...cream is Off. CONDITION/REASON: ■ If the temperature is too warm or too cold in the refrigerator or freezer, first check the air vents to your food may spoil. After performing a Master Alarm Reset, the indicator light will continue to flash until the temperature is below ...
...176;F (7°C) and 15°F (-9°C) for an extended period of time. Over Temperature IMPORTANT: If the Over Temperature Alarm activates, your model. REFRIGERATOR too cold Not set correctly for the freezer is normal. The LED will not sound again for longer than 10 minutes. See "Over ...cream is Off. CONDITION/REASON: ■ If the temperature is too warm or too cold in the refrigerator or freezer, first check the air vents to your food may spoil. After performing a Master Alarm Reset, the indicator light will continue to flash until the temperature is below ...
