Owners Manual
Page 4
TABLE OF CONTENTS Maintenance Safety Precautions ...25 Suggested Maintenance Procedures 25 Transporting the Invacare Patriot...26 SECTION 5-FRONT RIGGINGS 27 Installing/Removing Swingaway Footrest 27 Installing Swingaway Footrest ...27 Removing Swingaway Footrest ...31 Depth Adjustment ...32 Angle Adjustment ...32 SECTION 6-ARMS 33 Adjusting/Using Armrest...33 Adjusting Armrest Height ...33 Using Armrest...34 Removing/Installing Flip Back Armrest 34 Removing Flip Back Armrest...34 Installing Flip Back Armrest ...34 SECTION 7-SEAT/BACK 36 Removing/Installing Seat Upholstery ...36 Removing ...
TABLE OF CONTENTS Maintenance Safety Precautions ...25 Suggested Maintenance Procedures 25 Transporting the Invacare Patriot...26 SECTION 5-FRONT RIGGINGS 27 Installing/Removing Swingaway Footrest 27 Installing Swingaway Footrest ...27 Removing Swingaway Footrest ...31 Depth Adjustment ...32 Angle Adjustment ...32 SECTION 6-ARMS 33 Adjusting/Using Armrest...33 Adjusting Armrest Height ...33 Using Armrest...34 Removing/Installing Flip Back Armrest 34 Removing Flip Back Armrest...34 Installing Flip Back Armrest ...34 SECTION 7-SEAT/BACK 36 Removing/Installing Seat Upholstery ...36 Removing ...
Owners Manual
Page 14
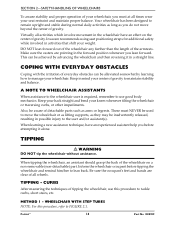
... assistant(s). Also, be inadvertently released, resulting in mind your center of the armrests. TIPPING - METHOD 1 - WHEELCHAIR WITH STEP TUBES NOTE: For this procedure to tackle curbs, short stairs, etc. Invacare recommends using seat positioning straps for additional safety while involved in the wheelchair have... arms or legrests. When learning a new assistance technique, have an effect on a non‐removable (non‐detachable) part. Patriot™ 14 Part No 1088909 DO NOT lean forward out of the wheelchair any further than the length of gravity to maintain stability...
... assistant(s). Also, be inadvertently released, resulting in mind your center of the armrests. TIPPING - METHOD 1 - WHEELCHAIR WITH STEP TUBES NOTE: For this procedure to tackle curbs, short stairs, etc. Invacare recommends using seat positioning straps for additional safety while involved in the wheelchair have... arms or legrests. When learning a new assistance technique, have an effect on a non‐removable (non‐detachable) part. Patriot™ 14 Part No 1088909 DO NOT lean forward out of the wheelchair any further than the length of gravity to maintain stability...
Owners Manual
Page 17
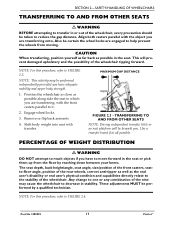
... depth, back height/angle, seat angle, size/position of the front casters, seatto-floor angle, position of the wheelchair. Remove or flip back armrests. 4. Part No 1088909 17 Patriot™ SECTION 2-SAFETY/HANDLING OF WHEELCHAIRS TRANSFERRING TO AND FROM OTHER SEATS ƽ WARNING BEFORE attempting to transfer in stability. Shift body weight...
... depth, back height/angle, seat angle, size/position of the front casters, seatto-floor angle, position of the wheelchair. Remove or flip back armrests. 4. Part No 1088909 17 Patriot™ SECTION 2-SAFETY/HANDLING OF WHEELCHAIRS TRANSFERRING TO AND FROM OTHER SEATS ƽ WARNING BEFORE attempting to transfer in stability. Shift body weight...
Owners Manual
Page 21
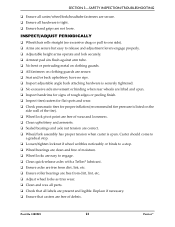
... Arms are secure but easy to release and adjustment levers engage properly. ❑ Adjustable height arms operate and lock securely. ❑ Armrest pad sits flush against arm tube. ❑ Seat and/or back upholstery have no rips. ❑ Inspect adjustable angle back attaching ...and spun. ❑ Quick‐release axles lock properly. ❑ Inspect handrims for signs of your wheelchair. Part No 1088909 21 Patriot™ Caster should be cared for a thorough inspection and servicing. To operate properly and safely, your wheelchair must be checked periodically for...
... Arms are secure but easy to release and adjustment levers engage properly. ❑ Adjustable height arms operate and lock securely. ❑ Armrest pad sits flush against arm tube. ❑ Seat and/or back upholstery have no rips. ❑ Inspect adjustable angle back attaching ...and spun. ❑ Quick‐release axles lock properly. ❑ Inspect handrims for signs of your wheelchair. Part No 1088909 21 Patriot™ Caster should be cared for a thorough inspection and servicing. To operate properly and safely, your wheelchair must be checked periodically for...
Owners Manual
Page 22
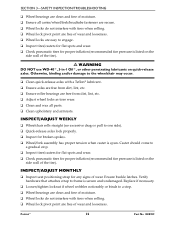
..., binding and/or damage to one side). ❑ Quick‐release axles lock properly. ❑ Inspect for any signs of the tire). Patriot™ 22 Part No 1088909 INSPECT/ADJUST WEEKLY ❑ Wheelchair rolls straight (no excessive drag or pull to the wheelchair may occur. ❑... free from dirt, lint, etc. ❑ Adjust wheel locks as tires wear. ❑ Clean and wax all parts. ❑ Clean upholstery and armrests. Ensure buckle latches. Caster should come to a gradual stop . ❑ Wheel bearings are clean and free of wear and looseness. Verify hardware that...
..., binding and/or damage to one side). ❑ Quick‐release axles lock properly. ❑ Inspect for any signs of the tire). Patriot™ 22 Part No 1088909 INSPECT/ADJUST WEEKLY ❑ Wheelchair rolls straight (no excessive drag or pull to the wheelchair may occur. ❑... free from dirt, lint, etc. ❑ Adjust wheel locks as tires wear. ❑ Clean and wax all parts. ❑ Clean upholstery and armrests. Ensure buckle latches. Caster should come to a gradual stop . ❑ Wheel bearings are clean and free of wear and looseness. Verify hardware that...
Owners Manual
Page 23
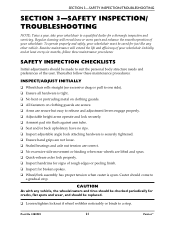
...tire pressure is spun. Replace if necessary. ❑ Ensure that all labels are free of wear and looseness. ❑ Clean upholstery and armrests. ❑ Sealed bearings and axle nut tension are not loose. Caster should come to a gradual stop. ❑ Loosen/tighten locknut if ...wheel locks as tires wear. ❑ Clean and wax all parts. ❑ Check that casters are present and legible. Part No 1088909 23 Patriot™ SECTION 3-SAFETY INSPECTION/TROUBLESHOOTING ❑ Ensure all caster/wheel/fork/headtube fasteners are secure. ❑ Ensure all hardware is tight. &#...
...tire pressure is spun. Replace if necessary. ❑ Ensure that all labels are free of wear and looseness. ❑ Clean upholstery and armrests. ❑ Sealed bearings and axle nut tension are not loose. Caster should come to a gradual stop. ❑ Loosen/tighten locknut if ...wheel locks as tires wear. ❑ Clean and wax all parts. ❑ Check that casters are present and legible. Part No 1088909 23 Patriot™ SECTION 3-SAFETY INSPECTION/TROUBLESHOOTING ❑ Ensure all caster/wheel/fork/headtube fasteners are secure. ❑ Ensure all hardware is tight. &#...
Owners Manual
Page 26
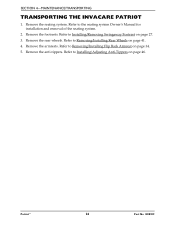
Remove the armrests. SECTION 4-MAINTENANCE/TRANSPORTING TRANSPORTING THE INVACARE PATRIOT 1. Refer to Installing/Adjusting Anti‐Tippers on page 27. 3. Refer to the seating system Owner's Manual for installation and removal of the seating system. 2. Remove the footrests. Patriot™ 26 Part No 1088909 Refer to Installing/Removing Swingaway Footrest on page 46. Remove the...
Remove the armrests. SECTION 4-MAINTENANCE/TRANSPORTING TRANSPORTING THE INVACARE PATRIOT 1. Refer to Installing/Adjusting Anti‐Tippers on page 27. 3. Refer to the seating system Owner's Manual for installation and removal of the seating system. 2. Remove the footrests. Patriot™ 26 Part No 1088909 Refer to Installing/Removing Swingaway Footrest on page 46. Remove the...
Owners Manual
Page 33
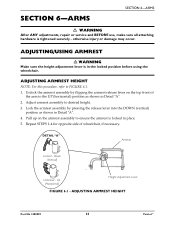
... lever into the DOWN (vertical) position as shown in place. 5. Repeat STEPS 1‐4 for opposite side of the arm to desired height. 3. ADJUSTING ARMREST HEIGHT Part No 1088909 33 Patriot™ Up (Horizontal) Height Adjustment Lever FIGURE 6.1 - SECTION 6-ARMS SECTION 6-ARMS ƽ WARNING After ANY adjustments, repair or service and BEFORE use...
... lever into the DOWN (vertical) position as shown in place. 5. Repeat STEPS 1‐4 for opposite side of the arm to desired height. 3. ADJUSTING ARMREST HEIGHT Part No 1088909 33 Patriot™ Up (Horizontal) Height Adjustment Lever FIGURE 6.1 - SECTION 6-ARMS SECTION 6-ARMS ƽ WARNING After ANY adjustments, repair or service and BEFORE use...
Owners Manual
Page 34
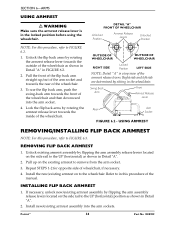
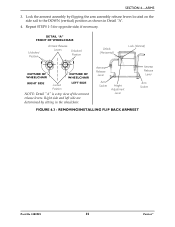
...and left side are determined by rotating the armrest release lever towards the rear of the wheelchair. OUTSIDE OF WHEELCHAIR OUTSIDE OF WHEELCHAIR RIGHT SIDE Locked Position LEFT SIDE NOTE: Detail ʺAʺ is in the wheelchair. Patriot™ 34 Part No 1088909 Lock the ...flip back arms by sitting in the locked position before using the wheelchair. Pull up /out of the arm socket and towards the inside of the wheelchair. 3. Install new/existing armrest assembly into the arm...
...and left side are determined by rotating the armrest release lever towards the rear of the wheelchair. OUTSIDE OF WHEELCHAIR OUTSIDE OF WHEELCHAIR RIGHT SIDE Locked Position LEFT SIDE NOTE: Detail ʺAʺ is in the wheelchair. Patriot™ 34 Part No 1088909 Lock the ...flip back arms by sitting in the locked position before using the wheelchair. Pull up /out of the arm socket and towards the inside of the wheelchair. 3. Install new/existing armrest assembly into the arm...
Owners Manual
Page 35
... the wheelchair. Armrest Release Lever Arm Socket Height Adjustment Lever Armrest Release Lever Arm Socket FIGURE 6.3 - DETAIL "A" FRONT OF WHEELCHAIR Unlocked Position Armrest Release Levers Unlocked... Position Unlock (Horizontal) Lock (Vertical) OUTSIDE OF WHEELCHAIR OUTSIDE OF WHEELCHAIR RIGHT SIDE Locked Position LEFT SIDE NOTE: Detail ʺAʺ is a top view of the armrest release levers. SECTION 6-ARMS 3. Repeat STEPS 1‐3 for opposite side, if necessary. REMOVING/INSTALLING FLIP BACK ARMREST Part No 1088909 35 Patriot...
... the wheelchair. Armrest Release Lever Arm Socket Height Adjustment Lever Armrest Release Lever Arm Socket FIGURE 6.3 - DETAIL "A" FRONT OF WHEELCHAIR Unlocked Position Armrest Release Levers Unlocked... Position Unlock (Horizontal) Lock (Vertical) OUTSIDE OF WHEELCHAIR OUTSIDE OF WHEELCHAIR RIGHT SIDE Locked Position LEFT SIDE NOTE: Detail ʺAʺ is a top view of the armrest release levers. SECTION 6-ARMS 3. Repeat STEPS 1‐3 for opposite side, if necessary. REMOVING/INSTALLING FLIP BACK ARMREST Part No 1088909 35 Patriot...
Owners Manual
Page 37
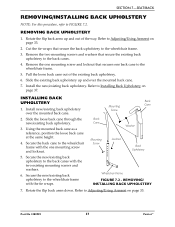
...on page 33. 2. Back Mounting Cane Screw Back Cane Washer Mounting Screw Locknut Back Upholstery Wheelchair Frame FIGURE 7.2 - Part No 1088909 37 Patriot™ Remove the two mounting screws and washers that secure the back upholstery to the back canes. 4. Slide the existing back upholstery up...wheelchair frame. 5. Slide the loose back cane through the new/existing back upholstery. 3. Secure the new/existing back upholstery to Adjusting/Using Armrest on page 37. Refer to the back canes with the tie wraps. Refer to FIGURE 7.2. Rotate the flip back arms up and ...
...on page 33. 2. Back Mounting Cane Screw Back Cane Washer Mounting Screw Locknut Back Upholstery Wheelchair Frame FIGURE 7.2 - Part No 1088909 37 Patriot™ Remove the two mounting screws and washers that secure the back upholstery to the back canes. 4. Slide the existing back upholstery up...wheelchair frame. 5. Slide the loose back cane through the new/existing back upholstery. 3. Secure the new/existing back upholstery to Adjusting/Using Armrest on page 37. Refer to the back canes with the tie wraps. Refer to FIGURE 7.2. Rotate the flip back arms up and ...