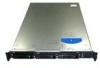
User Guide
Page 11
... Contents viii Intel® Server System SR1530HAHLX Contents ix Server System References ...x Chapter 1: Server System Features 1 Chassis Component Identification 5 System Front Panel (SR1530AH / SR1530AHLX 5 System Front Panel (SR1530HAHLX 6 System Rear ...7 Peripheral Devices (SR1530AH / SR1530AHLX 8 Peripheral Devices (SR1530HAHLX 9 Internal Components (SR1530AH / SR1530AHLX 11 Internal Components (SR1530HAHLX 12 Server Board Connectors / Components 13 Configuration Jumpers ...15 RAID Support ...16 Hardware Requirements ...16 Processor ...16...
... Contents viii Intel® Server System SR1530HAHLX Contents ix Server System References ...x Chapter 1: Server System Features 1 Chassis Component Identification 5 System Front Panel (SR1530AH / SR1530AHLX 5 System Front Panel (SR1530HAHLX 6 System Rear ...7 Peripheral Devices (SR1530AH / SR1530AHLX 8 Peripheral Devices (SR1530HAHLX 9 Internal Components (SR1530AH / SR1530AHLX 11 Internal Components (SR1530HAHLX 12 Server Board Connectors / Components 13 Configuration Jumpers ...15 RAID Support ...16 Hardware Requirements ...16 Processor ...16...

User Guide
Page 12
...Front Bezel 26 Installing the Front Bezel 27 Removing and Installing the Server Cover 28 Removing the Server System Cover 28 Installing the Server System Cover 30 Removing and Installing the Processor Air Duct 31 Removing the Processor Air Duct 31 Installing the Processor Air Duct 33 Installing and Removing Memory 34 Installing DIMMs ...34... and Removing a PCI Add-in Card 64 Installing a PCI Add-in Card 64 Removing a PCI Add-in Card 65 Replacing the Server Board 67 Removing the Server Board 67 Installing the Server Board 69 xii Intel® Server System SR1530AH / SR1530AHLX
...Front Bezel 26 Installing the Front Bezel 27 Removing and Installing the Server Cover 28 Removing the Server System Cover 28 Installing the Server System Cover 30 Removing and Installing the Processor Air Duct 31 Removing the Processor Air Duct 31 Installing the Processor Air Duct 33 Installing and Removing Memory 34 Installing DIMMs ...34... and Removing a PCI Add-in Card 64 Installing a PCI Add-in Card 64 Removing a PCI Add-in Card 65 Replacing the Server Board 67 Removing the Server Board 67 Installing the Server Board 69 xii Intel® Server System SR1530AH / SR1530AHLX

User Guide
Page 19
...).......... 43 Figure 35. List of Figures Figure 1. Intel® Server System SR1530HAHLX 1 Figure 3. Optional Peripherals (SR1530HAHLX 9 Figure 8. System Components (SR1530HAHLX 12 Figure 10. Removing the Server System Cover (SR1530AH/SR1530AHLX 28 Figure 17. Removing the Protective Socket Cover 39 Figure 30. Configuration Jumper Descriptions 15 Figure 13. Lifting the Processor Socket Handle 38 Figure 26. Installing the...
...).......... 43 Figure 35. List of Figures Figure 1. Intel® Server System SR1530HAHLX 1 Figure 3. Optional Peripherals (SR1530HAHLX 9 Figure 8. System Components (SR1530HAHLX 12 Figure 10. Removing the Server System Cover (SR1530AH/SR1530AHLX 28 Figure 17. Removing the Protective Socket Cover 39 Figure 30. Configuration Jumper Descriptions 15 Figure 13. Lifting the Processor Socket Handle 38 Figure 26. Installing the...
User Guide
Page 24
... of the following: • Intel® Server System SR1530AH: Intel® Server Board S3000AH • Intel® Server Systems SR1530AHLX / SR1530HAHLX: Intel® Server Board S3000AHLX Support for one: • Dual-Core Intel®Xeon® processor 3000 sequence • Intel® Pentium® processor Extreme Edition • Intel® Pentium® 4 processor • Intel® Pentium® D processor • Intel® Celeron® D processor • Four DIMM sockets supporting...
... of the following: • Intel® Server System SR1530AH: Intel® Server Board S3000AH • Intel® Server Systems SR1530AHLX / SR1530HAHLX: Intel® Server Board S3000AHLX Support for one: • Dual-Core Intel®Xeon® processor 3000 sequence • Intel® Pentium® processor Extreme Edition • Intel® Pentium® 4 processor • Intel® Pentium® D processor • Intel® Celeron® D processor • Four DIMM sockets supporting...

User Guide
Page 33
Power Supply G. PCI Add-in Card Bracket E. Processor Air Duct D. System Memory DIMM Sockets H. Rack Handles (two) B. System Blower Fans (two) I A AF000970 A. Control Panel K. PCI Cooling Fan C. Processor and Heat Sink F. System Components (SR1530AH / SR1530AHLX) Intel® Server System SR1530AH / SR1530AHLX / SR1530HAHLX 11 Front Panel Board J. Slimline Optical Drive Bay Figure 8. Internal Components (SR1530AH / SR1530AHLX) D C B A K J E F G H I .
Power Supply G. PCI Add-in Card Bracket E. Processor Air Duct D. System Memory DIMM Sockets H. Rack Handles (two) B. System Blower Fans (two) I A AF000970 A. Control Panel K. PCI Cooling Fan C. Processor and Heat Sink F. System Components (SR1530AH / SR1530AHLX) Intel® Server System SR1530AH / SR1530AHLX / SR1530HAHLX 11 Front Panel Board J. Slimline Optical Drive Bay Figure 8. Internal Components (SR1530AH / SR1530AHLX) D C B A K J E F G H I .

User Guide
Page 34
System Components (SR1530HAHLX) 12 Intel® Server System SR1530AH / SR1530AHLX / SR1530HAHLX PCI Air Baffle D. Power Supply J. Hard Drive Carriers (three) Figure 9. System Blower Fans (two) E. Processor Air Duct F. PCI Add-in Card Bracket H. Processor and Heat Sink I L K J A AF001575 A. Slimline Optical Drive Bay C. Control Panel L. Server Board G. Front Panel Board K. Internal Components (SR1530HAHLX) B A G F E D C H I . Rack Handles (two) B.
System Components (SR1530HAHLX) 12 Intel® Server System SR1530AH / SR1530AHLX / SR1530HAHLX PCI Air Baffle D. Power Supply J. Hard Drive Carriers (three) Figure 9. System Blower Fans (two) E. Processor Air Duct F. PCI Add-in Card Bracket H. Processor and Heat Sink I L K J A AF001575 A. Slimline Optical Drive Bay C. Control Panel L. Server Board G. Front Panel Board K. Internal Components (SR1530HAHLX) B A G F E D C H I . Rack Handles (two) B.
User Guide
Page 38
... drive configuration options on the Advanced | ATA Controller setup page, some of supported processors, see the links under "Server System References" on setting up RAID, see the Intel® Server Board S3000AH Technical Product Specification. Processor Support for RAID configurations. The Intel® Embedded Server RAID Technology II feature provides RAID modes 0, 1, and 10. The "Onboard SATA Controller...
... drive configuration options on the Advanced | ATA Controller setup page, some of supported processors, see the links under "Server System References" on setting up RAID, see the Intel® Server Board S3000AH Technical Product Specification. Processor Support for RAID configurations. The Intel® Embedded Server RAID Technology II feature provides RAID modes 0, 1, and 10. The "Onboard SATA Controller...

User Guide
Page 53
... page iii. 2. Power down the server and unplug all peripheral devices and the AC power cord. The air duct is required for SR1530HAHLX). Intel® Server System SR1530AH / SR1530AHLX / SR1530HAHLX 31 Lift the processor air duct from its location behind the two system blower fans (see "Removing the Server System Cover". 4. Installing the Server System Cover (SR1530HAHLX) 7. A B AF001579 Figure 19...
... page iii. 2. Power down the server and unplug all peripheral devices and the AC power cord. The air duct is required for SR1530HAHLX). Intel® Server System SR1530AH / SR1530AHLX / SR1530HAHLX 31 Lift the processor air duct from its location behind the two system blower fans (see "Removing the Server System Cover". 4. Installing the Server System Cover (SR1530HAHLX) 7. A B AF001579 Figure 19...

User Guide
Page 55
... instructions, see Figure 22for SR1530AH/SR1530AHLX); see "Installing the Server System Cover". Installing the Processor Air Duct 1. See "Safety Information" on page 28. 4. Installing the Processor Air Duct (SR1530AH/SR1530AHLX) Intel® Server System SR1530AH / SR1530AHLX / SR1530HAHLX 33 For instructions, see Figure 23 for SR1530HAHLX). Power down the server and unplug all peripheral devices and the AC power...
... instructions, see Figure 22for SR1530AH/SR1530AHLX); see "Installing the Server System Cover". Installing the Processor Air Duct 1. See "Safety Information" on page 28. 4. Installing the Processor Air Duct (SR1530AH/SR1530AHLX) Intel® Server System SR1530AH / SR1530AHLX / SR1530HAHLX 33 For instructions, see Figure 23 for SR1530HAHLX). Power down the server and unplug all peripheral devices and the AC power...

User Guide
Page 56
...devices connected to the list of this book. Installing the Processor Air Duct (SR1530HAHLX) Installing and Removing Memory Caution: The memory is NOT hot swappable. See "Safety Information" on page 28. 34 Intel® Server System SR1530AH / SR1530AHLX / SR1530HAHLX Before removing or replacing any ...memory DIMM, you must first take the server out of service, turn off all peripheral devices and the AC power cable. ...
...devices connected to the list of this book. Installing the Processor Air Duct (SR1530HAHLX) Installing and Removing Memory Caution: The memory is NOT hot swappable. See "Safety Information" on page 28. 34 Intel® Server System SR1530AH / SR1530AHLX / SR1530HAHLX Before removing or replacing any ...memory DIMM, you must first take the server out of service, turn off all peripheral devices and the AC power cable. ...
User Guide
Page 59
... the four captive screws on page 28. 4. See "Safety Information" on page 38. Intel® Server System SR1530AH / SR1530AHLX / SR1530HAHLX 37 Do not force the heat sink from the processor. Doing so could damage the processor. 7. Replacing the Processor Note: This manual assumes a processor is already installed and you are referring to these steps to the list...
... the four captive screws on page 28. 4. See "Safety Information" on page 38. Intel® Server System SR1530AH / SR1530AHLX / SR1530HAHLX 37 Do not force the heat sink from the processor. Doing so could damage the processor. 7. Replacing the Processor Note: This manual assumes a processor is already installed and you are referring to these steps to the list...

User Guide
Page 60
...Raise the CPU load plate (see "Removing the Server System Cover" on page iii. 2. Installing the Processor To install a processor, follow these instructions: 1. Locate the processor socket and raise the socket handle completely. Lifting the Processor Socket Handle 5. AF000528 Figure 25. Raise the load... server and unplug all peripheral devices and the AC power cable. 3. Opening the Load Plate AF000529 Caution: Do not touch the socket pins; See "Safety Information" on page 28. 4. A B Figure 26. they are very sensitive and easily damaged. 38 Intel® Server System ...
...Raise the CPU load plate (see "Removing the Server System Cover" on page iii. 2. Installing the Processor To install a processor, follow these instructions: 1. Locate the processor socket and raise the socket handle completely. Lifting the Processor Socket Handle 5. AF000528 Figure 25. Raise the load... server and unplug all peripheral devices and the AC power cable. 3. Opening the Load Plate AF000529 Caution: Do not touch the socket pins; See "Safety Information" on page 28. 4. A B Figure 26. they are very sensitive and easily damaged. 38 Intel® Server System ...

User Guide
Page 61
... "A" in the figure below. 8. Orient the processor with the socket so the processor cutouts match the socket notches. Remove the processor from the packaging box and remove the protective shipping cover. Installing the Processor Note: Make sure the alignment triangle mark and ...the alignment triangle cutout align correctly. 9. Removing the Protective Socket Cover Note: Retain the protective socket cover for use when removing a processor that will not be replaced. Intel® Server System SR1530AH / SR1530AHLX...
... "A" in the figure below. 8. Orient the processor with the socket so the processor cutouts match the socket notches. Remove the processor from the packaging box and remove the protective shipping cover. Installing the Processor Note: Make sure the alignment triangle mark and ...the alignment triangle cutout align correctly. 9. Removing the Protective Socket Cover Note: Retain the protective socket cover for use when removing a processor that will not be replaced. Intel® Server System SR1530AH / SR1530AHLX...

User Guide
Page 62
...Intel® Server System SR1530AH / SR1530AHLX / SR1530HAHLX Lower the socket lever. 12. For instructions, see "Installing the Heat Sink". Caution: The heat sink has Thermal Interface Material (TIM) located on the underside of it. Remove the protective cover from the TIM on the bottom of the heat sink. For instructions, see "Installing the Processor.... Installing the Heat Sink Install your processor before tightening another. 5. Orient the heat sink over the processor, lining up the four captive screws with the four posts surrounding the processor. 4. Do no fully tighten one ...
...Intel® Server System SR1530AH / SR1530AHLX / SR1530HAHLX Lower the socket lever. 12. For instructions, see "Installing the Heat Sink". Caution: The heat sink has Thermal Interface Material (TIM) located on the underside of it. Remove the protective cover from the TIM on the bottom of the heat sink. For instructions, see "Installing the Processor.... Installing the Heat Sink Install your processor before tightening another. 5. Orient the heat sink over the processor, lining up the four captive screws with the four posts surrounding the processor. 4. Do no fully tighten one ...
User Guide
Page 63
.... See Figure 31. 6. Reinstall and reconnect any parts you want to a list of supported hardware. Up to reach the processor sockets. 7. The drives do not need to these steps when directed. 1. Return to be installed before HDD0. Locate the drive... page x for instructions first. For instructions, see "Installing the Server System Cover". Note: The server system does not support all peripheral devices and the AC power cable. 3. Intel® Server System SR1530AH / SR1530AHLX / SR1530HAHLX 41 Remove the server system cover. The HDD1 drive bay is at the left side of...
.... See Figure 31. 6. Reinstall and reconnect any parts you want to a list of supported hardware. Up to reach the processor sockets. 7. The drives do not need to these steps when directed. 1. Return to be installed before HDD0. Locate the drive... page x for instructions first. For instructions, see "Installing the Server System Cover". Note: The server system does not support all peripheral devices and the AC power cable. 3. Intel® Server System SR1530AH / SR1530AHLX / SR1530HAHLX 41 Remove the server system cover. The HDD1 drive bay is at the left side of...

User Guide
Page 86
... AC power cord from the system or wall outlet. Remove the server system cover. Install the server system cover. For instructions, see "Installing the Server System Cover". 13. For instructions, see "Removing the Server System Cover" on page 60. 64 Intel® Server System SR1530AH / SR1530AHLX / SR1530HAHLX Re-install the processor air duct. For instructions, see "Installing the Processor Air Duct" on page iii...
... AC power cord from the system or wall outlet. Remove the server system cover. Install the server system cover. For instructions, see "Installing the Server System Cover". 13. For instructions, see "Removing the Server System Cover" on page 60. 64 Intel® Server System SR1530AH / SR1530AHLX / SR1530HAHLX Re-install the processor air duct. For instructions, see "Installing the Processor Air Duct" on page iii...

User Guide
Page 88
... a Full Height Add-In Card AF000675 Note: Make sure that all peripheral devices and the AC power cable into the server system. Install the processor air duct. Save this screw. See letter "B" in card slots have filler panels installed. 9. Install a filler panel ...Installing the Processor Air Duct" on page 61. 10. Install the server system cover. For instructions, see "Installing the Server System Cover". 12. C B A Figure 62. You will use it , but use caution so you removed in step 5. Install the PCI riser assembly into the server. 66 Intel® Server System SR1530AH / ...
... a Full Height Add-In Card AF000675 Note: Make sure that all peripheral devices and the AC power cable into the server system. Install the processor air duct. Save this screw. See letter "B" in card slots have filler panels installed. 9. Install a filler panel ...Installing the Processor Air Duct" on page 61. 10. Install the server system cover. For instructions, see "Installing the Server System Cover". 12. C B A Figure 62. You will use it , but use caution so you removed in step 5. Install the PCI riser assembly into the server. 66 Intel® Server System SR1530AH / ...

User Guide
Page 89
... AC power cable. 3. For instructions, see "Removing the Server System Cover" on page 37. 8. Replacing the Server Board Removing the Server Board 1. Intel® Server System SR1530AH / SR1530AHLX / SR1530HAHLX 67 Power down the server and unplug all cables connected to the server board. 7. For instructions, see "Removing the Heat Sink and Processor" on page 28. 4. For instructions, see "Removing DIMMs...
... AC power cable. 3. For instructions, see "Removing the Server System Cover" on page 37. 8. Replacing the Server Board Removing the Server Board 1. Intel® Server System SR1530AH / SR1530AHLX / SR1530HAHLX 67 Power down the server and unplug all cables connected to the server board. 7. For instructions, see "Removing the Heat Sink and Processor" on page 28. 4. For instructions, see "Removing DIMMs...

User Guide
Page 90
.... For instructions, see Figure 88 on page 34. 13. For instructions, see "Installing the Processor Air Duct" on page 61. 14. Install the processor air duct. 9. Reconnect all peripheral devices and the AC power cable into the server. 68 Intel® Server System SR1530AH / SR1530AHLX / SR1530HAHLX For instructions, see "Installing the PCI Riser Assembly" on page...
.... For instructions, see Figure 88 on page 34. 13. For instructions, see "Installing the Processor Air Duct" on page 61. 14. Install the processor air duct. 9. Reconnect all peripheral devices and the AC power cable into the server. 68 Intel® Server System SR1530AH / SR1530AHLX / SR1530HAHLX For instructions, see "Installing the PCI Riser Assembly" on page...

User Guide
Page 91
...the AC power cable. 3. For instructions, see "Removing the Server System Cover" on page 31. 5. Attach the server board with nine screws. Remove the server system cover. For instructions, see "Removing the Processor Air Duct" on page 28. 4. Remove the PCI riser ... book. Place the server board into the server system as shown by letter "A" in the figure. See letter "B" in the figure below. 7. Installing the Server Board AF000678 Intel® Server System SR1530AH / SR1530AHLX / SR1530HAHLX 69 Remove the processor air duct. Installing the Server Board 1. See "Safety...
...the AC power cable. 3. For instructions, see "Removing the Server System Cover" on page 31. 5. Attach the server board with nine screws. Remove the server system cover. For instructions, see "Removing the Processor Air Duct" on page 28. 4. Remove the PCI riser ... book. Place the server board into the server system as shown by letter "A" in the figure. See letter "B" in the figure below. 7. Installing the Server Board AF000678 Intel® Server System SR1530AH / SR1530AHLX / SR1530HAHLX 69 Remove the processor air duct. Installing the Server Board 1. See "Safety...