
Owners Manual
Page 5
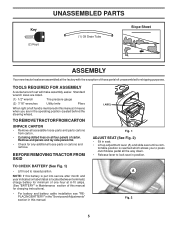
... are in seat. • Lift up adjustment lever (A) and slide seat until a com- TO CHECK BATTERY (See Fig. 1) • Lift hood to raised position. TO REMOVE TRACTOR FROM CARTON UNPACK CARTON • Remove all accessible loose parts and parts cartons from carton . • Cut along... for any additional loose parts or cartons and remove. TOOLS REQUIRED FOR ASSEMBLY A socket wrench set will make assembly easier. Key (2) Keys UNASSEMBLED PARTS (1) Oil Drain Tube Slope Sheet ASSEMBLY Your new tractor has been assembled at 6-10 amps. (See "BATTERY" in Maintenance section of this ...
... are in seat. • Lift up adjustment lever (A) and slide seat until a com- TO CHECK BATTERY (See Fig. 1) • Lift hood to raised position. TO REMOVE TRACTOR FROM CARTON UNPACK CARTON • Remove all accessible loose parts and parts cartons from carton . • Cut along... for any additional loose parts or cartons and remove. TOOLS REQUIRED FOR ASSEMBLY A socket wrench set will make assembly easier. Key (2) Keys UNASSEMBLED PARTS (1) Oil Drain Tube Slope Sheet ASSEMBLY Your new tractor has been assembled at 6-10 amps. (See "BATTERY" in Maintenance section of this ...

Owners Manual
Page 23
... • Raise hood. • Pull bulb holder out of the hole in the backside of the grill. • Replace bulb in holder and push bulb holder securely back into the hole in the backside of tractor. See electrical wiring diagram in fuse. TO REMOVE HOOD AND GRILL ASSEMBLY (See Fig.... 35) • Raise hood. • Unsnap headlight wire connector. • Stand in the Operation section of tractor. • To replace, reverse above ...
... • Raise hood. • Pull bulb holder out of the hole in the backside of the grill. • Replace bulb in holder and push bulb holder securely back into the hole in the backside of tractor. See electrical wiring diagram in fuse. TO REMOVE HOOD AND GRILL ASSEMBLY (See Fig.... 35) • Raise hood. • Unsnap headlight wire connector. • Stand in the Operation section of tractor. • To replace, reverse above ...


