
User Manual
Page 5
Chapter 1 Operating Instructions Introduction 7 Service 7 General Warnings / Before You Use Your Teknique 8 Hoveround® Teknique / Diagram 12 Hoveround® Teknique / Warning Labels 13 Chapter 1 Operating Instructions 17 Entering Your Teknique 17 Driving Your Teknique 18 Joystick Controllers 20 Chapter 2 Batteries and Charging 22 Caring For Your Batteries and Charger 22 Battery Replacement 23 Charging Your Batteries 24 Chapter 3 Manual Brake Release Levers 27 D82007778 REV N 7/10/12 Table of Contents 5
Chapter 1 Operating Instructions Introduction 7 Service 7 General Warnings / Before You Use Your Teknique 8 Hoveround® Teknique / Diagram 12 Hoveround® Teknique / Warning Labels 13 Chapter 1 Operating Instructions 17 Entering Your Teknique 17 Driving Your Teknique 18 Joystick Controllers 20 Chapter 2 Batteries and Charging 22 Caring For Your Batteries and Charger 22 Battery Replacement 23 Charging Your Batteries 24 Chapter 3 Manual Brake Release Levers 27 D82007778 REV N 7/10/12 Table of Contents 5

User Manual
Page 8
...be located at http://www.access-board.gov/adaag/html/adaag.htm. Keep your power wheelchair, we recommend that the power is a battery-operated motorized vehicle. Always set the joystick/controller speed/response control to be consistent with Disabilities Act, which can be set to when...and consideration for use the seat belt. 2. To avoid serious injury or death: 1. General Warnings Before You Use Your Teknique Before You Use Your Teknique The Hoveround® Teknique is OFF before getting into and out of the seat. 3. Never modify your wheelchair, and do not use accessories ...
...be located at http://www.access-board.gov/adaag/html/adaag.htm. Keep your power wheelchair, we recommend that the power is a battery-operated motorized vehicle. Always set the joystick/controller speed/response control to be consistent with Disabilities Act, which can be set to when...and consideration for use the seat belt. 2. To avoid serious injury or death: 1. General Warnings Before You Use Your Teknique Before You Use Your Teknique The Hoveround® Teknique is OFF before getting into and out of the seat. 3. Never modify your wheelchair, and do not use accessories ...

User Manual
Page 12
Diagram Adjustable Seatback Joystick Controller • Removable Seat • Flip-Up Foot Rest • Anti-Tip Wheels • • • Adjustable Armrests • Seat Belt • • • • Seat Height & Position Adjustment Batteries Dual Motor Drive Brake Release Levers 12 Hoveround® Teknique - Diagram D82007778 REV N 7/10/12 Hoveround® Teknique -
Diagram Adjustable Seatback Joystick Controller • Removable Seat • Flip-Up Foot Rest • Anti-Tip Wheels • • • Adjustable Armrests • Seat Belt • • • • Seat Height & Position Adjustment Batteries Dual Motor Drive Brake Release Levers 12 Hoveround® Teknique - Diagram D82007778 REV N 7/10/12 Hoveround® Teknique -
User Manual
Page 18
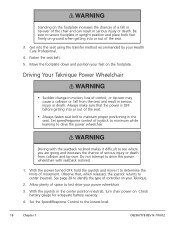
Standing on the footplate increases the chances of a fall from collision and tip-over of controller on your Teknique. 2. Move the footplate down and position your power wheelchair. 3. Get into or out of joystick to minimum while learning to identify ... seat using the transfer method recommended by your Health Care Professional. 4. See page 20 to drive the power wheelchair. Check battery gauge for adequate battery capacity. 4. Driving Your Teknique Power Wheelchair • Sudden change in serious injury or death. With the power turned OFF, hold the joystick and move ...
Standing on the footplate increases the chances of a fall from collision and tip-over of controller on your Teknique. 2. Move the footplate down and position your power wheelchair. 3. Get into or out of joystick to minimum while learning to identify ... seat using the transfer method recommended by your Health Care Professional. 4. See page 20 to drive the power wheelchair. Check battery gauge for adequate battery capacity. 4. Driving Your Teknique Power Wheelchair • Sudden change in serious injury or death. With the power turned OFF, hold the joystick and move ...

User Manual
Page 21
...Additional Features Locking feature - The system indicator may blink or the controller will completely power off . 2. To stop more quickly. System Status Indicator - Battery Gauge - Recharge as often as possible. 4. Indicates the currently selected speed by the number displayed or the number of operation drive, speed or power options... 7. Joystick Controller All the controls and indicators necessary to drive your controller. 1. In speed mode, move the joystick forward to identify your Teknique are located on . 5. Locks the controller. D82007778 REV N 7/10/12 Chapter 1 21
...Additional Features Locking feature - The system indicator may blink or the controller will completely power off . 2. To stop more quickly. System Status Indicator - Battery Gauge - Recharge as often as possible. 4. Indicates the currently selected speed by the number displayed or the number of operation drive, speed or power options... 7. Joystick Controller All the controls and indicators necessary to drive your controller. 1. In speed mode, move the joystick forward to identify your Teknique are located on . 5. Locks the controller. D82007778 REV N 7/10/12 Chapter 1 21

User Manual
Page 22
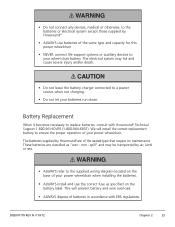
...have been frozen. 22 Chapter 2 D82007778 REV N 7/10/12 Failure to the product. ALWAYS wash your hands after handling any part of the battery. • Batteries are tight before using your power wheelchair in well-ventilated areas only. • When handling and/or working on...attempt to prevent dropping, pinching or lifting-related injuries. • ALWAYS make sure the protective terminal covers are installed and all warnings about the batteries in this user instruction manual and any labels applied to do not allow metal objects such as tools, jewelry, trunk lids, and toolboxes to ...
...have been frozen. 22 Chapter 2 D82007778 REV N 7/10/12 Failure to the product. ALWAYS wash your hands after handling any part of the battery. • Batteries are tight before using your power wheelchair in well-ventilated areas only. • When handling and/or working on...attempt to prevent dropping, pinching or lifting-related injuries. • ALWAYS make sure the protective terminal covers are installed and all warnings about the batteries in this user instruction manual and any labels applied to do not allow metal objects such as tools, jewelry, trunk lids, and toolboxes to ...
User Manual
Page 23
... to the supplied wiring diagram located on the base of batteries in accordance with Hoveround® Technical Support 1-800-96-HOVER (1-800-964-6837). non - D82007778 REV N 7/10/12 Chapter 2 23 We will prevent battery and wire overload. • ALWAYS dispose of your power... wheelchair. The electrical system may be transported by Hoveround® are classified as specified on the battery label. • Do not connect any devices, medical or...
... to the supplied wiring diagram located on the base of batteries in accordance with Hoveround® Technical Support 1-800-96-HOVER (1-800-964-6837). non - D82007778 REV N 7/10/12 Chapter 2 23 We will prevent battery and wire overload. • ALWAYS dispose of your power... wheelchair. The electrical system may be transported by Hoveround® are classified as specified on the battery label. • Do not connect any devices, medical or...
User Manual
Page 24
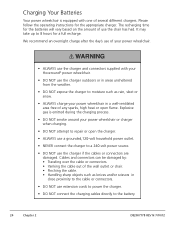
...charging. • DO NOT attempt to repair or open flame. It may take up to 8 hours for the appropriate charger. Charging Your Batteries Your power wheelchair is emitted during the charging process. • DO NOT smoke around your power wheelchair in close proximity to the cable ...power the charger. • DO NOT connect the charging cables directly to the battery. 24 Chapter 2 D82007778 REV N 7/10/12 Please follow the operating instructions for a full recharge. Explosive gas is equipped with your Hoveround® power wheelchair. • DO NOT use the charger outdoors or in ...
...charging. • DO NOT attempt to repair or open flame. It may take up to 8 hours for the appropriate charger. Charging Your Batteries Your power wheelchair is emitted during the charging process. • DO NOT smoke around your power wheelchair in close proximity to the cable ...power the charger. • DO NOT connect the charging cables directly to the battery. 24 Chapter 2 D82007778 REV N 7/10/12 Please follow the operating instructions for a full recharge. Explosive gas is equipped with your Hoveround® power wheelchair. • DO NOT use the charger outdoors or in ...
User Manual
Page 25
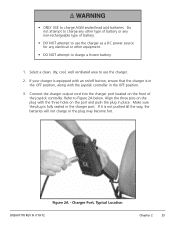
..., along with the three holes on the port and push the plug in place. Make sure the plug is not pushed all the way, the batteries will not charge or the plug may become hot. • ONLY USE to Figure 2A below. Connect the charger output cord into the charger port... the plug with the joystick controller in the charger port. Refer to charge AGM sealed lead acid batteries. If it is fully seated in the OFF position. 3. Align the three pins on the front of battery. • DO NOT attempt to use the charger. 2. Figure 2A - Do not attempt to use the...
..., along with the three holes on the port and push the plug in place. Make sure the plug is not pushed all the way, the batteries will not charge or the plug may become hot. • ONLY USE to Figure 2A below. Connect the charger output cord into the charger port... the plug with the joystick controller in the charger port. Refer to charge AGM sealed lead acid batteries. If it is fully seated in the OFF position. 3. Align the three pins on the front of battery. • DO NOT attempt to use the charger. 2. Figure 2A - Do not attempt to use the...
User Manual
Page 26
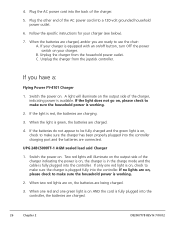
... FY-4101 Charger 1. Unplug the charger from the joystick controller. Unplug the charger from the household power outlet. When the light is red, the batteries are charged. 26 Chapter 2 D82007778 REV N 7/10/12 UPG 24BC5000TF-1 AGM sealed lead acid Charger 1. If only one green light is on ... red lights will illuminate on the output side of the charger indicating the power is fully plugged into the controller charging port and the batteries are on , check to make sure the household power is fully plugged into the controller. Follow the specific instructions for your charger. ...
... FY-4101 Charger 1. Unplug the charger from the joystick controller. Unplug the charger from the household power outlet. When the light is red, the batteries are charged. 26 Chapter 2 D82007778 REV N 7/10/12 UPG 24BC5000TF-1 AGM sealed lead acid Charger 1. If only one green light is on ... red lights will illuminate on the output side of the charger indicating the power is fully plugged into the controller charging port and the batteries are on , check to make sure the household power is fully plugged into the controller. Follow the specific instructions for your charger. ...

User Manual
Page 43
...proper maintenance, including cleaning. • Always perform the operator performance and maintenance checks that are detailed in any way. Service Please contact Hoveround® Technical Support at 1-800-96-HOVER (1-800-964-6837) for assistance if: • Your power wheelchair is not working correctly... or stay latched. • Safe and effective use of this manual. • Do not perform any maintenance without first disconnecting the batteries. • Do not modify your power wheelchair. D82007778 REV N 7/10/12 Chapter 8 43 Stop using your power wheelchair immediately, ...
...proper maintenance, including cleaning. • Always perform the operator performance and maintenance checks that are detailed in any way. Service Please contact Hoveround® Technical Support at 1-800-96-HOVER (1-800-964-6837) for assistance if: • Your power wheelchair is not working correctly... or stay latched. • Safe and effective use of this manual. • Do not perform any maintenance without first disconnecting the batteries. • Do not modify your power wheelchair. D82007778 REV N 7/10/12 Chapter 8 43 Stop using your power wheelchair immediately, ...
User Manual
Page 44
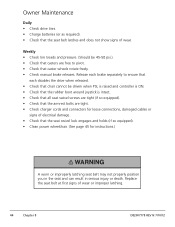
... to pivot. • Check that the seat belt latches and does not show signs of wear. Owner Maintenance Daily • Check drive tires. • Charge batteries (or as required). • Check that caster wheels rotate freely. • Check manual brake releases. Replace the seat belt at first signs of electrical damage...
... to pivot. • Check that the seat belt latches and does not show signs of wear. Owner Maintenance Daily • Check drive tires. • Charge batteries (or as required). • Check that caster wheels rotate freely. • Check manual brake releases. Replace the seat belt at first signs of electrical damage...
User Manual
Page 54
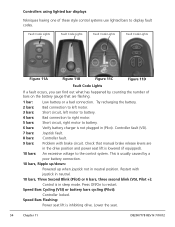
... up when joystick not in sleep mode. Press Off/On to battery. 6 bars: Verify battery charger is in neutral position. Controllers using lighted bar displays Tekniques having one of bars on the battery gauge that manual brake release levers are flashing. 1 bar: Low battery or a bad connection. Controller fault (VSI). 7 bars: Joystick fault. 8 bars: Controller...
... up when joystick not in sleep mode. Press Off/On to battery. 6 bars: Verify battery charger is in neutral position. Controllers using lighted bar displays Tekniques having one of bars on the battery gauge that manual brake release levers are flashing. 1 bar: Low battery or a bad connection. Controller fault (VSI). 7 bars: Joystick fault. 8 bars: Controller...

User Manual
Page 57
... .8", 1.5", or 2.3" from lowest position Total weight, with batteries** 179 lbs Base only** 90 lbs Base with batteries** 139 lbs Batteries** Two U1 batteries, 33 amp hour capacity each , sealed AGM. Batteries - Total weight with batteries 183 lbs. Base with batteries 223 lbs. Appendix D: Teknique FWD Specifications Performance Maximum Speed Range (per battery charge) Capacity Turning Radius Ground Clearance Maximum...
... .8", 1.5", or 2.3" from lowest position Total weight, with batteries** 179 lbs Base only** 90 lbs Base with batteries** 139 lbs Batteries** Two U1 batteries, 33 amp hour capacity each , sealed AGM. Batteries - Total weight with batteries 183 lbs. Base with batteries 223 lbs. Appendix D: Teknique FWD Specifications Performance Maximum Speed Range (per battery charge) Capacity Turning Radius Ground Clearance Maximum...

User Manual
Page 58
... floor 19" Seat height adjustment .8", 1.5", or 2.3" from lowest position Total weight, with batteries 229 lbs Base only 100 lbs Base with batteries 178 lbs Batteries Two group 22 batteries, 50 amp hour capacity each, Sealed AGM Tires and casters Tire type and tread Tire ...vary with 20" seat in lowest position and foot plate) Length 42" Overall Width 25" Top of rider. Appendix D: Teknique RWD Specifications Performance Maximum Speed Range (per battery charge) Capacity Turning Radius Ground Clearance Maximum step climb Maximum grade climb 5.5 mph* 20 miles* 300 lbs 36" 2.5" ...
... floor 19" Seat height adjustment .8", 1.5", or 2.3" from lowest position Total weight, with batteries 229 lbs Base only 100 lbs Base with batteries 178 lbs Batteries Two group 22 batteries, 50 amp hour capacity each, Sealed AGM Tires and casters Tire type and tread Tire ...vary with 20" seat in lowest position and foot plate) Length 42" Overall Width 25" Top of rider. Appendix D: Teknique RWD Specifications Performance Maximum Speed Range (per battery charge) Capacity Turning Radius Ground Clearance Maximum step climb Maximum grade climb 5.5 mph* 20 miles* 300 lbs 36" 2.5" ...

User Manual
Page 59
...floor 21" Seat height adjustment .8", 1.5", or 2.3" from lowest position Total weight, with batteries 273 lbs Base only 114 lbs Base with batteries 222 lbs Batteries Two group 24 batteries, 75 amp hour capacity each, Sealed AGM Tires and casters Tire type and tread ...* Speed and range will vary with respect to change without notice. D82007778 REV N 7/10/12 Chapter 11 59 Appendix D: Teknique XHD Specifications Performance Maximum Speed Range (per battery charge) Capacity Turning Radius Ground Clearance Maximum step climb Maximum grade climb 5 mph* 20 miles* 450 lbs 28" 3.7" ...
...floor 21" Seat height adjustment .8", 1.5", or 2.3" from lowest position Total weight, with batteries 273 lbs Base only 114 lbs Base with batteries 222 lbs Batteries Two group 24 batteries, 75 amp hour capacity each, Sealed AGM Tires and casters Tire type and tread ...* Speed and range will vary with respect to change without notice. D82007778 REV N 7/10/12 Chapter 11 59 Appendix D: Teknique XHD Specifications Performance Maximum Speed Range (per battery charge) Capacity Turning Radius Ground Clearance Maximum step climb Maximum grade climb 5 mph* 20 miles* 450 lbs 28" 3.7" ...

User Manual
Page 60
Note: Specifications and equipment subject to terrain and weight of rider. Appendix D: Teknique HD-6 Specifications Performance Maximum Speed Range (per battery charge) Capacity Turning Radius Ground Clearance Maximum step climb Maximum grade climb 3.3 mph* 15 miles* 600 lbs 28" 3.2" 2" 6° ... to floor 20.5" Seat height adjustment .8", 1.5", or 2.3" from lowest position Total weight, with batteries 279 lbs Base only 120 lbs Base with batteries 228 lbs Batteries Two group 24 batteries, 75 amp hour capacity each, Sealed AGM Tires and casters Tire type and tread Tire diameter ...
Note: Specifications and equipment subject to terrain and weight of rider. Appendix D: Teknique HD-6 Specifications Performance Maximum Speed Range (per battery charge) Capacity Turning Radius Ground Clearance Maximum step climb Maximum grade climb 3.3 mph* 15 miles* 600 lbs 28" 3.2" 2" 6° ... to floor 20.5" Seat height adjustment .8", 1.5", or 2.3" from lowest position Total weight, with batteries 279 lbs Base only 120 lbs Base with batteries 228 lbs Batteries Two group 24 batteries, 75 amp hour capacity each, Sealed AGM Tires and casters Tire type and tread Tire diameter ...
User Manual
Page 61
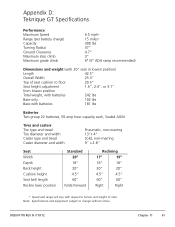
Appendix D: Teknique GT Specifications Performance Maximum Speed Range (per battery charge) Capacity Turning Radius Ground Clearance Maximum step climb Maximum grade climb 6.5 mph* 15 miles* 300 lbs 37" 4.7" 3" 6° (5° ADA ramp recommended) Dimensions ... Top of seat cushion to floor 20.5" Seat height adjustment 1.6", 2.4", or 3.1" from lowest position Total weight, with batteries 242 lbs Base only 102 lbs Base with batteries 181 lbs Batteries Two group 22 batteries, 50 amp hour capacity each, Sealed AGM Tires and casters Tire type and tread Tire diameter and width Caster...
Appendix D: Teknique GT Specifications Performance Maximum Speed Range (per battery charge) Capacity Turning Radius Ground Clearance Maximum step climb Maximum grade climb 6.5 mph* 15 miles* 300 lbs 37" 4.7" 3" 6° (5° ADA ramp recommended) Dimensions ... Top of seat cushion to floor 20.5" Seat height adjustment 1.6", 2.4", or 3.1" from lowest position Total weight, with batteries 242 lbs Base only 102 lbs Base with batteries 181 lbs Batteries Two group 22 batteries, 50 amp hour capacity each, Sealed AGM Tires and casters Tire type and tread Tire diameter and width Caster...

User Manual
Page 66
... free from defects in materials and workmanship for a period of one (1) year from the date of purchase. Hoveround® Corporation warrants batteries to be free from defects in materials or workmanship for any such product. For warranty service please contact your ...; option, be free from defects in materials and workmanship for a period of five (5) years and the Teknique XHD and HD-6 for a particular purpose, and shall not extend beyond Hoveround's® control. This warranty does not include any , including but not limited to the implied warranties of merchantability ...
... free from defects in materials and workmanship for a period of one (1) year from the date of purchase. Hoveround® Corporation warrants batteries to be free from defects in materials or workmanship for any such product. For warranty service please contact your ...; option, be free from defects in materials and workmanship for a period of five (5) years and the Teknique XHD and HD-6 for a particular purpose, and shall not extend beyond Hoveround's® control. This warranty does not include any , including but not limited to the implied warranties of merchantability ...


