Manual
Page 2
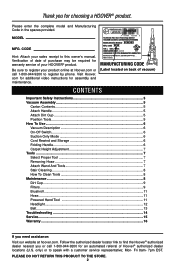
...9200 to the store. 2 Mon- Verification of date of purchase may be required for assembly and maintenance. Please enter the complete model and Manufacturing Code in China Manufacturing code (Label located on back of vacuum) Contents Important Safety Instructions 3 Vacuum Assembly 5 Carton ...Brushroll...11 Hose...11 Powered Hand Tool 11 Headlight...12 Belt...13 Troubleshooting 14 Service...15 Warranty...16 If you need assistance: Visit our website at Hoover.com or call 1-800-944-9200 for choosing a HOOVER® product. com for additional video instructions for warranty...
...9200 to the store. 2 Mon- Verification of date of purchase may be required for assembly and maintenance. Please enter the complete model and Manufacturing Code in China Manufacturing code (Label located on back of vacuum) Contents Important Safety Instructions 3 Vacuum Assembly 5 Carton ...Brushroll...11 Hose...11 Powered Hand Tool 11 Headlight...12 Belt...13 Troubleshooting 14 Service...15 Warranty...16 If you need assistance: Visit our website at Hoover.com or call 1-800-944-9200 for choosing a HOOVER® product. com for additional video instructions for warranty...
Manual
Page 12
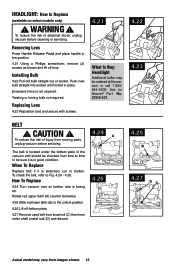
... located under the bottom plate of socket. To reduce the risk of injury from time to time to be ordered at Hoover. how to replace (available on select models only) ! installing bulb 4.22 Pull old bulb straight out of the vacuum and should be checked from moving parts, ...26 4.25 b 4.27 DC Actual model may be sure it is stretched, cut or broken. To reduce the risk of electrical shock, unplug vacuum before servicing. 4.24 A The belt is not required. WARNING ! Ask for Hoover® Part No. 27313-107. 4.22 4.23 belt ! To check the belt, refer to the unlock position. 4....
... located under the bottom plate of socket. To reduce the risk of injury from time to time to be ordered at Hoover. how to replace (available on select models only) ! installing bulb 4.22 Pull old bulb straight out of the vacuum and should be checked from moving parts, ...26 4.25 b 4.27 DC Actual model may be sure it is stretched, cut or broken. To reduce the risk of electrical shock, unplug vacuum before servicing. 4.24 A The belt is not required. WARNING ! Ask for Hoover® Part No. 27313-107. 4.22 4.23 belt ! To check the belt, refer to the unlock position. 4....
Manual
Page 13
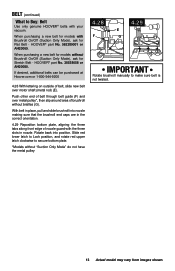
... the three tabs along front edge of belt through belt guide (F) and over motor shaft (metal rod) (E). When purchasing a new belt for Flat Belt - HOOVER® part No. 38528058 or AH20080. With belt in nozzle. Belt (continued) What to make sure belt is not twisted. 13 Actual model may vary from images shown. HOOVER® part No. 562289001 or AH20065...
... the three tabs along front edge of belt through belt guide (F) and over motor shaft (metal rod) (E). When purchasing a new belt for Flat Belt - HOOVER® part No. 38528058 or AH20080. With belt in nozzle. Belt (continued) What to make sure belt is not twisted. 13 Actual model may vary from images shown. HOOVER® part No. 562289001 or AH20065...


