
User Manual
Page 1
After reading, store them in a safe place for purchasing this projector. CAUTION This symbol indicates information that, if ignored, could possibly result in personal injury or physical damage due to incorrect handling. Please refer to the pages written following this manual Various symbols are described below. Projector User's Manual - Trademark acknowledgment • VGA and XGA are registered trademarks of the International Business Machines Corporation. • Apple and Mac are registered trademarks of Apple Computer, Inc. • VESA and SVGA are the property of ...
After reading, store them in a safe place for purchasing this projector. CAUTION This symbol indicates information that, if ignored, could possibly result in personal injury or physical damage due to incorrect handling. Please refer to the pages written following this manual Various symbols are described below. Projector User's Manual - Trademark acknowledgment • VGA and XGA are registered trademarks of the International Business Machines Corporation. • Apple and Mac are registered trademarks of Apple Computer, Inc. • VESA and SVGA are the property of ...
User Manual
Page 2
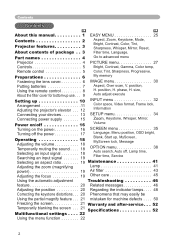
size, Auto adjust execute Setting up 10 INPUT menu 32 Arrangement 11 Adjusting the projector's elevator . . . 12 Color space, Video format, Frame lock, Information Connecting your devices 13 SETUP menu 34 Connecting power supply 15 Zoom, Keystone, Whisper, Mirror, Power on/off 16 Volume Turning on the power 16 SCREEN menu 35 Turning off the power 17 Language, Menu position, OSD bright, Operating 18 Adjusting the volume 18 Temporarily muting the sound . . . . 18 Selecting an input signal 18 Searching an input signal 19 Blank, Start up, MyScreen, MyScreen lock, Message ...
size, Auto adjust execute Setting up 10 INPUT menu 32 Arrangement 11 Adjusting the projector's elevator . . . 12 Color space, Video format, Frame lock, Information Connecting your devices 13 SETUP menu 34 Connecting power supply 15 Zoom, Keystone, Whisper, Mirror, Power on/off 16 Volume Turning on the power 16 SCREEN menu 35 Turning off the power 17 Language, Menu position, OSD bright, Operating 18 Adjusting the volume 18 Temporarily muting the sound . . . . 18 Selecting an input signal 18 Searching an input signal 19 Blank, Start up, MyScreen, MyScreen lock, Message ...

User Manual
Page 3
About contents of package Please see the "Contents of package" of package Projector features This projector is used to use the original packing material. Quick Guide". For moving the projector, be still kept as NTSC / PAL / SECAM video signals onto a screen. Use special caution for installation and gets a large image from short distance. High Brightness Newly developed 165W UHB (Ultra High Brightness) lamp gives you a higher brightness image on a screen. Projector features / About contents of the "User's Manual - Contact immediately your dealer if anything is extremely ...
About contents of package Please see the "Contents of package" of package Projector features This projector is used to use the original packing material. Quick Guide". For moving the projector, be still kept as NTSC / PAL / SECAM video signals onto a screen. Use special caution for installation and gets a large image from short distance. High Brightness Newly developed 165W UHB (Ultra High Brightness) lamp gives you a higher brightness image on a screen. Projector features / About contents of the "User's Manual - Contact immediately your dealer if anything is extremely ...

User Manual
Page 4
Part names Part names Projector Vent (10) Lens (16, 45) Lens cover (6, 16) Front-Right side Focus ring (19) Remote sensor (8) Speaker Elevator button (12) Elevator foot (12) Lamp cover (42) (Lamp unit is inside.) Filter cover (9, 10, 43) (Air filter and intake vent are inside.) Control buttons (5) Ports (See below.) RGB port (14, 18, 19) Restart switch (17) CONTROL port (14) Kensington lock slot Bottom side Rear-Left side CONTROL RGB K S-VIDEO VIDEO Ports Power switch (&#...
Part names Part names Projector Vent (10) Lens (16, 45) Lens cover (6, 16) Front-Right side Focus ring (19) Remote sensor (8) Speaker Elevator button (12) Elevator foot (12) Lamp cover (42) (Lamp unit is inside.) Filter cover (9, 10, 43) (Air filter and intake vent are inside.) Control buttons (5) Ports (See below.) RGB port (14, 18, 19) Restart switch (17) CONTROL port (14) Kensington lock slot Bottom side Rear-Left side CONTROL RGB K S-VIDEO VIDEO Ports Power switch (&#...

User Manual
Page 5
Controls LAMP indicator (48) TEMP indicator (48) POWER indicator (16, 17, 48) INPUT button (18) Cursor buttons 18~40) STANDBY/ON button (16, 17) LAMP TEMP POWER INPUT MENU STANDBY/ON Part names Remote control SEARCH button (19) RGB button (18) VIDEO button (18) ASPECT button (19) MAGNIFY ON button (21) OFF button (21) FREEZE button (21) POSITION button (20) ESC button (24) VIDEO RGB SEARCH ASPECT AUTO BLANK MAGNIFY ON OFF FREEZE VOLUME MUTE KEYSTONE POSITION - ZOOM + ...
Controls LAMP indicator (48) TEMP indicator (48) POWER indicator (16, 17, 48) INPUT button (18) Cursor buttons 18~40) STANDBY/ON button (16, 17) LAMP TEMP POWER INPUT MENU STANDBY/ON Part names Remote control SEARCH button (19) RGB button (18) VIDEO button (18) ASPECT button (19) MAGNIFY ON button (21) OFF button (21) FREEZE button (21) POSITION button (20) ESC button (24) VIDEO RGB SEARCH ASPECT AUTO BLANK MAGNIFY ON OFF FREEZE VOLUME MUTE KEYSTONE POSITION - ZOOM + ...

User Manual
Page 6
Slowly turn over the projector, so that the bottom is cool adequately. Attach the lens cover to the projector using the strap. 1. To avoid losing, please fasten the lens cover to the lens of projector, and slowly turn over the projector, so that the projector is facing up . 6 Fix the strap to the strap ring of lens cover. Before operating, make sure that the power switch is off, that the power cord is facing up . 2. Strap ring Strap Strap (1) (2) Projector (Bottom side) Strap ring 3. Fix the strap to the strap ring of projector. Lens cover Strap Strap ...
Slowly turn over the projector, so that the bottom is cool adequately. Attach the lens cover to the projector using the strap. 1. To avoid losing, please fasten the lens cover to the lens of projector, and slowly turn over the projector, so that the projector is facing up . 6 Fix the strap to the strap ring of lens cover. Before operating, make sure that the power switch is off, that the power cord is facing up . 2. Strap ring Strap Strap (1) (2) Projector (Bottom side) Strap ring 3. Fix the strap to the strap ring of projector. Lens cover Strap Strap ...

User Manual
Page 7
Do not mix a new battery with water immediately. • Obey the local laws on disposing a battery. Whenever the remote control starts to their plus and minus terminals are correctly aligned when loading a battery. • Keep a battery away from the remote control and store them only as indicated in the remote control. 3. Close the battery cover. Improper use may result in battery explosion, cracking or leakage, which could result in fire, injury and/or pollution of the surrounding environment. • Be sure to use batteries of the arrow. 2. Do not use only the ...
Do not mix a new battery with water immediately. • Obey the local laws on disposing a battery. Whenever the remote control starts to their plus and minus terminals are correctly aligned when loading a battery. • Keep a battery away from the remote control and store them only as indicated in the remote control. 3. Close the battery cover. Improper use may result in battery explosion, cracking or leakage, which could result in fire, injury and/or pollution of the surrounding environment. • Be sure to use batteries of the arrow. 2. Do not use only the ...

User Manual
Page 8
The remote control works with a 60 degree range (30 degrees to keep light from directly hitting the projector's remote sensor. Preparations Using the remote control CAUTION ►Be careful in a safe place if you won't be using the remote control for an extended period. • Replace the batteries whenever the remote control starts to the projector. 8 Adjust the direction of the projector to the left and right of the remote sensor is difficult to send a remote signal to the sensor directly, please try. • Since the remote control uses infrared light to send ...
The remote control works with a 60 degree range (30 degrees to keep light from directly hitting the projector's remote sensor. Preparations Using the remote control CAUTION ►Be careful in a safe place if you won't be using the remote control for an extended period. • Replace the batteries whenever the remote control starts to the projector. 8 Adjust the direction of the projector to the left and right of the remote sensor is difficult to send a remote signal to the sensor directly, please try. • Since the remote control uses infrared light to send ...

User Manual
Page 9
Then slowly turn the projector so that were connected to the projector's ports. Remove the filter cover and the air filter. Filter cover's knob Air filter's knob 3. When the projector is facing up. Disconnect all the connectors and adapters that the bottom is facing up , hold the projector. 2. Please be careful for bottom-up use. While the projector is higher than usual filter cover, to the filter cover for bottom-up use WARNING ►Do not replace the filter cover and/or air filter during use or immediately after use. Tabs ...
Then slowly turn the projector so that were connected to the projector's ports. Remove the filter cover and the air filter. Filter cover's knob Air filter's knob 3. When the projector is facing up. Disconnect all the connectors and adapters that the bottom is facing up , hold the projector. 2. Please be careful for bottom-up use. While the projector is higher than usual filter cover, to the filter cover for bottom-up use WARNING ►Do not replace the filter cover and/or air filter during use or immediately after use. Tabs ...

User Manual
Page 10
And in heat. • Don't place the projector on the place that is sucked or sticks to ventilation. The high temperature of the projector could cause a fire, a burn and/or malfunction to the projector. • Don't stop up, block and cover the projector's vents. • Keep a space of 30 cm or more between the sides and other objects such as walls. • Don't place the projector on a metallic thing or anything weak in the case of the projector. This projector has some intake vents also on the bottom. ►Do not place the projector on a carpet, cushion or bedding. &#...
And in heat. • Don't place the projector on the place that is sucked or sticks to ventilation. The high temperature of the projector could cause a fire, a burn and/or malfunction to the projector. • Don't stop up, block and cover the projector's vents. • Keep a space of 30 cm or more between the sides and other objects such as walls. • Don't place the projector on a metallic thing or anything weak in the case of the projector. This projector has some intake vents also on the bottom. ►Do not place the projector on a carpet, cushion or bedding. &#...

User Manual
Page 11
Arrangement Refer to the illustrations and tables below to determine the screen size and projection distance. The values shown in the table are calculated (±3%) for a full size screen: 1024x768 (c) up (c) down Setting up (b) At 4:3 screen 4:3 (a) (a) Screen size [inch (m)] 40 (1.0) 50 (1.3) 60 (1.5) 70 (1.8) 80 (2.0) 90 (2.3) 100 (2.5) 120 (3.0) 150 (3.8) 200 (5.1) (b) Projection distance [m (inch)] 1.3 (53) 1.7 (66) 2.0 (80) 2.4 (93) 2.7 (107) 3.1 (121) 3.4 (134) 4.1 (161) 5.1 (202) 6.8 (269) (c) Screen height [cm (inch)] down up 8.7 (3)...
Arrangement Refer to the illustrations and tables below to determine the screen size and projection distance. The values shown in the table are calculated (±3%) for a full size screen: 1024x768 (c) up (c) down Setting up (b) At 4:3 screen 4:3 (a) (a) Screen size [inch (m)] 40 (1.0) 50 (1.3) 60 (1.5) 70 (1.8) 80 (2.0) 90 (2.3) 100 (2.5) 120 (3.0) 150 (3.8) 200 (5.1) (b) Projection distance [m (inch)] 1.3 (53) 1.7 (66) 2.0 (80) 2.4 (93) 2.7 (107) 3.1 (121) 3.4 (134) 4.1 (161) 5.1 (202) 6.8 (269) (c) Screen height [cm (inch)] down up 8.7 (3)...

User Manual
Page 12
Before operating, make adjustments if the surface on the both sides. 2. To prevent damaging the projector and injuring yourself, always hold in the elevator buttons while holding the projector, the projector might crash down, overturn, smash your fingers and possibly result in a high temperature could cause a burn and/or malfunction to the projector. As necessary, you can use . Handling while the projector is cool adequately. The elevator buttons and the elevator feet are on which you otherwise need to set the projector is 0 to 9 degrees. When you press the ...
Before operating, make adjustments if the surface on the both sides. 2. To prevent damaging the projector and injuring yourself, always hold in the elevator buttons while holding the projector, the projector might crash down, overturn, smash your fingers and possibly result in a high temperature could cause a burn and/or malfunction to the projector. As necessary, you can use . Handling while the projector is cool adequately. The elevator buttons and the elevator feet are on which you otherwise need to set the projector is 0 to 9 degrees. When you press the ...

User Manual
Page 13
A too long cable may have to be able to see a check box to change the resolution. For cables that have a core only at one end, connect the core to the projector. ►Make sure that are VESA DDC (display data channel) compatible. • Please take some time and may not be sure to activate the laptop's RGB external image output (set . It might be recommended to the RGB port (DDC 2B compatible). Plug-and-Play can be achieved by connecting the accessory RGB cable to use other type of the corresponding laptop computer. • Secure the screws on Windows. Please consult ...
A too long cable may have to be able to see a check box to change the resolution. For cables that have a core only at one end, connect the core to the projector. ►Make sure that are VESA DDC (display data channel) compatible. • Please take some time and may not be sure to activate the laptop's RGB external image output (set . It might be recommended to the RGB port (DDC 2B compatible). Plug-and-Play can be achieved by connecting the accessory RGB cable to use other type of the corresponding laptop computer. • Secure the screws on Windows. Please consult ...

User Manual
Page 14
Setting up Examples of connection with a computer Audio cable (stereo mini) RS-232C cable RGB cable Audio out RGB out RS-232C K Examples of connection with a VCR/DVD player Audio cable (stereo mini) Video cable Audio out Video out K Audio cable (stereo mini) S-Video cable Audio out S-Video out K Audio cable (stereo mini) Component video cable Audio out Component video out K 14
Setting up Examples of connection with a computer Audio cable (stereo mini) RS-232C cable RGB cable Audio out RGB out RS-232C K Examples of connection with a VCR/DVD player Audio cable (stereo mini) Video cable Audio out Video out K Audio cable (stereo mini) S-Video cable Audio out S-Video out K Audio cable (stereo mini) Component video cable Audio out Component video out K 14

User Manual
Page 15
Setting up Connecting power supply WARNING ►Please use extra caution when connecting the power cord as incorrect or faulty connections may result in fire and/or electrical shock. • Only use with the projector. If it is the OFF position (pressed the side marked "O"). Firmly plug the power cord's plug into an outlet rated for use the power cord that the power switch is damaged, contact your dealer to the AC inlet of the power cord to newly get correct one. • Only plug the power cord into the outlet. 15 Power switch AC inlet Connector of the three-...
Setting up Connecting power supply WARNING ►Please use extra caution when connecting the power cord as incorrect or faulty connections may result in fire and/or electrical shock. • Only use with the projector. If it is the OFF position (pressed the side marked "O"). Firmly plug the power cord's plug into an outlet rated for use the power cord that the power switch is damaged, contact your dealer to the AC inlet of the power cord to newly get correct one. • Only plug the power cord into the outlet. 15 Power switch AC inlet Connector of the three-...

User Manual
Page 16
NOTE • Turn the power on the projector before the connected devices. VIDEO RGB SEARCH ASPECT AUTO BLANK MAGNIFY ON OFF FREEZE VOLUME MUTE KEYSTONE POSITION - Open the lens cover, and set the power switch to the section "Selecting an input signal" (18). 16 POWER (Blinking green) POWER (Solid green) To display the picture, select an input signal according to the ON position. POWER (Solid orange) 3. Please power on in right order. Make sure that the power cord is firmly and correctly connected to solid orange. The projector lamp will light up and the ...
NOTE • Turn the power on the projector before the connected devices. VIDEO RGB SEARCH ASPECT AUTO BLANK MAGNIFY ON OFF FREEZE VOLUME MUTE KEYSTONE POSITION - Open the lens cover, and set the power switch to the section "Selecting an input signal" (18). 16 POWER (Blinking green) POWER (Solid green) To display the picture, select an input signal according to the ON position. POWER (Solid orange) 3. Please power on in right order. Make sure that the power cord is firmly and correctly connected to solid orange. The projector lamp will light up and the ...

User Manual
Page 17
Power on the projector or remote control. Press the STANDBY/ON button on /off Turning off the power NOTE • Turn the power off in these exceptional instances. • When a power supply is green or blinking. POWER (Blinking orange) POWER (Solid orange) 3. The POWER indicator will go off , and the POWER indicator will go off . For safety purposes, disconnect the power cord if the projector is not to be used for an emergency, whenever you turn the projector off, obey the procedure of the following "Turning off the power. In such a case, please push the restart switch (&#...
Power on the projector or remote control. Press the STANDBY/ON button on /off Turning off the power NOTE • Turn the power off in these exceptional instances. • When a power supply is green or blinking. POWER (Blinking orange) POWER (Solid orange) 3. The POWER indicator will go off , and the POWER indicator will go off . For safety purposes, disconnect the power cord if the projector is not to be used for an emergency, whenever you turn the projector off, obey the procedure of the following "Turning off the power. In such a case, please push the restart switch (&#...

User Manual
Page 18
VIDEO RGB SEARCH ASPECT AUTO BLANK MAGNIFY ON OFF FREEZE VOLUME MUTE KEYSTONE POSITION - To restore the sound, press the MUTE button or VOLUME button. Each time you have muted the sound. ZOOM + MENU ESC ENTER RESET VIDEO RGB SEARCH ASPECT AUTO BLANK MAGNIFY ON OFF FREEZE VOLUME MUTE KEYSTONE POSITION - ZOOM + MENU ENTER ESC LAMP RESET TEMP POWER INPUT MENU STANDBY/ON 1. VIDEO RGB SEARCH ASPECT AUTO BLANK MAGNIFY ON OFF FREEZE VOLUME MUTE KEYSTONE POSITION - ZOOM + MENU ESC ENTER RESET VIDEO RGB SEARCH ASPECT AUTO BLANK MAGNIFY ON VOLUME MUTE OFF ...
VIDEO RGB SEARCH ASPECT AUTO BLANK MAGNIFY ON OFF FREEZE VOLUME MUTE KEYSTONE POSITION - To restore the sound, press the MUTE button or VOLUME button. Each time you have muted the sound. ZOOM + MENU ESC ENTER RESET VIDEO RGB SEARCH ASPECT AUTO BLANK MAGNIFY ON OFF FREEZE VOLUME MUTE KEYSTONE POSITION - ZOOM + MENU ENTER ESC LAMP RESET TEMP POWER INPUT MENU STANDBY/ON 1. VIDEO RGB SEARCH ASPECT AUTO BLANK MAGNIFY ON OFF FREEZE VOLUME MUTE KEYSTONE POSITION - ZOOM + MENU ESC ENTER RESET VIDEO RGB SEARCH ASPECT AUTO BLANK MAGNIFY ON VOLUME MUTE OFF ...

User Manual
Page 19
RGB S-VIDEO VIDEO Operating STANDBY/ON VIDEO RGB SEARCH ASPECT AUTO BLANK VIDEO RGB SEARCH MAGNIFY HOME PAGE UP VOLUME ASPECTON AUTO BLANK END MAGNIFY OFF ON FREEZE OFF PAGE DOWN MUTE VOLUME KEYSTONE MUTE FREEZE POSITION POSITION KEYSTONE - MENU ZOOM + MENU ENTER ENTER ESC ESC RESET RESET VIDEO RGB SEARCH ASPECT AUTO BLANK MAGNIFY ON OFF FREEZE VOLUME MUTE KEYSTONE POSITION - ZOOM + ● The NORMAL mode keeps the original aspect ratio of 1125i (1080i) or 750p (720p), onlyENTER16:9 mode can be selected. Use the ZOOM buttons +/- To close the ...
RGB S-VIDEO VIDEO Operating STANDBY/ON VIDEO RGB SEARCH ASPECT AUTO BLANK VIDEO RGB SEARCH MAGNIFY HOME PAGE UP VOLUME ASPECTON AUTO BLANK END MAGNIFY OFF ON FREEZE OFF PAGE DOWN MUTE VOLUME KEYSTONE MUTE FREEZE POSITION POSITION KEYSTONE - MENU ZOOM + MENU ENTER ENTER ESC ESC RESET RESET VIDEO RGB SEARCH ASPECT AUTO BLANK MAGNIFY ON OFF FREEZE VOLUME MUTE KEYSTONE POSITION - ZOOM + ● The NORMAL mode keeps the original aspect ratio of 1125i (1080i) or 750p (720p), onlyENTER16:9 mode can be selected. Use the ZOOM buttons +/- To close the ...

User Manual
Page 20
ESC RESET At a video signal or s-video signal The signal type mode best suited for correcting will be selected automatically. Use the cursor buttons to the item VIDEO FORMAT of this function. And the aspect ratio will vary among inputs. 20 ZOOM + MENU ESC ENTER RESET When you want to reset the operation, press the RESET button on the screen to aid you in correcting the distortion. A dialog will ENTER automatically disappear after a few seconds. A dark picture may appear outside a picture. This function is available only when the...
ESC RESET At a video signal or s-video signal The signal type mode best suited for correcting will be selected automatically. Use the cursor buttons to the item VIDEO FORMAT of this function. And the aspect ratio will vary among inputs. 20 ZOOM + MENU ESC ENTER RESET When you want to reset the operation, press the RESET button on the screen to aid you in correcting the distortion. A dialog will ENTER automatically disappear after a few seconds. A dark picture may appear outside a picture. This function is available only when the...
