
Hardware and Software Guide
Page 20
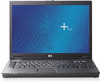
Component ID Rear Components Component 1 Power connector 2 External monitor port Description Connects an AC adapter or an optional automobile or aircraft adapter. Connects an optional external VGA monitor or projector. 1-10 Hardware and Software Guide
Component ID Rear Components Component 1 Power connector 2 External monitor port Description Connects an AC adapter or an optional automobile or aircraft adapter. Connects an optional external VGA monitor or projector. 1-10 Hardware and Software Guide

Hardware and Software Guide
Page 26
... region and country. Component ID Additional Hardware Components Component Description 1 AC adapter Enables the notebook to run on electrical power and charges the battery pack. 2 Power cord* Connects the AC adapter to an AC electrical outlet. 3 Primary battery pack* 4 Modem adapter* 5 Modem cable* Runs the notebook when the notebook is not connected to a telephone jack or a country-specific modem...
... region and country. Component ID Additional Hardware Components Component Description 1 AC adapter Enables the notebook to run on electrical power and charges the battery pack. 2 Power cord* Connects the AC adapter to an AC electrical outlet. 3 Primary battery pack* 4 Modem adapter* 5 Modem cable* Runs the notebook when the notebook is not connected to a telephone jack or a country-specific modem...

Hardware and Software Guide
Page 32
... write to a CD or DVD Recommended Power Source ■ Charged battery pack in the notebook ■ External power supplied through one of the following devices: ❐ AC adapter ❐ Optional AC adapter ❐ Optional docking device ❐ Optional automobile or aircraft adapter External power supplied through one of the following table indicates the best power sources...
... write to a CD or DVD Recommended Power Source ■ Charged battery pack in the notebook ■ External power supplied through one of the following devices: ❐ AC adapter ❐ Optional AC adapter ❐ Optional docking device ❐ Optional automobile or aircraft adapter External power supplied through one of the following table indicates the best power sources...
Hardware and Software Guide
Page 46
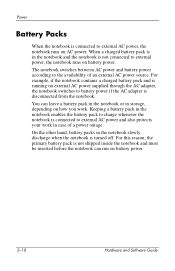
..., battery packs in the notebook and the notebook is not connected to external power, the notebook runs on battery power. Power Battery Packs When the notebook is connected to external AC power, the notebook runs on external AC power supplied through the AC adapter, the notebook switches to battery power if the AC adapter is disconnected from the notebook. Keeping a battery pack in...
..., battery packs in the notebook and the notebook is not connected to external power, the notebook runs on battery power. Power Battery Packs When the notebook is connected to external AC power, the notebook runs on external AC power supplied through the AC adapter, the notebook switches to battery power if the AC adapter is disconnected from the notebook. Keeping a battery pack in...

Hardware and Software Guide
Page 47
.... ✎ Only compatible AC adapters and battery packs should be unused for two weeks or more, remove the battery pack and store it to prolong battery pack life. For additional information, visit the HP Web site at http://www.hp.com or use the Worldwide Telephone Numbers booklet, included with the notebook. Hardware and Software...
.... ✎ Only compatible AC adapters and battery packs should be unused for two weeks or more, remove the battery pack and store it to prolong battery pack life. For additional information, visit the HP Web site at http://www.hp.com or use the Worldwide Telephone Numbers booklet, included with the notebook. Hardware and Software...

Hardware and Software Guide
Page 51
... charged can be supplied through the AC adapter. Charging a New Battery Pack Fully charge the battery pack while the notebook is connected to external power through the following: ■ AC adapter ■ Optional AC adapter ■ Optional docking device ■ Optional automobile or aircraft adapter ✎ An optional aircraft adapter can run the notebook, but it cannot charge a battery pack...
... charged can be supplied through the AC adapter. Charging a New Battery Pack Fully charge the battery pack while the notebook is connected to external power through the following: ■ AC adapter ■ Optional AC adapter ■ Optional docking device ■ Optional automobile or aircraft adapter ✎ An optional aircraft adapter can run the notebook, but it cannot charge a battery pack...

Hardware and Software Guide
Page 54
... Options > Hibernate tab. 2. If a low-battery condition is available, connect the AC adapter or an optional automobile or aircraft adapter. 2-26 Hardware and Software Guide When External Power Is Available To resolve a low-battery condition when external power is not resolved, the notebook enters a critical low-battery condition. To verify that the Enable hibernate...
... Options > Hibernate tab. 2. If a low-battery condition is available, connect the AC adapter or an optional automobile or aircraft adapter. 2-26 Hardware and Software Guide When External Power Is Available To resolve a low-battery condition when external power is not resolved, the notebook enters a critical low-battery condition. To verify that the Enable hibernate...

Hardware and Software Guide
Page 206
...install a ROM update only when the notebook is running on battery power, docked in compressed files called ROMPaqs. Access the page on the HP Web site is packaged in an optional docking device, or connected to reliable external power using the AC adapter. During the download and installation: ...■ Do not unplug the notebook from the electrical outlet. ■ Do not shut...
...install a ROM update only when the notebook is running on battery power, docked in compressed files called ROMPaqs. Access the page on the HP Web site is packaged in an optional docking device, or connected to reliable external power using the AC adapter. During the download and installation: ...■ Do not unplug the notebook from the electrical outlet. ■ Do not shut...

Hardware and Software Guide
Page 216
... in Windows after the process is displayed.) 8. Connect the notebook to external power through the AC adapter and turn off the notebook. 4. Immediately insert the Operating System disc into the notebook. 3. Press the power/standby button again to start the notebook. 5. When prompted, press any key to start from the... for at least 5 seconds to learn more about backing up your files. See the Windows online Help utility to turn on the notebook, back up your data before reinstalling the operating system. Software Update and Recovery 6. This process takes 1 to 2 hours to accept...
... in Windows after the process is displayed.) 8. Connect the notebook to external power through the AC adapter and turn off the notebook. 4. Immediately insert the Operating System disc into the notebook. 3. Press the power/standby button again to start the notebook. 5. When prompted, press any key to start from the... for at least 5 seconds to learn more about backing up your files. See the Windows online Help utility to turn on the notebook, back up your data before reinstalling the operating system. Software Update and Recovery 6. This process takes 1 to 2 hours to accept...

Hardware and Software Guide
Page 227
...HP. Specifications Rated Input Power The power information in Norway with phase-to travel internationally with the notebook. The notebook operates on DC power, which can be powered from a stand-alone DC power source, it is designed for IT power systems in this section may be powered only with an AC adapter... or DC power cord supplied or approved by an AC or a DC ...
...HP. Specifications Rated Input Power The power information in Norway with phase-to travel internationally with the notebook. The notebook operates on DC power, which can be powered from a stand-alone DC power source, it is designed for IT power systems in this section may be powered only with an AC adapter... or DC power cord supplied or approved by an AC or a DC ...

Hardware and Software Guide
Page 241
... 2-34 calibrating 2-28 charge display 2-24 charge information hotkey 3-7, 3-10 charge sequence 2-22 charging 2-23, 2-28 Hardware and Software Guide Index-1 Index 1394 port 1-13 A AC adapter 1-16 AC power 2-18 accessing notebook information 14-2 administrative password.
... 2-34 calibrating 2-28 charge display 2-24 charge information hotkey 3-7, 3-10 charge sequence 2-22 charging 2-23, 2-28 Hardware and Software Guide Index-1 Index 1394 port 1-13 A AC adapter 1-16 AC power 2-18 accessing notebook information 14-2 administrative password.

Getting Started
Page 7
Provides power to the notebook when the notebook is not connected to an AC outlet. Connects the AC adapter to external power. (Continued) 1-3 Component 1 AC adapter 2 Power cord 3 Battery pack Getting Started Description Converts AC power to DC power. Hardware Setup Step 1: Identify the Hardware Required for Setup To set up the notebook for the first time, you need the notebook and the components listed in the following table. ✎ Power cords, AC adapters, modem cables, and modem adapters may vary in appearance.
Provides power to the notebook when the notebook is not connected to an AC outlet. Connects the AC adapter to external power. (Continued) 1-3 Component 1 AC adapter 2 Power cord 3 Battery pack Getting Started Description Converts AC power to DC power. Hardware Setup Step 1: Identify the Hardware Required for Setup To set up the notebook for the first time, you need the notebook and the components listed in the following table. ✎ Power cords, AC adapters, modem cables, and modem adapters may vary in appearance.

Getting Started
Page 13
Plug the power cord into the AC adapter 2, and then into the power connector 1. 2. The battery light is turned on and the battery pack begins to external power: 1. Plug the AC adapter into an electrical outlet 3. Hardware Setup Step 4: Connect the Notebook to External Power To connect the notebook to charge. ✎ Power cords and electrical outlets vary in appearance by region and country. Getting Started 1-9
Plug the power cord into the AC adapter 2, and then into the power connector 1. 2. The battery light is turned on and the battery pack begins to external power: 1. Plug the AC adapter into an electrical outlet 3. Hardware Setup Step 4: Connect the Notebook to External Power To connect the notebook to charge. ✎ Power cords and electrical outlets vary in appearance by region and country. Getting Started 1-9

Getting Started
Page 16
Hardware Setup Step 7: Turn On the Notebook To turn on , and you have installed a battery pack, make sure the battery pack is firmly seated. ■ Refer to the Worldwide Telephone Numbers booklet (English only) included with the notebook to contact Customer Care. 1-12 Getting ...Started The power/standby light next to begin software setup. If the notebook does not power up: ■ Make sure the AC adapter is securely plugged into the notebook and an electrical outlet. ■ Make sure the electrical outlet is providing power. (To...
Hardware Setup Step 7: Turn On the Notebook To turn on , and you have installed a battery pack, make sure the battery pack is firmly seated. ■ Refer to the Worldwide Telephone Numbers booklet (English only) included with the notebook to contact Customer Care. 1-12 Getting ...Started The power/standby light next to begin software setup. If the notebook does not power up: ■ Make sure the AC adapter is securely plugged into the notebook and an electrical outlet. ■ Make sure the electrical outlet is providing power. (To...

Getting Started
Page 38
... identifies the icons for a power/standby button 1, a power/standby light 2, and an AC adapter 3. Troubleshooting Quick Troubleshooting Power Features Several of the notebook. It also has a battery light. ■ The locations and functions of the power features on your notebook are identified in this guide and in the Hardware and Software Guide, which...
... identifies the icons for a power/standby button 1, a power/standby light 2, and an AC adapter 3. Troubleshooting Quick Troubleshooting Power Features Several of the notebook. It also has a battery light. ■ The locations and functions of the power features on your notebook are identified in this guide and in the Hardware and Software Guide, which...

Getting Started
Page 39
...light is off and the notebook cannot be turned on, adequate power may not be turned on when connected to an AC outlet, verify that the AC outlet is connected to an external power source other than an AC outlet, connect the notebook to an AC outlet using the AC adapter. When the power/standby ...light is on, the notebook is on battery power or is providing adequate ...
...light is off and the notebook cannot be turned on, adequate power may not be turned on when connected to an AC outlet, verify that the AC outlet is connected to an external power source other than an AC outlet, connect the notebook to an AC outlet using the AC adapter. When the power/standby ...light is on, the notebook is on battery power or is providing adequate ...

Getting Started
Page 50
Restoring to a Restore Point To restore the notebook to a reliable AC outlet through the AC adapter. 2. Select Create a restore point, and then follow the instructions on the screen. B-4 Getting Started Select Start > Help and Support > System Restore. 3. Make sure the notebook is connected to a restore point: 1. System Restore Setting a Restore Point To set a system restore point manually: 1. Select Start > Help and Support > System Restore. 2. Select Restore my computer to an earlier time, and then follow the instructions on the page.
Restoring to a Restore Point To restore the notebook to a reliable AC outlet through the AC adapter. 2. Select Create a restore point, and then follow the instructions on the screen. B-4 Getting Started Select Start > Help and Support > System Restore. 3. Make sure the notebook is connected to a restore point: 1. System Restore Setting a Restore Point To set a system restore point manually: 1. Select Start > Help and Support > System Restore. 2. Select Restore my computer to an earlier time, and then follow the instructions on the page.

Getting Started
Page 53
... f8 to continue. (A "Licensing Agreement" page is displayed.) 8. Connect the notebook to repair the selected Windows installation. (The repair process begins. Press R to an AC outlet through the AC adapter and turn on the notebook. 2. Press the power/standby button again to shut down the notebook using the operating system, press and hold the power/standby...
... f8 to continue. (A "Licensing Agreement" page is displayed.) 8. Connect the notebook to repair the selected Windows installation. (The repair process begins. Press R to an AC outlet through the AC adapter and turn on the notebook. 2. Press the power/standby button again to shut down the notebook using the operating system, press and hold the power/standby...

Getting Started
Page 54
... Microsoft Certificate of your personal data, back up your operating system. ✎ If you are unable to shut down the notebook using the operating system, press and hold the power/standby button for your Product Key. If other recovery efforts do not...4. Connect the notebook to start the notebook. 5. To reinstall the operating system: 1. Shut down the notebook using the standard shutdown procedure for your data before reinstalling the operating system. Press the power/standby button again to an AC outlet through the AC adapter and turn on the notebook. 2. System Restore...
... Microsoft Certificate of your personal data, back up your operating system. ✎ If you are unable to shut down the notebook using the operating system, press and hold the power/standby button for your Product Key. If other recovery efforts do not...4. Connect the notebook to start the notebook. 5. To reinstall the operating system: 1. Shut down the notebook using the standard shutdown procedure for your data before reinstalling the operating system. Press the power/standby button again to an AC outlet through the AC adapter and turn on the notebook. 2. System Restore...

Getting Started
Page 57
Index 1394 port 4-5 A AC adapter connecting 1-9 identifying 1-3 power feature A-2 AC adapter light A-2 antivirus software 3-2 applications, reinstalling or repairing B-5 audio-in (microphone) jack 4-5 audio-out (headphone) jack 4-5 AutoPlay A-7 B battery bay, primary 4-6 battery ...light 4-3 compartment, memory module 4-6 computer viruses A-5 connectors docking 4-6 power 4-5 travel battery 4-6 cord, power 1-9 surge protection 3-3 troubleshooting A-3 country-specific modem adapter 1-4, 1-8 customer support A-8, A-9 D devices, external drivers A-7 troubleshooting A-7 Getting Started Index-1
Index 1394 port 4-5 A AC adapter connecting 1-9 identifying 1-3 power feature A-2 AC adapter light A-2 antivirus software 3-2 applications, reinstalling or repairing B-5 audio-in (microphone) jack 4-5 audio-out (headphone) jack 4-5 AutoPlay A-7 B battery bay, primary 4-6 battery ...light 4-3 compartment, memory module 4-6 computer viruses A-5 connectors docking 4-6 power 4-5 travel battery 4-6 cord, power 1-9 surge protection 3-3 troubleshooting A-3 country-specific modem adapter 1-4, 1-8 customer support A-8, A-9 D devices, external drivers A-7 troubleshooting A-7 Getting Started Index-1


