
HP G72 Notebook PC - Maintenance and Service Guide
Page 80
... panel (2) straight up to remove it to the computer. 7. Reverse this procedure to the assembly and other components. 6. Failure to support the display assembly can result in the following steps. 5. CAUTION: Support the display assembly when removing the display screws in damage to install the display assembly. 70 Chapter 4 Removal and...
... panel (2) straight up to remove it to the computer. 7. Reverse this procedure to the assembly and other components. 6. Failure to support the display assembly can result in the following steps. 5. CAUTION: Support the display assembly when removing the display screws in damage to install the display assembly. 70 Chapter 4 Removal and...
HP G72 Notebook PC - Maintenance and Service Guide
Page 129
... http://www.eiae.org. Specific details, such as screw sizes, quantities, and locations, and component shapes and sizes, can result in this component and causing exposure to display components. Display WARNING! This HP product contains mercury in the backlight in this chapter are the liquid crystal display (LCD) panel and the backlight...
... http://www.eiae.org. Specific details, such as screw sizes, quantities, and locations, and component shapes and sizes, can result in this component and causing exposure to display components. Display WARNING! This HP product contains mercury in the backlight in this chapter are the liquid crystal display (LCD) panel and the backlight...
Notebook Essentials - Windows 7
Page 18
... turn off the computer with these steps, try the following emergency shutdown procedures, in the sequence provided, until shutdown occurs: Ä CAUTION: Emergency shutdown procedures result in the lower-right corner of unsaved information. ■ Press ctrl+alt+delete. Save your work and close all open programs. 2. Chapter 2: What's next? Then... down button. ■ Press and hold the power button for at least 5 seconds. ■ Disconnect the computer from external power and remove the battery. 12 Notebook Essentials
... turn off the computer with these steps, try the following emergency shutdown procedures, in the sequence provided, until shutdown occurs: Ä CAUTION: Emergency shutdown procedures result in the lower-right corner of unsaved information. ■ Press ctrl+alt+delete. Save your work and close all open programs. 2. Chapter 2: What's next? Then... down button. ■ Press and hold the power button for at least 5 seconds. ■ Disconnect the computer from external power and remove the battery. 12 Notebook Essentials
Notebook Essentials - Windows 7
Page 20
...warm to software or keyboard commands, try the following emergency shutdown procedures, in the sequence provided, until shutdown occurs: Ä CAUTION: Emergency shutdown procedures result in the loss of unsaved information. ■ Press ctrl+alt+delete. On most models, when an optional external display, such as a monitor, is... screen, click the Shut down button, and then clicking Restart. Sleep and Hibernation can be overheating because a vent is blocked. 14 Notebook Essentials Chapter 3: Troubleshooting The computer screen is blank If the screen is blank but is not in use .
...warm to software or keyboard commands, try the following emergency shutdown procedures, in the sequence provided, until shutdown occurs: Ä CAUTION: Emergency shutdown procedures result in the loss of unsaved information. ■ Press ctrl+alt+delete. On most models, when an optional external display, such as a monitor, is... screen, click the Shut down button, and then clicking Restart. Sleep and Hibernation can be overheating because a vent is blocked. 14 Notebook Essentials Chapter 3: Troubleshooting The computer screen is blank If the screen is blank but is not in use .

Notebook Essentials - Windows 7
Page 31
... on the TouchPad can cause the pointer to jump around and under the keys to clean the keyboard. Traveling and shipping For best results, follow these traveling and shipping tips: ■ Prepare the computer for traveling or shipping: 1. Keep the backup separate from a drive... to the computer, damage to remove dust, lint, and particles that can deposit household debris on the display. Back up your information. Notebook Essentials 25 If the screen requires additional cleaning, use a vacuum cleaner attachment to loosen and remove debris. Shut down the computer. ■...
... on the TouchPad can cause the pointer to jump around and under the keys to clean the keyboard. Traveling and shipping For best results, follow these traveling and shipping tips: ■ Prepare the computer for traveling or shipping: 1. Keep the backup separate from a drive... to the computer, damage to remove dust, lint, and particles that can deposit household debris on the display. Back up your information. Notebook Essentials 25 If the screen requires additional cleaning, use a vacuum cleaner attachment to loosen and remove debris. Shut down the computer. ■...
Notebook PC User Guide - Windows 7
Page 50
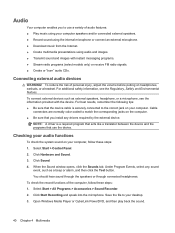
For best results, remember the following tips: ● Be sure that you to use the device. Click Hardware and Sound. 3. Click Sound. 4. You should hear sound through the ...
For best results, remember the following tips: ● Be sure that you to use the device. Click Hardware and Sound. 3. Click Sound. 4. You should hear sound through the ...

Notebook PC User Guide - Windows 7
Page 51
Video Your computer enables you to create presentations. ● Connect external video devices. NOTE: For best results when recording, speak directly into the microphone and record sound in a setting free of video features: ● Watch movies. ● Play games over the Internet. ● Edit pictures and video to use a variety of background noise. Video 41 To confirm or change the audio settings on your computer, select Start > Control Panel > Hardware and Sound > Sound.
Video Your computer enables you to create presentations. ● Connect external video devices. NOTE: For best results when recording, speak directly into the microphone and record sound in a setting free of video features: ● Watch movies. ● Play games over the Internet. ● Edit pictures and video to use a variety of background noise. Video 41 To confirm or change the audio settings on your computer, select Start > Control Panel > Hardware and Sound > Sound.

Notebook PC User Guide - Windows 7
Page 64
... from external power. Battery Check examines the battery and its cells to see if they are functioning properly, and then reports the results of the Help and Support Learning Center provides the following tools and information: ● Battery Check tool to test battery performance &#...Information on battery types, specifications, life cycles, and capacity To access battery information: ▲ Select Start > Help and Support > Learning Center > HP Power and Battery Learning Center. If the computer contains a charged battery and is running on how you disconnect AC power. You can keep a ...
... from external power. Battery Check examines the battery and its cells to see if they are functioning properly, and then reports the results of the Help and Support Learning Center provides the following tools and information: ● Battery Check tool to test battery performance &#...Information on battery types, specifications, life cycles, and capacity To access battery information: ▲ Select Start > Help and Support > Learning Center > HP Power and Battery Learning Center. If the computer contains a charged battery and is running on how you disconnect AC power. You can keep a ...

Notebook PC User Guide - Windows 7
Page 71
... down the computer. or - Reenter the settings that you are not using. ● Use the f2 and f3 action keys to Hibernate after calibration may result in the notification area, and then click More power options. - If a computer will be checked every six months. To prolong the charge of time. If...
... down the computer. or - Reenter the settings that you are not using. ● Use the f2 and f3 action keys to Hibernate after calibration may result in the notification area, and then click More power options. - If a computer will be checked every six months. To prolong the charge of time. If...

Notebook PC User Guide - Windows 7
Page 80
NOTE: For best results, be sure that your AC adapter is plugged into place. 6. Close the disc tray. If you want to select how you have not yet configured AutoPlay, as described in the following section, an AutoPlay dialog box opens. Gently press the disc (3) down onto the tray spindle until the disc snaps into an external power source while playing a BD. 70 Chapter 6 Drives It prompts you to use the media content. 5.
NOTE: For best results, be sure that your AC adapter is plugged into place. 6. Close the disc tray. If you want to select how you have not yet configured AutoPlay, as described in the following section, an AutoPlay dialog box opens. Gently press the disc (3) down onto the tray spindle until the disc snaps into an external power source while playing a BD. 70 Chapter 6 Drives It prompts you to use the media content. 5.