
IP Console Switch User Guide
Page 2
...accompanying such products and services. Linux is a U.S. UNIX is subject to change without notice. HP shall not be construed as constituting an additional warranty. HP assumes you are U.S. registered mark of The Open Group. registered trademark of Microsoft Corporation. registered... trademarks of Linus Torvalds. Energy Star is a U.S. This procedure is for HP products and services are set forth in rack products. HP IP Console Switch User Guide October 2004 (Fourth Edition) Part Number 263924-004 Audience Assumptions This ...
...accompanying such products and services. Linux is a U.S. UNIX is subject to change without notice. HP shall not be construed as constituting an additional warranty. HP assumes you are U.S. registered mark of The Open Group. registered trademark of Microsoft Corporation. registered... trademarks of Linus Torvalds. Energy Star is a U.S. This procedure is for HP products and services are set forth in rack products. HP IP Console Switch User Guide October 2004 (Fourth Edition) Part Number 263924-004 Audience Assumptions This ...

IP Console Switch User Guide
Page 3
... Switch 9 Overview...9 Installation Checklist...9 Kit Contents...9 Required Items Not Included 10 Optional Items ...10 Required Tools ...10 Rack Mounting the HP IP Console Switch 10 Performing a Side-Mount Type A Installation 11 Performing a Side-Mount Type B Installation 13 Performing a Standard-Mount Installation 14 Performing a Cantilever-Mount Type A Installation ...
... Switch 9 Overview...9 Installation Checklist...9 Kit Contents...9 Required Items Not Included 10 Optional Items ...10 Required Tools ...10 Rack Mounting the HP IP Console Switch 10 Performing a Side-Mount Type A Installation 11 Performing a Side-Mount Type B Installation 13 Performing a Standard-Mount Installation 14 Performing a Cantilever-Mount Type A Installation ...

IP Console Switch User Guide
Page 4
... Server Console Switch 38 Cascading a Compaq Server Console Switch with an HP IP Console Switch 39 Example of a Compaq Server Console Switch Cascade Configuration 40 Cascading an HP KVM Server Console Switch with an HP IP Console Switch 41 Example of an HP IP Console Switch Cascade Configuration 43 Local Port Operation 45 Overview...45 Accessing the...
... Server Console Switch 38 Cascading a Compaq Server Console Switch with an HP IP Console Switch 39 Example of a Compaq Server Console Switch Cascade Configuration 40 Cascading an HP KVM Server Console Switch with an HP IP Console Switch 41 Example of an HP IP Console Switch Cascade Configuration 43 Local Port Operation 45 Overview...45 Accessing the...
IP Console Switch User Guide
Page 5
...TFTP for Windows Operating Systems 95 Enabling TFTP for Linux Operating Systems 95 Upgrading the HP IP Console Switch Firmware 97 Upgrading the HP IP Console Switch Firmware 97 Upgrading the HP IP Console Switch Firmware through the IP Console Viewer 99 Troubleshooting 101 When a Serial Interface Adapter Stops Responding 101 When the... is Distorted or Not Readable 106 When the OSD is Inaccessible ...106 When RILOE and iLO are not Working Correctly with the HP IP Console Switch 106 When the Run Diagnostics Test Fails 106 When the Screen Saver Does Not Turn On 106 When the Servers Are...
...TFTP for Windows Operating Systems 95 Enabling TFTP for Linux Operating Systems 95 Upgrading the HP IP Console Switch Firmware 97 Upgrading the HP IP Console Switch Firmware 97 Upgrading the HP IP Console Switch Firmware through the IP Console Viewer 99 Troubleshooting 101 When a Serial Interface Adapter Stops Responding 101 When the... is Distorted or Not Readable 106 When the OSD is Inaccessible ...106 When RILOE and iLO are not Working Correctly with the HP IP Console Switch 106 When the Run Diagnostics Test Fails 106 When the Screen Saver Does Not Turn On 106 When the Servers Are...

IP Console Switch User Guide
Page 6
6 HP IP Console Switch User Guide Are the Keyboard, Monitor, and Mouse Connections on the Console Switch Hot-Pluggable? ....... 110 Are the Server Connections on the Console ... 114 What are the Minimum and Maximum Cable Lengths 114 What Kind of CAT5 Cables Are Supported 114 Why Can Remote HP IP Console Switch Users Not Access Servers Attached to a Cascaded HP KVM Server Console Switch? ...115 Regulatory Compliance Notices 117 Regulatory Compliance Identification Numbers 117 Federal Communications Commission Notice 118 FCC...
6 HP IP Console Switch User Guide Are the Keyboard, Monitor, and Mouse Connections on the Console Switch Hot-Pluggable? ....... 110 Are the Server Connections on the Console ... 114 What are the Minimum and Maximum Cable Lengths 114 What Kind of CAT5 Cables Are Supported 114 Why Can Remote HP IP Console Switch Users Not Access Servers Attached to a Cascaded HP KVM Server Console Switch? ...115 Regulatory Compliance Notices 117 Regulatory Compliance Identification Numbers 117 Federal Communications Commission Notice 118 FCC...

IP Console Switch User Guide
Page 8
8 HP IP Console Switch User Guide Item 1 2 3 4 5 6 7 Description CPU HP IP Console Switch IA Network Keyboard connector Mouse connector Video connector
8 HP IP Console Switch User Guide Item 1 2 3 4 5 6 7 Description CPU HP IP Console Switch IA Network Keyboard connector Mouse connector Video connector

IP Console Switch User Guide
Page 9
... Contents • HP IP Console Switch 9 Installing the HP IP Console Switch In This Section Overview ...9 Installation Checklist ...9 Rack Mounting the HP IP Console Switch 10 Overview You must install the HP IP Console Viewer before using the HP IP Console Switch. The HP IP Console Viewer enables ... keyboard, video, and mouse information between operators and connected computers. The HP IP Console Switch system uses Ethernet networking infrastructures and TCP/IP protocol to the console switch through IP connection. For more information, refer to be used, a dedicated, switched...
... Contents • HP IP Console Switch 9 Installing the HP IP Console Switch In This Section Overview ...9 Installation Checklist ...9 Rack Mounting the HP IP Console Switch 10 Overview You must install the HP IP Console Viewer before using the HP IP Console Switch. The HP IP Console Viewer enables ... keyboard, video, and mouse information between operators and connected computers. The HP IP Console Switch system uses Ethernet networking infrastructures and TCP/IP protocol to the console switch through IP connection. For more information, refer to be used, a dedicated, switched...
IP Console Switch User Guide
Page 10
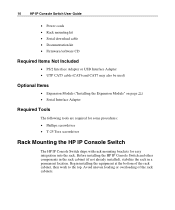
...rack cabinet (if not already installed), stabilize the rack in a permanent location. Begin installing the equipment at the bottom of the rack cabinets. 10 HP IP Console Switch User Guide • Power cords • Rack mounting kit • Serial download cable • Documentation kit • Firmware/software ...Interface Adapter Required Tools The following tools are required for some procedures: • Phillips screwdriver • T-25 Torx screwdriver Rack Mounting the HP IP Console Switch The HP IP Console Switch ships with rack mounting brackets for easy integration into the rack.
...rack cabinet (if not already installed), stabilize the rack in a permanent location. Begin installing the equipment at the bottom of the rack cabinets. 10 HP IP Console Switch User Guide • Power cords • Rack mounting kit • Serial download cable • Documentation kit • Firmware/software ...Interface Adapter Required Tools The following tools are required for some procedures: • Phillips screwdriver • T-25 Torx screwdriver Rack Mounting the HP IP Console Switch The HP IP Console Switch ships with rack mounting brackets for easy integration into the rack.

IP Console Switch User Guide
Page 11
...console switch. and round-hole rails − Type B-Square-hole rails NOTE: The HP IP Console Switch cannot be sure that the power is on the unit. Installing the HP IP Console Switch 11 NOTE: Before installing the HP IP Console Switch into a rack with round-hole rails. • Standard-mount •...rails Performing a Side-Mount Type A Installation 1. If the activity indicator light does not display, be side-mounted into the rack, connect the HP IP Console Switch to a power source, using the power cords provided, and power on , the power cord is connected, and the power source is valid...
...console switch. and round-hole rails − Type B-Square-hole rails NOTE: The HP IP Console Switch cannot be sure that the power is on the unit. Installing the HP IP Console Switch 11 NOTE: Before installing the HP IP Console Switch into a rack with round-hole rails. • Standard-mount •...rails Performing a Side-Mount Type A Installation 1. If the activity indicator light does not display, be side-mounted into the rack, connect the HP IP Console Switch to a power source, using the power cords provided, and power on , the power cord is connected, and the power source is valid...

IP Console Switch User Guide
Page 12
12 HP IP Console Switch User Guide 2. Attach the side-mounting brackets to the console switch using the four screws you removed. 3. Slide the side-mounting bracket tabs into the U locations on each side of the rack.
12 HP IP Console Switch User Guide 2. Attach the side-mounting brackets to the console switch using the four screws you removed. 3. Slide the side-mounting bracket tabs into the U locations on each side of the rack.

IP Console Switch User Guide
Page 13
Installing the HP IP Console Switch 13 4. Performing a Side-Mount Type B Installation 1. Remove the four screws, two on each side, from the console switch. 2. Attach the side-mounting brackets to the rails using the four screws you removed. Secure the console switch to the console switch using four self-tapping screws, two on each side.
Installing the HP IP Console Switch 13 4. Performing a Side-Mount Type B Installation 1. Remove the four screws, two on each side, from the console switch. 2. Attach the side-mounting brackets to the rails using the four screws you removed. Secure the console switch to the console switch using four self-tapping screws, two on each side.

IP Console Switch User Guide
Page 14
14 HP IP Console Switch User Guide 3. Install four cage nuts into the U locations on each side of the rack. 4. Secure the console switch to the rails, using four M-6 screws, two on each side. Performing a Standard-Mount Installation 1. Remove the four screws, two on each side, from the console switch. Slide the side-mounting bracket tabs into the side-mounting bracket U locations. 5.
14 HP IP Console Switch User Guide 3. Install four cage nuts into the U locations on each side of the rack. 4. Secure the console switch to the rails, using four M-6 screws, two on each side. Performing a Standard-Mount Installation 1. Remove the four screws, two on each side, from the console switch. Slide the side-mounting bracket tabs into the side-mounting bracket U locations. 5.

IP Console Switch User Guide
Page 15
Slide the console switch into the rear of the 1U product. Attach the 1U brackets to the console switch using the four screws you removed. 3. Install a cage nut behind each rear rail if they have not already been installed. 4. Installing the HP IP Console Switch 15 2.
Slide the console switch into the rear of the 1U product. Attach the 1U brackets to the console switch using the four screws you removed. 3. Install a cage nut behind each rear rail if they have not already been installed. 4. Installing the HP IP Console Switch 15 2.

IP Console Switch User Guide
Page 16
Attach the 1U brackets to the rails using the four screws you removed. Remove the four screws, two on each side, from the console switch. 2. 16 HP IP Console Switch User Guide 5. Performing a Cantilever-Mount Type A Installation 1. Secure the console switch to the console switch using two M-6 screws, one on each side.
Attach the 1U brackets to the rails using the four screws you removed. Remove the four screws, two on each side, from the console switch. 2. 16 HP IP Console Switch User Guide 5. Performing a Cantilever-Mount Type A Installation 1. Secure the console switch to the console switch using two M-6 screws, one on each side.

IP Console Switch User Guide
Page 17
Performing a Cantilever-Mount Type B Installation 1. Remove the four screws, two on each side, from the console switch. Install up to the rails, using the appropriate number of T-25 Torx screws. Installing the HP IP Console Switch 17 3. Secure the console switch to six clip nuts. 4.
Performing a Cantilever-Mount Type B Installation 1. Remove the four screws, two on each side, from the console switch. Install up to the rails, using the appropriate number of T-25 Torx screws. Installing the HP IP Console Switch 17 3. Secure the console switch to six clip nuts. 4.

IP Console Switch User Guide
Page 18
Attach the 1U brackets to six cage nuts. 18 HP IP Console Switch User Guide 2. Install up to the console switch using the four screws you removed. 3.
Attach the 1U brackets to six cage nuts. 18 HP IP Console Switch User Guide 2. Install up to the console switch using the four screws you removed. 3.

IP Console Switch User Guide
Page 19
Installing the HP IP Console Switch 19 4. Secure the console switch to the rails using the appropriate number of M-6 screws.
Installing the HP IP Console Switch 19 4. Secure the console switch to the rails using the appropriate number of M-6 screws.

IP Console Switch User Guide
Page 21
... Expansion Module Hardware Several rack mounting configurations include: • Side-mount Installation Checklist Before installation, refer to the following list to be added to the HP IP Console Switch system, increasing the total number of the listed components were received. The Expansion Module ships with rack-mounting hardware for your convenience. 21...
... Expansion Module Hardware Several rack mounting configurations include: • Side-mount Installation Checklist Before installation, refer to the following list to be added to the HP IP Console Switch system, increasing the total number of the listed components were received. The Expansion Module ships with rack-mounting hardware for your convenience. 21...

IP Console Switch User Guide
Page 22
Slide the tabs on the side-mounting brackets into the rack frame. 2. Secure the Expansion Module to the rack frame, using one self-tapping screw for the bottom side-mounting bracket. 22 HP IP Console Switch User Guide • Rail-mount • Velcro-mount Performing a Side-Mount Installation 1.
Slide the tabs on the side-mounting brackets into the rack frame. 2. Secure the Expansion Module to the rack frame, using one self-tapping screw for the bottom side-mounting bracket. 22 HP IP Console Switch User Guide • Rail-mount • Velcro-mount Performing a Side-Mount Installation 1.

IP Console Switch User Guide
Page 24
... the rack frame. Remove the protective strip from one end of the Velcro and attach the Expansion Module to the IN port on the HP IP Console Switch. 4. 24 HP IP Console Switch User Guide Performing a Velcro-Mount Installation 1. Mount the Expansion Module into the rack. 2. Connect the other side of another UTP CAT5...
... the rack frame. Remove the protective strip from one end of the Velcro and attach the Expansion Module to the IN port on the HP IP Console Switch. 4. 24 HP IP Console Switch User Guide Performing a Velcro-Mount Installation 1. Mount the Expansion Module into the rack. 2. Connect the other side of another UTP CAT5...


