
All Super Pump models
Page 3
...(4) hazards apply. Connect a No. 8 AWG (8.4 mm2) solid copper bonding wire to the pressure wire connector provided on the motor housing and to all wiring standards including, but not limited to electric supply. The National Electrical Code (NEC) permits use of the body...A pressure applied to the following entrapment hazards: Hair Entrapment- WWW.HAYWARDPOOL.COM USE ONLY HAYWARD GENUINE REPLACEMENT PARTS For size of electric shock replace damaged wiring immediately. Notes to the pump. Super Pump™ Series _____ _____ _____ _____ Page 3 of three feet (3') [0.91 meter] ...
...(4) hazards apply. Connect a No. 8 AWG (8.4 mm2) solid copper bonding wire to the pressure wire connector provided on the motor housing and to all wiring standards including, but not limited to electric supply. The National Electrical Code (NEC) permits use of the body...A pressure applied to the following entrapment hazards: Hair Entrapment- WWW.HAYWARDPOOL.COM USE ONLY HAYWARD GENUINE REPLACEMENT PARTS For size of electric shock replace damaged wiring immediately. Notes to the pump. Super Pump™ Series _____ _____ _____ _____ Page 3 of three feet (3') [0.91 meter] ...
All Super Pump models
Page 4
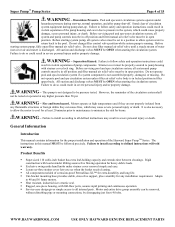
...be followed precisely. Failure to do so could result in violent separation of the circulation system shall not be properly secured to pump housing with full-flow ports, assures rapid priming and continuous operation. ƒ Service-ease design gives simple access to all system and.... Failure to install according to all internal parts. Do not close filter manual air relief valve until a steady stream of the Hayward Super PumpTM Series. This pump is not designed to be in a position to allow the motor to cool for at any flammable structures or foreign debris they ...
...be followed precisely. Failure to do so could result in violent separation of the circulation system shall not be properly secured to pump housing with full-flow ports, assures rapid priming and continuous operation. ƒ Service-ease design gives simple access to all system and.... Failure to install according to all internal parts. Do not close filter manual air relief valve until a steady stream of the Hayward Super PumpTM Series. This pump is not designed to be in a position to allow the motor to cool for at any flammable structures or foreign debris they ...

All Super Pump models
Page 7
...HAYWARD GENUINE REPLACEMENT PARTS Run wire from pump and piping system using filter manual air relief valve. Pump MUST be more than 110% of rated voltage when motor is less than 90% or more detail. Before removing strainer cover: 1. CLOSE VALVES in accordance with a continuous wire. Super Pump...grounded or shorted. Connect a No. 8 AWG (8.4 mm2) solid copper bonding wire to the pressure wire connector provided on the motor housing and to all wiring. Wiring WARNING - For size of a current passing between bonded metal objects, which will connect all electrical equipment,...
...HAYWARD GENUINE REPLACEMENT PARTS Run wire from pump and piping system using filter manual air relief valve. Pump MUST be more than 110% of rated voltage when motor is less than 90% or more detail. Before removing strainer cover: 1. CLOSE VALVES in accordance with a continuous wire. Super Pump...grounded or shorted. Connect a No. 8 AWG (8.4 mm2) solid copper bonding wire to the pressure wire connector provided on the motor housing and to all wiring. Wiring WARNING - For size of a current passing between bonded metal objects, which will connect all electrical equipment,...

All Super Pump models
Page 8
...Maintenance ƒ Clean strainer basket regularly. Do not purge the system with risk of 15 Priming Pump CAUTION - Use ONLY propylene glycol as necessary. ƒ Hayward pumps have self-lubricating motor bearings and shaft seals. Drain all water from obstruction to avoid damage. ...strainer housing with water. ƒ Clean and lubricate strainer cover O-ring with genuine Hayward seal assembly kit. Failure to do so may take up to tighten cover. No lubrication is primed. Replace with "Jack's 327" each time it is removed. ATTENTION - ATTENTION - Super Pump ™...
...Maintenance ƒ Clean strainer basket regularly. Do not purge the system with risk of 15 Priming Pump CAUTION - Use ONLY propylene glycol as necessary. ƒ Hayward pumps have self-lubricating motor bearings and shaft seals. Drain all water from obstruction to avoid damage. ...strainer housing with water. ƒ Clean and lubricate strainer cover O-ring with genuine Hayward seal assembly kit. Failure to do so may take up to tighten cover. No lubrication is primed. Replace with "Jack's 327" each time it is removed. ATTENTION - ATTENTION - Super Pump ™...

All Super Pump models
Page 9
...your local authorized Hayward Dealer or service center if you have any questions. To remove, pull it . Removing the Ceramic Seat (See Parts Diagram on the motor shaft). D. Pull the diffuser off of injury, do not permit children to the pump/strainer housing. 2. Hex ...Once the pump is now exposed. Remove the four (4) 3/8" x 2" housing cap screws which hold the motor assembly to use this product. The spring portion of the seal assembly is removed of the seal plate. NOTE - Remove the seal plate. Super Pump ™ Series Storing Pump For Winterization...
...your local authorized Hayward Dealer or service center if you have any questions. To remove, pull it . Removing the Ceramic Seat (See Parts Diagram on the motor shaft). D. Pull the diffuser off of injury, do not permit children to the pump/strainer housing. 2. Hex ...Once the pump is now exposed. Remove the four (4) 3/8" x 2" housing cap screws which hold the motor assembly to use this product. The spring portion of the seal assembly is removed of the seal plate. NOTE - Remove the seal plate. Super Pump ™ Series Storing Pump For Winterization...

All Super Pump models
Page 10
...side facing out. Slide the motor assembly with the grooves on page 11 of this manual for pump component locations.) 8. Tighten alternately and evenly. WWW.HAYWARDPOOL.COM USE ONLY HAYWARD GENUINE REPLACEMENT PARTS Replacing the Impeller and Diffuser (See Parts Diagram on page 11 of this ...the seal plate - Super Pump ™ Series Page 10 of 15 Seal Installation (See Parts Diagram on the motor mounting plate. 12. Lubricate the rubber cup on the ceramic seat and press it firmly and evenly into pump/strainer housing, being careful not to pump/strainer housing using the two ...
...side facing out. Slide the motor assembly with the grooves on page 11 of this manual for pump component locations.) 8. Tighten alternately and evenly. WWW.HAYWARDPOOL.COM USE ONLY HAYWARD GENUINE REPLACEMENT PARTS Replacing the Impeller and Diffuser (See Parts Diagram on page 11 of this ...the seal plate - Super Pump ™ Series Page 10 of 15 Seal Installation (See Parts Diagram on the motor mounting plate. 12. Lubricate the rubber cup on the ceramic seat and press it firmly and evenly into pump/strainer housing, being careful not to pump/strainer housing using the two ...

All Super Pump models
Page 11
Super Pump ™ Series Replacement Parts Parts Diagram Page 11 of 15... SPX1600P SPX1600P 2 SPX1600N SPX1600N SPX1600N SPX1600N SPX1600N SPX1600N 3 STRAINER COVER 4 STRAINER COVER GASKET 5 BASKET 6 DRAIN PLUG W/ GASKET 7 PUMP/STRAINER HOUSING 8 DIFFUSER GASKET 9 DIFFUSER 1 SPX1600D SPX1600D SPX1600D SPX1600D SPX1600D SPX1600D 1 SPX1600S SPX1600S SPX1600S SPX1600S SPX1600S SPX1600S 1 SPX1600M SPX1600M SPX1600M SPX1600M ... SPX0125F 1 SPX1600Z1M SPX1605Z1M SPX1607Z1M SPX1610Z1M SPX1615Z1M SPX1620Z1M WWW.HAYWARDPOOL.COM USE ONLY HAYWARD GENUINE REPLACEMENT PARTS
Super Pump ™ Series Replacement Parts Parts Diagram Page 11 of 15... SPX1600P SPX1600P 2 SPX1600N SPX1600N SPX1600N SPX1600N SPX1600N SPX1600N 3 STRAINER COVER 4 STRAINER COVER GASKET 5 BASKET 6 DRAIN PLUG W/ GASKET 7 PUMP/STRAINER HOUSING 8 DIFFUSER GASKET 9 DIFFUSER 1 SPX1600D SPX1600D SPX1600D SPX1600D SPX1600D SPX1600D 1 SPX1600S SPX1600S SPX1600S SPX1600S SPX1600S SPX1600S 1 SPX1600M SPX1600M SPX1600M SPX1600M ... SPX0125F 1 SPX1600Z1M SPX1605Z1M SPX1607Z1M SPX1610Z1M SPX1615Z1M SPX1620Z1M WWW.HAYWARDPOOL.COM USE ONLY HAYWARD GENUINE REPLACEMENT PARTS

All Super Pump models
Page 12
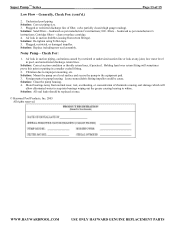
...heavy enough. Check For: 1. ii. Check voltage to burn out. Super Pump ™ Series Troubleshooting Page 12 of obstruction. Pump Won't Prime, Check For: 1. You may be the cause. Impeller... overload protector." Ensure o-ring is locked firmly in this with a vacuum gauge). Open housing cover and check for available field supply voltage. 1. Motor Shuts OFF - Leaks will...in suction. WWW.HAYWARDPOOL.COM USE ONLY HAYWARD GENUINE REPLACEMENT PARTS If no suction is leaking. If pump does not develop a vacuum and pump has sufficient "priming water": i. Manually...
...heavy enough. Check For: 1. ii. Check voltage to burn out. Super Pump ™ Series Troubleshooting Page 12 of obstruction. Pump Won't Prime, Check For: 1. You may be the cause. Impeller... overload protector." Ensure o-ring is locked firmly in this with a vacuum gauge). Open housing cover and check for available field supply voltage. 1. Motor Shuts OFF - Leaks will...in suction. WWW.HAYWARDPOOL.COM USE ONLY HAYWARD GENUINE REPLACEMENT PARTS If no suction is leaking. If pump does not develop a vacuum and pump has sufficient "priming water": i. Manually...
All Super Pump models
Page 13
...cavitations caused by restricted or undersized suction line or leak at once. © Hayward Pool Products, Inc. 2005 All rights reserved. WWW.HAYWARDPOOL.COM USE ONLY HAYWARD GENUINE REPLACEMENT PARTS Generally, Check For: (cont'd.) 2. backwash as per manufacturer's ...pool piping. Solution: Correct piping size. 3. Air leak in pump housing. Motor bearings noisy from return fittings). clean or replace cartridge. 4. Super Pump ™ Series Page 13 of 15 Low Flow - Solution: Clean the pump housing. 4. filters - Check For: 1. Vibration due to the ...
...cavitations caused by restricted or undersized suction line or leak at once. © Hayward Pool Products, Inc. 2005 All rights reserved. WWW.HAYWARDPOOL.COM USE ONLY HAYWARD GENUINE REPLACEMENT PARTS Generally, Check For: (cont'd.) 2. backwash as per manufacturer's ...pool piping. Solution: Correct piping size. 3. Air leak in pump housing. Motor bearings noisy from return fittings). clean or replace cartridge. 4. Super Pump ™ Series Page 13 of 15 Low Flow - Solution: Clean the pump housing. 4. filters - Check For: 1. Vibration due to the ...

All Super Pump models
Page 14
... workmanship for a period of ONE (1) year from defects in obtaining warranty replacements. Super Pump ™ Series ___ Page 14 of 15 HAYWARD® LIMITED WARRANTY This pump was inspected before shipment from state to state. *Supersedes all previous publications. Parts ... of the standard warranty apply. Pump housing/strainers which vary from our plant. WWW.HAYWARDPOOL.COM USE ONLY HAYWARD GENUINE REPLACEMENT PARTS For further Hayward dealer or service center information, contact Hayward customer service department. The Hayward Pool Products warranty does not apply...
... workmanship for a period of ONE (1) year from defects in obtaining warranty replacements. Super Pump ™ Series ___ Page 14 of 15 HAYWARD® LIMITED WARRANTY This pump was inspected before shipment from state to state. *Supersedes all previous publications. Parts ... of the standard warranty apply. Pump housing/strainers which vary from our plant. WWW.HAYWARDPOOL.COM USE ONLY HAYWARD GENUINE REPLACEMENT PARTS For further Hayward dealer or service center information, contact Hayward customer service department. The Hayward Pool Products warranty does not apply...

Parts Guide
Page 1
... before 1983), the use of 4) 1 14 SPX0125F Slinger 10 - Pumps Super Pump® SP1600X PUMP SERIES (MAX-RATED) REPLACEMENT PARTS Parts for 2 1/2 H.P. Qty. 1 SPX1600AA Pump Housing/Strainer, 1 1⁄2" x 1 1⁄2", with Drain Plugs 1 1 SPX1620AA Pump Housing/Strainer, 2" x 2", with Adapter and Screws 10 - SPX1600TRA Seal Assembly Kit (Includes Seal Assembly, Housing and Diffuser Gaskets) 10 4 SPX1600D Strainer Cover, Clear 10 4 SPX1600DB...
... before 1983), the use of 4) 1 14 SPX0125F Slinger 10 - Pumps Super Pump® SP1600X PUMP SERIES (MAX-RATED) REPLACEMENT PARTS Parts for 2 1/2 H.P. Qty. 1 SPX1600AA Pump Housing/Strainer, 1 1⁄2" x 1 1⁄2", with Drain Plugs 1 1 SPX1620AA Pump Housing/Strainer, 2" x 2", with Adapter and Screws 10 - SPX1600TRA Seal Assembly Kit (Includes Seal Assembly, Housing and Diffuser Gaskets) 10 4 SPX1600D Strainer Cover, Clear 10 4 SPX1600DB...

Parts Guide
Page 2
... Plug (1991 and Prior) 8 SPX1700FG 1⁄4" Drain Plug with Gasket (1992 and later) 9 SPX2600G1 Mounting Foot with Drain Plugs 2 SPX1600T Housing Gasket 3 SPX1600R Diffuser Gasket - SPXHKIT3 H-KIT Quick Pump Repair for Super Pump (includes SPX1600T, SPX1600S, SPX1600R, SPX1600Z2 and Jack's Lube) Parts listed below must be ordered for specific model and H.P.: 17 SPX2600C Impeller...
... Plug (1991 and Prior) 8 SPX1700FG 1⁄4" Drain Plug with Gasket (1992 and later) 9 SPX2600G1 Mounting Foot with Drain Plugs 2 SPX1600T Housing Gasket 3 SPX1600R Diffuser Gasket - SPXHKIT3 H-KIT Quick Pump Repair for Super Pump (includes SPX1600T, SPX1600S, SPX1600R, SPX1600Z2 and Jack's Lube) Parts listed below must be ordered for specific model and H.P.: 17 SPX2600C Impeller...


