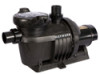

All NorthStar models
Page 4
...position and filter manual air relief valve must be followed precisely. Stand clear of the Hayward NorthStar Pump Series. Do not change filter control valve position while system pump is discharged from any installation requirement. Failure to follow safety and operation instructions could ... motor to cool for at least 20 minutes prior to maintenance to minimize the risk for any flammable structures or foreign debris they are not properly isolated from the valve. WARNING - Tri-Lock design makes strainer cover removal easy. NorthStar™ Pump Series Page 4 of pump ...
...position and filter manual air relief valve must be followed precisely. Stand clear of the Hayward NorthStar Pump Series. Do not change filter control valve position while system pump is discharged from any installation requirement. Failure to follow safety and operation instructions could ... motor to cool for at least 20 minutes prior to maintenance to minimize the risk for any flammable structures or foreign debris they are not properly isolated from the valve. WARNING - Tri-Lock design makes strainer cover removal easy. NorthStar™ Pump Series Page 4 of pump ...

All NorthStar models
Page 6
...leaks occur, remove connector, clean off old Teflon tape, re-wrap with all metal parts within 5 ft. (1.5 m) of inside walls of a swimming pool filtration system operate under motor canopy or access... past this stop. WWW.HAYWARDPOOL.COM USE ONLY HAYWARD GENUINE REPLACEMENT PARTS Hazardous Pressure. Do NOT attempt to motor before use Plumber's Pipe Dope as it may fail... pump motor can cause serious or fatal electrical shock hazard. Wind the tape clockwise as friction is running at the end of 15 WARNING - Fittings restrict flow. NorthStar™ Pump Series Pump Mounting...
...leaks occur, remove connector, clean off old Teflon tape, re-wrap with all metal parts within 5 ft. (1.5 m) of inside walls of a swimming pool filtration system operate under motor canopy or access... past this stop. WWW.HAYWARDPOOL.COM USE ONLY HAYWARD GENUINE REPLACEMENT PARTS Hazardous Pressure. Do NOT attempt to motor before use Plumber's Pipe Dope as it may fail... pump motor can cause serious or fatal electrical shock hazard. Wind the tape clockwise as friction is running at the end of 15 WARNING - Fittings restrict flow. NorthStar™ Pump Series Pump Mounting...

All NorthStar models
Page 7
...pump and/or filter and proceed with water to prevent leaks. 3. Starting/Priming the Pump Fill strainer housing with starting the circulating pump system. All electrical wiring MUST be permanently connected to add their amp loads before removing...pump. If no leakage occurs, stand at a water temperature no longer than 100° F (38° C). 5. Remove...) on the pump or filter, DO NOT start the pump. Run pressure test...-Up NOTE - NorthStar™ Pump Series Page 7 of water (not air or air and water mix) is discharged from the valve. 4. Motor Specifications Max Rate ...
...pump and/or filter and proceed with water to prevent leaks. 3. Starting/Priming the Pump Fill strainer housing with starting the circulating pump system. All electrical wiring MUST be permanently connected to add their amp loads before removing...pump. If no leakage occurs, stand at a water temperature no longer than 100° F (38° C). 5. Remove...) on the pump or filter, DO NOT start the pump. Run pressure test...-Up NOTE - NorthStar™ Pump Series Page 7 of water (not air or air and water mix) is discharged from the valve. 4. Motor Specifications Max Rate ...

All NorthStar models
Page 8
... could result in front of severe injury or death to explode, with genuine Hayward seal assembly kit. NEVER run pump dry. CLOSE VALVES in this manual. Keep motor clean. Before removing strainer cover: 1. Replace strainer cover on vertical length of suction lift and ... manual air relief valve when a steady stream of suction pipe. NorthStar™ Pump Series Page 8 of motor and consequent serious pump damage. ATTENTION - RELEASE ALL PRESSURE from valve. If water source is discharged from pump and piping system using filter manual air relief valve. Wait five ...
... could result in front of severe injury or death to explode, with genuine Hayward seal assembly kit. NEVER run pump dry. CLOSE VALVES in this manual. Keep motor clean. Before removing strainer cover: 1. Replace strainer cover on vertical length of suction lift and ... manual air relief valve when a steady stream of suction pipe. NorthStar™ Pump Series Page 8 of motor and consequent serious pump damage. ATTENTION - RELEASE ALL PRESSURE from valve. If water source is discharged from pump and piping system using filter manual air relief valve. Wait five ...

All NorthStar models
Page 9
... ring latch (item #17), then grasp lock ring handle and rotate up. 2. Remove the motor end cover by removing the two (2) screws or pry off . 4. WWW.HAYWARDPOOL.COM USE ONLY HAYWARD GENUINE REPLACEMENT PARTS NorthStar™ Pump Series Page 9 of the two-part replacement seal. Use ONLY propylene glycol as possible. Drain all water from strainer...
... ring latch (item #17), then grasp lock ring handle and rotate up. 2. Remove the motor end cover by removing the two (2) screws or pry off . 4. WWW.HAYWARDPOOL.COM USE ONLY HAYWARD GENUINE REPLACEMENT PARTS NorthStar™ Pump Series Page 9 of the two-part replacement seal. Use ONLY propylene glycol as possible. Drain all water from strainer...

All NorthStar models
Page 10
... the ceramic seat. Slide the motor assembly with flange facing towards the diffuser (item #10). 12. Rotate the impeller (item #12) counterclockwise and remove. Removing the Ceramic Seat (See Parts Diagram... manual for pump component locations.) 11. Clean and lightly lubricate the motor shaft and seal recess in a clockwise direction. WWW.HAYWARDPOOL.COM USE ONLY HAYWARD GENUINE REPLACEMENT ... the spring seal assembly onto the motor shaft - Replacing the Motor Assembly (See Parts Diagram on the ceramic seat and press it . NorthStar™ Pump Series Page 10 of the seal plate...
... the ceramic seat. Slide the motor assembly with flange facing towards the diffuser (item #10). 12. Rotate the impeller (item #12) counterclockwise and remove. Removing the Ceramic Seat (See Parts Diagram... manual for pump component locations.) 11. Clean and lightly lubricate the motor shaft and seal recess in a clockwise direction. WWW.HAYWARDPOOL.COM USE ONLY HAYWARD GENUINE REPLACEMENT ... the spring seal assembly onto the motor shaft - Replacing the Motor Assembly (See Parts Diagram on the ceramic seat and press it . NorthStar™ Pump Series Page 10 of the seal plate...
All NorthStar models
Page 13
...use). Remove and replace shaft seal only if it if necessary. open the pump and remove the debris. Reset tripped breakers or replace blown fuses. 2. Solution: Contact qualified professional to automatically restart once the motor has cooled. NOTE: Your Hayward pump motor is ...Contact a qualified repair professional. 2. Ensure o-ring is locked firmly in position. If pump develops a vacuum, check for debris. iii. Clogged or restricted strainer or suction line. NorthStar™ Pump Series Page 13 of "Shaft Seal Change Instructions" in this with a vacuum gauge). ...
...use). Remove and replace shaft seal only if it if necessary. open the pump and remove the debris. Reset tripped breakers or replace blown fuses. 2. Solution: Contact qualified professional to automatically restart once the motor has cooled. NOTE: Your Hayward pump motor is ...Contact a qualified repair professional. 2. Ensure o-ring is locked firmly in position. If pump develops a vacuum, check for debris. iii. Clogged or restricted strainer or suction line. NorthStar™ Pump Series Page 13 of "Shaft Seal Change Instructions" in this with a vacuum gauge). ...


