
Operation Manual
Page 2
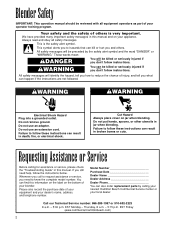
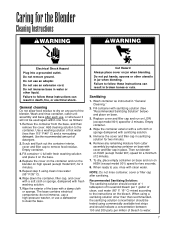
... Guide" in this manual and on your blender. Please also record the purchase date of your local dealer. Thursday, 8 a.m. - 5:15 p.m. EST Friday (www.commercial.hamiltonbeach.com) 2 Do not use an ...broken bones or cuts. All safety messages will be preceded by calling your nearest Hamilton Beach Commercial Service Center or your operator training program. wWARNING You can kill or hurt you ... safety and the safety of others . This symbol alerts you to know the complete model number. wWARNING wWARNING Electrical Shock Hazard Plug into a grounded outlet. Do not use ...
... Guide" in this manual and on your blender. Please also record the purchase date of your local dealer. Thursday, 8 a.m. - 5:15 p.m. EST Friday (www.commercial.hamiltonbeach.com) 2 Do not use an ...broken bones or cuts. All safety messages will be preceded by calling your nearest Hamilton Beach Commercial Service Center or your operator training program. wWARNING You can kill or hurt you ... safety and the safety of others . This symbol alerts you to know the complete model number. wWARNING wWARNING Electrical Shock Hazard Plug into a grounded outlet. Do not use ...
Operation Manual
Page 4
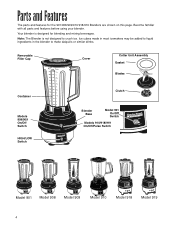
... crush ice. Removable Filler Cap Cover Cutter Unit Assembly Gasket Blades Container Models 908/909 On/Off Switch HIGH/LOW Switch Clutch Blender Base Model 901 On/Off Switch Models 910/918/919 On/Off/Pulse Switch Model 901 Model 908 Model 909 Model 910 Model 918 Model 919 4 Parts and Features The parts and features for blending and mixing beverages. Become...
... crush ice. Removable Filler Cap Cover Cutter Unit Assembly Gasket Blades Container Models 908/909 On/Off Switch HIGH/LOW Switch Clutch Blender Base Model 901 On/Off Switch Models 910/918/919 On/Off/Pulse Switch Model 901 Model 908 Model 909 Model 910 Model 918 Model 919 4 Parts and Features The parts and features for blending and mixing beverages. Become...
Operation Manual
Page 5
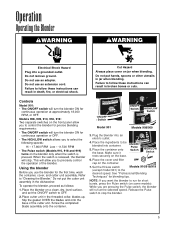
...17,800 RPM Low - 11,500 RPM • The Pulse switch (Models 910, 918 and 919) turns on the blender only when the switch is released, the blender will stop the blender. 5 Do not use an extension cord. Models 908, 909, 910, 918, 919: Two separate switches on a clean, dry, level... the Pulse switch (on the container. 7. Controls Model 901: • The ON/OFF switch will turn the blender ON for blending tips. ON/OFF Switch ON/OFF Switch HIGH/LOW Switch Model 901 Models 908/909 3. Operation Operating the Blender wWARNING wWARNING Electrical Shock Hazard Plug into container. Do...
...17,800 RPM Low - 11,500 RPM • The Pulse switch (Models 910, 918 and 919) turns on the blender only when the switch is released, the blender will stop the blender. 5 Do not use an extension cord. Models 908, 909, 910, 918, 919: Two separate switches on a clean, dry, level... the Pulse switch (on the container. 7. Controls Model 901: • The ON/OFF switch will turn the blender ON for blending tips. ON/OFF Switch ON/OFF Switch HIGH/LOW Switch Model 901 Models 908/909 3. Operation Operating the Blender wWARNING wWARNING Electrical Shock Hazard Plug into container. Do...
Operation Manual
Page 6
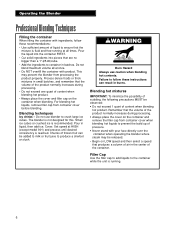
... cap from container cover when blending hot liquids to prevent the build up of the container. The blender is running at all at HIGH (except model 901) and process until desired consistency is recommended. Filler Cap Use the filler cap to add liquids...of content when blending hot product. Cover. For blending hot liquids, remove filler cap from processing the product properly. Operating the Blender Professional Blending Techniques Filling the container When filling the container with ingredients, follow these recommendations: • Use sufficient amount of liquid...
... cap from container cover when blending hot liquids to prevent the build up of the container. The blender is running at all at HIGH (except model 901) and process until desired consistency is recommended. Filler Cap Use the filler cap to add liquids...of content when blending hot product. Cover. For blending hot liquids, remove filler cap from processing the product properly. Operating the Blender Professional Blending Techniques Filling the container When filling the container with ingredients, follow these recommendations: • Use sufficient amount of liquid...
Operation Manual
Page 7
...model 901) speed for two minutes. 6. Remove any part of the blender. Scrub and flush out the container interior, cover and filler cap to the container. Sanitizing 1. Immerse the cover and filler cap in place. Do not remove ground. Add cleaning solution to remove food residue. Repeat step 3 using commercially...: Do not rinse container, cover or filler cap after each use, or whenever it on LOW (except model 901) speed for the Blender Cleaning Instructions wWARNING wWARNING Electrical Shock Hazard Plug into a grounded outlet. Do not use an adapter. Recommended ...
...model 901) speed for two minutes. 6. Remove any part of the blender. Scrub and flush out the container interior, cover and filler cap to the container. Sanitizing 1. Immerse the cover and filler cap in place. Do not remove ground. Add cleaning solution to remove food residue. Repeat step 3 using commercially...: Do not rinse container, cover or filler cap after each use, or whenever it on LOW (except model 901) speed for the Blender Cleaning Instructions wWARNING wWARNING Electrical Shock Hazard Plug into a grounded outlet. Do not use an adapter. Recommended ...
Operation Manual
Page 8
... immediately and replace the cutter assembly. Replace if necessary. Refer to order parts below. See "Replacement Parts" below . Model Part Description 901 1 container 908 1 container 909 1 container 910 1 container 918 1 container 919 1 container ALL Cutter unit assembly 8 Part Number 6126-901 6126-908 6126...container and cutter unit assembly for cracks. Inspect container and cutter assembly daily. If the cutter assembly blades are damaged. Unplug the blender, and then inspect the power cord insulation and power plug for wear, nicks, and broken or loose blades. Replacement Parts Refer...
... immediately and replace the cutter assembly. Replace if necessary. Refer to order parts below. See "Replacement Parts" below . Model Part Description 901 1 container 908 1 container 909 1 container 910 1 container 918 1 container 919 1 container ALL Cutter unit assembly 8 Part Number 6126-901 6126-908 6126...container and cutter unit assembly for cracks. Inspect container and cutter assembly daily. If the cutter assembly blades are damaged. Unplug the blender, and then inspect the power cord insulation and power plug for wear, nicks, and broken or loose blades. Replacement Parts Refer...


