
Operation Manual
Page 2
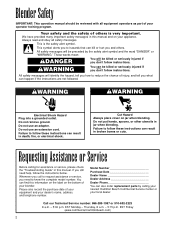
...will identify the hazard, tell you how to hazards that can find this information on the label on the bottom of your blender. Do not remove ground. Do not use an adapter. Requesting Assistance or Service Before calling for assistance or service, please ... Cut Hazard Always place cover on your operator training program. Blender Safety IMPORTANT: This operation manual should be reviewed with all safety messages. All safety messages will be preceded by calling your nearest Hamilton Beach Commercial Service Center or your dealer's name, address, and telephone ...
...will identify the hazard, tell you how to hazards that can find this information on the label on the bottom of your blender. Do not remove ground. Do not use an adapter. Requesting Assistance or Service Before calling for assistance or service, please ... Cut Hazard Always place cover on your operator training program. Blender Safety IMPORTANT: This operation manual should be reviewed with all safety messages. All safety messages will be preceded by calling your nearest Hamilton Beach Commercial Service Center or your dealer's name, address, and telephone ...
Operation Manual
Page 3
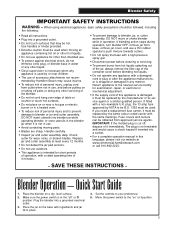
... If you need a replacement fuse carrier, it must be replaced by Hamilton Beach may be followed, including the following: • Read all instructions. • Plug into blender jar while operating blender, or store utensils in the blender jar when it immediately. Place the jar on the base with a ...Use handles or knobs provided. • Extreme caution must be used . Replace jar and cutter assembly at www.commercial.hamiltonbeach.com or call 910-692-2223. - Place the blender on " or I position. 3 Fuse covers and carriers can be used when moving parts. • Blades are...
... If you need a replacement fuse carrier, it must be replaced by Hamilton Beach may be followed, including the following: • Read all instructions. • Plug into blender jar while operating blender, or store utensils in the blender jar when it immediately. Place the jar on the base with a ...Use handles or knobs provided. • Extreme caution must be used . Replace jar and cutter assembly at www.commercial.hamiltonbeach.com or call 910-692-2223. - Place the blender on " or I position. 3 Fuse covers and carriers can be used when moving parts. • Blades are...
Operation Manual
Page 4
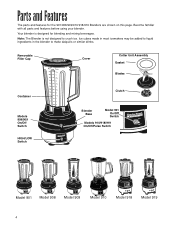
... crush ice. Become familiar with all parts and features before using your blender. Removable Filler Cap Cover Cutter Unit Assembly Gasket Blades Container Models 908/909 On/Off Switch HIGH/LOW Switch Clutch Blender Base Model 901 On/Off Switch Models 910/918/919 On/Off/Pulse Switch Model 901 Model... 908 Model 909 Model 910 Model 918 Model 919 4 Parts and Features The ...
... crush ice. Become familiar with all parts and features before using your blender. Removable Filler Cap Cover Cutter Unit Assembly Gasket Blades Container Models 908/909 On/Off Switch HIGH/LOW Switch Clutch Blender Base Model 901 On/Off Switch Models 910/918/919 On/Off/Pulse Switch Model 901 Model... 908 Model 909 Model 910 Model 918 Model 919 4 Parts and Features The ...
Operation Manual
Page 5
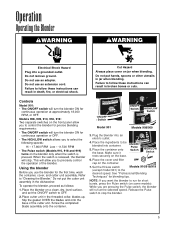
...electrical shock. When the switch is pressed. ON/OFF Switch ON/OFF Switch HIGH/LOW Switch Model 901 Models 908/909 3. ON/OFF/ Pulse 5. HIGH/LOW Switch 6. NOTE: If you want the blender to OFF. 2. Controls Model 901: • The ON/OFF switch will run for blending tips. Refer to... to precisely control the operation of the cutter unit. Slip the gasket OVER the blades and onto the base of the blender. Place the container onto Switch the base. Models 908, 909, 910, 918, 919: Two separate switches on the front panel allow you are pressing the Pulse switch, the...
...electrical shock. When the switch is pressed. ON/OFF Switch ON/OFF Switch HIGH/LOW Switch Model 901 Models 908/909 3. ON/OFF/ Pulse 5. HIGH/LOW Switch 6. NOTE: If you want the blender to OFF. 2. Controls Model 901: • The ON/OFF switch will run for blending tips. Refer to... to precisely control the operation of the cutter unit. Slip the gasket OVER the blades and onto the base of the blender. Place the container onto Switch the base. Models 908, 909, 910, 918, 919: Two separate switches on the front panel allow you are pressing the Pulse switch, the...
Operation Manual
Page 6
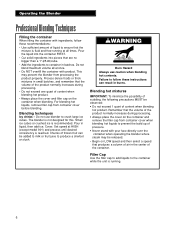
...fluid and free-running . 6 Blending techniques Icy drinks - Do not blend maximum volume all times. wWARNING Burn Hazard Always use blender to container in liquid, then add ice. Pour the liquid into the container FIRST. • Cut solid ingredients into pieces ... is reached. For blending hot liquids, remove filler cap from processing the product properly. Pour in batches. The blender is recommended. Operating the Blender Professional Blending Techniques Filling the container When filling the container with ingredients, follow these recommendations: • Use sufficient ...
...fluid and free-running . 6 Blending techniques Icy drinks - Do not blend maximum volume all times. wWARNING Burn Hazard Always use blender to container in liquid, then add ice. Pour the liquid into the container FIRST. • Cut solid ingredients into pieces ... is reached. For blending hot liquids, remove filler cap from processing the product properly. Pour in batches. The blender is recommended. Operating the Blender Professional Blending Techniques Filling the container When filling the container with ingredients, follow these recommendations: • Use sufficient ...
Operation Manual
Page 7
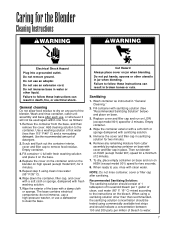
...rinse with fresh washing solution and place it will not be tested using commercially available test strips and should be used again within one hour, as instructed in sanitizing solution for the Blender Cleaning Instructions wWARNING wWARNING Electrical Shock Hazard Plug into a grounded outlet. Wipe...minutes. 5. Then run on HiGH (except model 901) speed for two seconds. 8. To dry, place empty container on base and run blender on HIGH (except model 901) speed for a minimum of hot water (less than that recommended, the sanitizing solution concentration should indicate a ...
...rinse with fresh washing solution and place it will not be tested using commercially available test strips and should be used again within one hour, as instructed in sanitizing solution for the Blender Cleaning Instructions wWARNING wWARNING Electrical Shock Hazard Plug into a grounded outlet. Wipe...minutes. 5. Then run on HiGH (except model 901) speed for two seconds. 8. To dry, place empty container on base and run blender on HIGH (except model 901) speed for a minimum of hot water (less than that recommended, the sanitizing solution concentration should indicate a ...
Operation Manual
Page 8
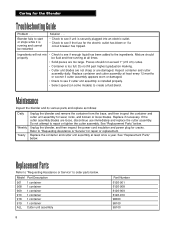
...if unit is too full. Model Part Description 901 1 container 908 1 container 909 1 container 910 1 container 918 1 container 919 1 container ALL Cutter unit assembly 8 Part Number 6126-901 6126-908 6126-909 6126-910 98000 98100 99100 Inspect container and cutter assembly daily. Do not fill ...assembly at least once a year. Replacement Parts Refer to "Requesting Assistance or Service" to repair or tighten the cutter assembly. Unplug the blender, and then inspect the power cord insulation and power plug for repair or replacement. Caring for wear, nicks, and broken or loose blades...
...if unit is too full. Model Part Description 901 1 container 908 1 container 909 1 container 910 1 container 918 1 container 919 1 container ALL Cutter unit assembly 8 Part Number 6126-901 6126-908 6126-909 6126-910 98000 98100 99100 Inspect container and cutter assembly daily. Do not fill ...assembly at least once a year. Replacement Parts Refer to "Requesting Assistance or Service" to repair or tighten the cutter assembly. Unplug the blender, and then inspect the power cord insulation and power plug for repair or replacement. Caring for wear, nicks, and broken or loose blades...


