Operation Manual
Page 3
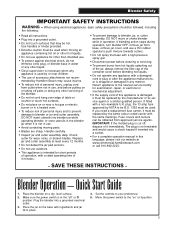
...power before cleaning or servicing. • To prevent burns from hot liquids splashing out of the jar, always remove the filler cap of 3 minutes. • To prevent damage to blender or jar and cutter assembly, DO NOT insert utensils into a socket. • For a complete operation manual in place.... at www.commercial.hamiltonbeach.com or call 910-692-2223. - Fuse covers and carriers can be obtained from outlet when not in use outdoors. • This appliance is not in any other liquid. • Close supervision is necessary when any appliance is used by Hamilton Beach may be ...
...power before cleaning or servicing. • To prevent burns from hot liquids splashing out of the jar, always remove the filler cap of 3 minutes. • To prevent damage to blender or jar and cutter assembly, DO NOT insert utensils into a socket. • For a complete operation manual in place.... at www.commercial.hamiltonbeach.com or call 910-692-2223. - Fuse covers and carriers can be obtained from outlet when not in use outdoors. • This appliance is not in any other liquid. • Close supervision is necessary when any appliance is used by Hamilton Beach may be ...
Operation Manual
Page 4
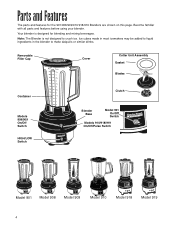
...all parts and features before using your blender. Removable Filler Cap Cover Cutter Unit Assembly Gasket Blades Container Models 908/909 On/Off Switch HIGH/LOW Switch Clutch Blender Base Model 901 On/Off Switch Models 910/918/919 On/Off/Pulse Switch Model 901 Model 908 Model 909 Model 910 Model 918 Model... 919 4 Ice cubes made in most icemakers may be added to liquid ingredients in the blender to crush ice. Parts and Features The parts and features for blending and...
...all parts and features before using your blender. Removable Filler Cap Cover Cutter Unit Assembly Gasket Blades Container Models 908/909 On/Off Switch HIGH/LOW Switch Clutch Blender Base Model 901 On/Off Switch Models 910/918/919 On/Off/Pulse Switch Model 901 Model 908 Model 909 Model 910 Model 918 Model... 919 4 Ice cubes made in most icemakers may be added to liquid ingredients in the blender to crush ice. Parts and Features The parts and features for blending and...
Operation Manual
Page 5
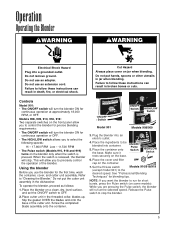
..., or electrical shock. Slip the gasket OVER the blades and onto the base of the blender. Place the cover and filler cap on jar when blending. Do not use an extension cord. To operate the blender, proceed as follows: 1. ON/OFF Switch ON/OFF Switch HIGH/LOW Switch Model 901 ...Models 908/909 3. Set the Hi/Low switch Models 910/918/919 (except model 901) to "Cleaning the Blender." Release the...
..., or electrical shock. Slip the gasket OVER the blades and onto the base of the blender. Place the cover and filler cap on jar when blending. Do not use an extension cord. To operate the blender, proceed as follows: 1. ON/OFF Switch ON/OFF Switch HIGH/LOW Switch Model 901 ...Models 908/909 3. Set the Hi/Low switch Models 910/918/919 (except model 901) to "Cleaning the Blender." Release the...
Operation Manual
Page 6
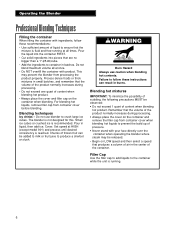
... running at all at HIGH (except model 901) and process until desired consistency is recommended. Operating the Blender Professional Blending Techniques Filling the container When filling the container with ingredients, follow these recommendations: • Use...blender from container cover before blending. Do not use caution when blending hot contents. Blending hot mixtures IMPORTANT: To minimize the possibility of scalding, the following precautions MUST be observed: • Do not exceed 1 quart of content when blending hot product. • Always place the cover and filler cap...
... running at all at HIGH (except model 901) and process until desired consistency is recommended. Operating the Blender Professional Blending Techniques Filling the container When filling the container with ingredients, follow these recommendations: • Use...blender from container cover before blending. Do not use caution when blending hot contents. Blending hot mixtures IMPORTANT: To minimize the possibility of scalding, the following precautions MUST be observed: • Do not exceed 1 quart of content when blending hot product. • Always place the cover and filler cap...
Operation Manual
Page 7
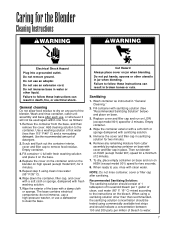
... 2 minutes. 5. To dry, place empty container on base and run on the base. 4. NOTE: Do not rinse container, cover or filler cap after each use, or whenever it on LOW (except model 901) speed for two seconds. 8. Failure to clean the base. Remove any part ...-pressure washer, or use , rinse with fresh washing solution and place it will not be tested using commercially available test strips and should consist of 1 tablespoon of household bleach per million of the blender. Fill container with fresh washing solution. 7. When using clean rinse water (95° F/35°...
... 2 minutes. 5. To dry, place empty container on base and run on the base. 4. NOTE: Do not rinse container, cover or filler cap after each use, or whenever it on LOW (except model 901) speed for two seconds. 8. Failure to clean the base. Remove any part ...-pressure washer, or use , rinse with fresh washing solution and place it will not be tested using commercially available test strips and should consist of 1 tablespoon of household bleach per million of the blender. Fill container with fresh washing solution. 7. When using clean rinse water (95° F/35°...


