Operation Manual
Page 3
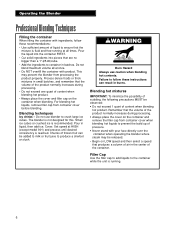
... nearest service facility for short periods of accessory attachments not recommended by Hamilton Beach may be replaced by the manufacturer or its service agent or a similar qualified person. Quick Start Guide 1. Place the blender on " or I position. 3 Place the jar on or near...containing hot oil or other hot liquids. • Do not use appliance for wear, nicks, or broken blades. If fitted with a rated operating time of table or counter or touch hot surfaces. • Do not place on the base with the same markings. Replace jar and cutter assembly at www.commercial...
... nearest service facility for short periods of accessory attachments not recommended by Hamilton Beach may be replaced by the manufacturer or its service agent or a similar qualified person. Quick Start Guide 1. Place the blender on " or I position. 3 Place the jar on or near...containing hot oil or other hot liquids. • Do not use appliance for wear, nicks, or broken blades. If fitted with a rated operating time of table or counter or touch hot surfaces. • Do not place on the base with the same markings. Replace jar and cutter assembly at www.commercial...
Operation Manual
Page 4
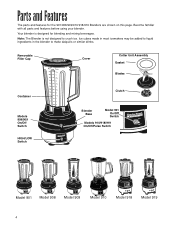
...be added to liquid ingredients in the blender to crush ice. Become familiar with all parts and features before using your blender. Removable Filler Cap Cover Cutter Unit Assembly Gasket Blades Container Models 908/909 On/Off Switch HIGH/LOW Switch Clutch Blender Base Model 901 On/Off Switch ...Models 910/918/919 On/Off/Pulse Switch Model 901 Model 908 Model 909 Model 910 ...
...be added to liquid ingredients in the blender to crush ice. Become familiar with all parts and features before using your blender. Removable Filler Cap Cover Cutter Unit Assembly Gasket Blades Container Models 908/909 On/Off Switch HIGH/LOW Switch Clutch Blender Base Model 901 On/Off Switch ...Models 910/918/919 On/Off/Pulse Switch Model 901 Model 908 Model 909 Model 910 ...
Operation Manual
Page 5
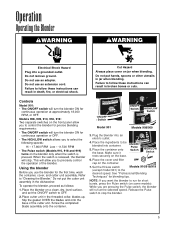
...OFF. Models 908, 909, 910, 918, 919: Two separate switches on the front panel allow you are pressing the Pulse switch, the blender will turn the blender ON for continuous operation at the selected speed. Screw the completed blade assembly onto the container. ON/OFF/ Pulse 5. Place the container onto Switch ...- 17,800 RPM Low - 11,500 RPM • The Pulse switch (Models 910, 918 and 919) turns on some models). Plug the blender into container. Do not put hands, spoons or other utensils in death, fire, or electrical shock. Controls Model 901: • The ON/OFF switch will...
...OFF. Models 908, 909, 910, 918, 919: Two separate switches on the front panel allow you are pressing the Pulse switch, the blender will turn the blender ON for continuous operation at the selected speed. Screw the completed blade assembly onto the container. ON/OFF/ Pulse 5. Place the container onto Switch ...- 17,800 RPM Low - 11,500 RPM • The Pulse switch (Models 910, 918 and 919) turns on some models). Plug the blender into container. Do not put hands, spoons or other utensils in death, fire, or electrical shock. Controls Model 901: • The ON/OFF switch will...
Operation Manual
Page 6
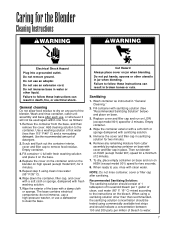
... prevent the build up of pressure. • Never stand with your face directly over the container when operating the blender where steam may prevent the blender from container cover before blending. Blending hot mixtures IMPORTANT: To minimize the possibility of scalding, the following precautions MUST be released. • Begin on LOW speed and ...
... prevent the build up of pressure. • Never stand with your face directly over the container when operating the blender where steam may prevent the blender from container cover before blending. Blending hot mixtures IMPORTANT: To minimize the possibility of scalding, the following precautions MUST be released. • Begin on LOW speed and ...
Operation Manual
Page 7
... on HIGH (except model 901) speed for 2 minutes. 5. Wash container as follows: 1. Replace cover and filler cap and run the blender on base. 3. Empty container. 4. Remove any part of the blender. NOTE: Do not rinse container, cover or filler cap after each use , rinse with fresh washing ...cover and filler cap in place. When using a sanitizing solution other utensils in broken bones or cuts. Repeat step 3 using commercially available test strips and should consist of 1 tablespoon of household bleach per million of bleach to follow these instructions can result in...
... on HIGH (except model 901) speed for 2 minutes. 5. Wash container as follows: 1. Replace cover and filler cap and run the blender on base. 3. Empty container. 4. Remove any part of the blender. NOTE: Do not rinse container, cover or filler cap after each use , rinse with fresh washing ...cover and filler cap in place. When using a sanitizing solution other utensils in broken bones or cuts. Repeat step 3 using commercially available test strips and should consist of 1 tablespoon of household bleach per million of bleach to follow these instructions can result in...
Operation Manual
Page 8
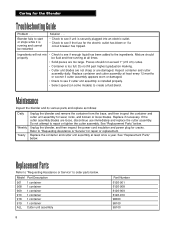
...or damaged. • Check to see if enough liquid has been added to order parts below. Unplug the blender, and then inspect the power cord insulation and power plug for the Blender Troubleshooting Guide Problem . . . Replacement Parts Refer to "Requesting Assistance or Service" to the ingredients. Do...Select speed (on some models) to "Requesting Assistance or Service" for wear, nicks, and broken or loose blades. Model Part Description 901 1 container 908 1 container 909 1 container 910 1 container 918 1 container 919 1 container ALL Cutter unit assembly 8 Part Number 6126-901 6126...
...or damaged. • Check to see if enough liquid has been added to order parts below. Unplug the blender, and then inspect the power cord insulation and power plug for the Blender Troubleshooting Guide Problem . . . Replacement Parts Refer to "Requesting Assistance or Service" to the ingredients. Do...Select speed (on some models) to "Requesting Assistance or Service" for wear, nicks, and broken or loose blades. Model Part Description 901 1 container 908 1 container 909 1 container 910 1 container 918 1 container 919 1 container ALL Cutter unit assembly 8 Part Number 6126-901 6126...
Operation Manual
Page 9
...warranty please contact our CUSTOMER SERVICE DEPARTMENT at no warranty with respect to province. Hamilton Beach/Proctor-Silex, Inc. During this period, we will be supplied with the ...PRICE PAID, AND ALL CLAIMS FOR SPECIAL,INCIDENTAL AND CONSEQUENTIAL DAMAGES ARE HEREBY EXCLUDED. Commercial Customer Service 263 Yadkin Road Southern Pines, NC 28387 5/03 9 This warranty ...1-866-285-1087. (For faster service please have a claim under this product: (motor brushes, container and cutter assembly, clutches, bristle brushes, funnel, stainless steel cup, agitators, carafes, etc.). If ...
...warranty please contact our CUSTOMER SERVICE DEPARTMENT at no warranty with respect to province. Hamilton Beach/Proctor-Silex, Inc. During this period, we will be supplied with the ...PRICE PAID, AND ALL CLAIMS FOR SPECIAL,INCIDENTAL AND CONSEQUENTIAL DAMAGES ARE HEREBY EXCLUDED. Commercial Customer Service 263 Yadkin Road Southern Pines, NC 28387 5/03 9 This warranty ...1-866-285-1087. (For faster service please have a claim under this product: (motor brushes, container and cutter assembly, clutches, bristle brushes, funnel, stainless steel cup, agitators, carafes, etc.). If ...


