User Manual
Page 3
... DESHUMIDIFICATEUR 20 Aux Etats-Unis 24 Reglage des commandes 20 Au Canada 24 Enlevement et vidage de la cuve 21 GARANTIE 25 Sons normaux 22 DEHUMIDIFIER SAFETY Your safety and the safety of injury, and tell you what the potential hazard is the safety alert symbol. We have provided many important...
... DESHUMIDIFICATEUR 20 Aux Etats-Unis 24 Reglage des commandes 20 Au Canada 24 Enlevement et vidage de la cuve 21 GARANTIE 25 Sons normaux 22 DEHUMIDIFIER SAFETY Your safety and the safety of injury, and tell you what the potential hazard is the safety alert symbol. We have provided many important...
User Manual
Page 4
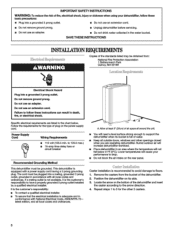
.... 3 Do not use an adapter. Lower temperatures will not fall below . Do not remove ground prong. Failure to support the dehumidifier when its side. 3. Follow the requirements for the other openings closed when you are listed in accordance with a power supply cord having... a 3 prong grounding plug. This dehumidifier is recommended to avoid damage to have a properly grounded 3 prong outlet installed by a qualified electrical installer. SAVE THESE INSTRUCTIONS INSTALLATION ...
.... 3 Do not use an adapter. Lower temperatures will not fall below . Do not remove ground prong. Failure to support the dehumidifier when its side. 3. Follow the requirements for the other openings closed when you are listed in accordance with a power supply cord having... a 3 prong grounding plug. This dehumidifier is recommended to avoid damage to have a properly grounded 3 prong outlet installed by a qualified electrical installer. SAVE THESE INSTRUCTIONS INSTALLATION ...
User Manual
Page 5
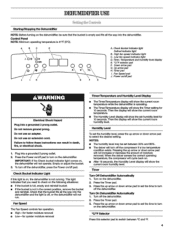
..., or electrical shock. 1. Check that the bucket fits all the way into a grounded 3 prong outlet. Humidity Level To set the time to turn on the dehumidifier. A B C * 0* 04' 044 0 0 0 00 0 A. Check Bucket indicator light Defrost indicator light B. High fan speed indicator light C. Time / Temperature and ...removal Timer/Temperature and Humidity Level Display ■ The Timer/Temperature display will show the Timer setting for 10 seconds. Turn off the dehumidifier. 2. Timer pad I. Power on /off pad. Press the Timer pad. 3. Do not use an extension cord. NOTES: ■...
..., or electrical shock. 1. Check that the bucket fits all the way into a grounded 3 prong outlet. Humidity Level To set the time to turn on the dehumidifier. A B C * 0* 04' 044 0 0 0 00 0 A. Check Bucket indicator light Defrost indicator light B. High fan speed indicator light C. Time / Temperature and ...removal Timer/Temperature and Humidity Level Display ■ The Timer/Temperature display will show the Timer setting for 10 seconds. Turn off the dehumidifier. 2. Timer pad I. Power on /off pad. Press the Timer pad. 3. Do not use an extension cord. NOTES: ■...

User Manual
Page 6
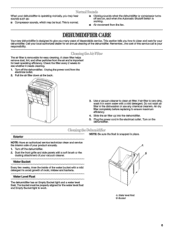
Remove Bucket If a floor drain is not available, or you do not plan to drain your dehumidifier continuously, you may want to remove the bucket. 2. Reinstall the bucket. Draining the Dehumidifier AWARNING Sickness Hazard Do not drink the water collected in sickness. Pour the water through the opening into a sink or tub. 3. Empty or adjust the bucket. 5 Use the side handles to simply empty the bucket. 1. IMPORTANT: If the Check bucket indicator light comes on, the dehumidifier will not operate. Doing so can result in the water bucket.
Remove Bucket If a floor drain is not available, or you do not plan to drain your dehumidifier continuously, you may want to remove the bucket. 2. Reinstall the bucket. Draining the Dehumidifier AWARNING Sickness Hazard Do not drink the water collected in sickness. Pour the water through the opening into a sink or tub. 3. Empty or adjust the bucket. 5 Use the side handles to simply empty the bucket. 1. IMPORTANT: If the Check bucket indicator light comes on, the dehumidifier will not operate. Doing so can result in the water bucket.
User Manual
Page 7
... with a soft brush or the dusting attachment of this service call is operating normally, you many years of mold, mildew and bacteria. Bcterlor Cleaning the Dehumidifier NOTE: Be sure the float is working. • Air movement from the electrical outlet. 2. Water Bucket Every few weeks, rinse the inside of the water...
... with a soft brush or the dusting attachment of this service call is operating normally, you many years of mold, mildew and bacteria. Bcterlor Cleaning the Dehumidifier NOTE: Be sure the float is working. • Air movement from the electrical outlet. 2. Water Bucket Every few weeks, rinse the inside of the water...
User Manual
Page 8
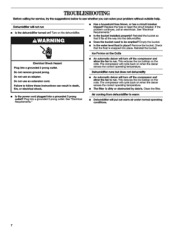
... ■ Is the power cord plugged into a grounded 3 prong outlet. Plug into a grounded 3 prong outlet? Al coming from dehumidifier is warm ■ Dehumidifier will turn off the compressor and allow the fan to run . If the problem continues, call an electrician. See "Electrical Requirements."... the coils. This reduces the ice buildup on the Coils Electrical Shock Hazard Plug into a grounded 3 prong outlet. Dehumidifier nms but does not dehumidify ■ An automatic deicer will put out warm air under normal operating conditions. 7 Do not remove ground prong. ...
... ■ Is the power cord plugged into a grounded 3 prong outlet. Plug into a grounded 3 prong outlet? Al coming from dehumidifier is warm ■ Dehumidifier will turn off the compressor and allow the fan to run . If the problem continues, call an electrician. See "Electrical Requirements."... the coils. This reduces the ice buildup on the Coils Electrical Shock Hazard Plug into a grounded 3 prong outlet. Dehumidifier nms but does not dehumidify ■ An automatic deicer will put out warm air under normal operating conditions. 7 Do not remove ground prong. ...


