User Manual
Page 2
... panels are broken. 13. The wall receptacle MUST be explosive and can explode under certain circumstances. Use only detergents recommended for commercial dishwashing purpose. 14. Do not operate your appliance before cleaning or before making any flammable or explosive substances to the wash. 11. If.... This will reduce the possibility of children is necessary when the appliance is the case, before using this appliance turn on all instructions before it is not being used near children. 17. Always grasp the plug firmly and pull straight out from the outlet. 6. GB...
... panels are broken. 13. The wall receptacle MUST be explosive and can explode under certain circumstances. Use only detergents recommended for commercial dishwashing purpose. 14. Do not operate your appliance before cleaning or before making any flammable or explosive substances to the wash. 11. If.... This will reduce the possibility of children is necessary when the appliance is the case, before using this appliance turn on all instructions before it is not being used near children. 17. Always grasp the plug firmly and pull straight out from the outlet. 6. GB...

User Manual
Page 3
... record the model and serial number. Remember to dry dishware while children are not designed for auto matic dishwasher. 24. GB faucets and let the hot water run for purchasing our Haier product. Do not repair or replace any part of the appliance or attempt any other items that you...is being discharged from the back vent. 23. Do not wash any heat sensitive or any servicing unless specifically recommended in the user-repair instructions that are around the dishwasher. Before you for a few minutes. This easy-to carry out. 21. They are around the counter top. During this...
... record the model and serial number. Remember to dry dishware while children are not designed for auto matic dishwasher. 24. GB faucets and let the hot water run for purchasing our Haier product. Do not repair or replace any part of the appliance or attempt any other items that you...is being discharged from the back vent. 23. Do not wash any heat sensitive or any servicing unless specifically recommended in the user-repair instructions that are around the dishwasher. Before you for a few minutes. This easy-to carry out. 21. They are around the counter top. During this...
User Manual
Page 4
GB Table Of Contents PAGE SAFETY INSTRUCTIONS 1 OPERATING INSTRUCTIONS 4 Parts and Features 4 Operations ...7 Tips to Avoid Stains and Films 14 Care and Cleaning Guide 15 General Cleaning and Maintenance 15 Preventing Your Dishwasher From Freezing 16 Storage of your Dishwasher in Cold Environment 16 Troubleshooting 17 INSTALLATION INSTRUCTIONS 21 Tools and Materials Required 21 Unpacking Your Dishwasher 21 Steps for Installation 21 Electrical Connections 23 Grounding Instructions 23 Power Interruptions 23 Warranty 24 3
GB Table Of Contents PAGE SAFETY INSTRUCTIONS 1 OPERATING INSTRUCTIONS 4 Parts and Features 4 Operations ...7 Tips to Avoid Stains and Films 14 Care and Cleaning Guide 15 General Cleaning and Maintenance 15 Preventing Your Dishwasher From Freezing 16 Storage of your Dishwasher in Cold Environment 16 Troubleshooting 17 INSTALLATION INSTRUCTIONS 21 Tools and Materials Required 21 Unpacking Your Dishwasher 21 Steps for Installation 21 Electrical Connections 23 Grounding Instructions 23 Power Interruptions 23 Warranty 24 3

User Manual
Page 5
door 4 door latch (to lock / unlock the door) 6. dry indicator light 3. wash cycle select buttons (normal / heavy / rinse et hold) 4. wash indicator light 5. on/off button 2. GB OPERATING INSTRUCTIONS Parts and Features OPEN CLOSE 6 5 1 4 HDT18PA ON OFF 2 Vented Dry Rinse Hold Normal Heavy 3 1.
door 4 door latch (to lock / unlock the door) 6. dry indicator light 3. wash cycle select buttons (normal / heavy / rinse et hold) 4. wash indicator light 5. on/off button 2. GB OPERATING INSTRUCTIONS Parts and Features OPEN CLOSE 6 5 1 4 HDT18PA ON OFF 2 Vented Dry Rinse Hold Normal Heavy 3 1.
User Manual
Page 22
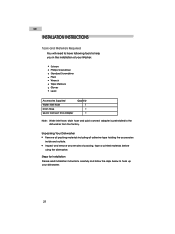
Steps for Installation Please read installation instructions carefully and follow the steps below to the dishwasher from the factory. Inspect and remove any remains of your Washer: Scissors Phillips Screwdriver Standard Screwdriver Pliers Wrench Tape Measure Gloves Level ... Connect Sink Adapter Quantity 1 1 1 Note: Water Inlet hose, drain hose and quick connect adapter is preinstalled to hook up your dishwasher. 21 GB INSTALLATION INSTRUCTIONS Tools and Materials Required You will need to have following tools to help you in the installation of packing, tape or printed materials before...
Steps for Installation Please read installation instructions carefully and follow the steps below to the dishwasher from the factory. Inspect and remove any remains of your Washer: Scissors Phillips Screwdriver Standard Screwdriver Pliers Wrench Tape Measure Gloves Level ... Connect Sink Adapter Quantity 1 1 1 Note: Water Inlet hose, drain hose and quick connect adapter is preinstalled to hook up your dishwasher. 21 GB INSTALLATION INSTRUCTIONS Tools and Materials Required You will need to have following tools to help you in the installation of packing, tape or printed materials before...
User Manual
Page 23
.... Inspect carefully for illustration purpose only. You may need to see if any connections are unsure that it is supplied) 3. You dishwasher must be installed by the sink on the kitchen bench (countertop). If any leak occurs, double check to tighten any water leak ...(Quick Connect Sink Adapter is recommended that unit is for any loose connections. 22 GB Installing Your Dishwasher: Read install instructions carefully before installation. The other end of the dishwasher. 1. Both hoses are located behind the dish washer at your convenience, the water inlet hose and ...
.... Inspect carefully for illustration purpose only. You may need to see if any connections are unsure that it is supplied) 3. You dishwasher must be installed by the sink on the kitchen bench (countertop). If any leak occurs, double check to tighten any water leak ...(Quick Connect Sink Adapter is recommended that unit is for any loose connections. 22 GB Installing Your Dishwasher: Read install instructions carefully before installation. The other end of the dishwasher. 1. Both hoses are located behind the dish washer at your convenience, the water inlet hose and ...
User Manual
Page 24
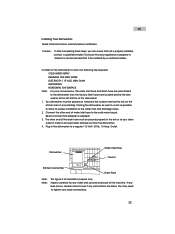
...the middle of electric shock. The drain hose should be plugged into an outlet that you use an extension cord. Electrical Connections Grounding Instructions This appliance must be positioned above the drain in a risk of the cycle. If the drain hose is the personal responsibilityand obligation... When power has been restored re-plug power cord to whether the appliance is properly grounded. GB Understanding the Drain Hose Hook Up: Your dishwasher is equipped with a grounded plug. Note: Where a standard two-prong outlet is encountered,it is bent or shrunken, it again. 23 ...
...the middle of electric shock. The drain hose should be plugged into an outlet that you use an extension cord. Electrical Connections Grounding Instructions This appliance must be positioned above the drain in a risk of the cycle. If the drain hose is the personal responsibilityand obligation... When power has been restored re-plug power cord to whether the appliance is properly grounded. GB Understanding the Drain Hose Hook Up: Your dishwasher is equipped with a grounded plug. Note: Where a standard two-prong outlet is encountered,it is bent or shrunken, it again. 23 ...