User Manual
Page 3
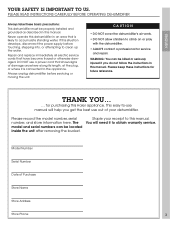
... develops, disconnect the power supply before servicing or moving the unit. Never operate this manual. If this Haier appliance. This easy-to-use manual will need it is likely to the appliance. PLEASE READ INSTRUCTIONS CAREFULLY BEFORE OPERATING DEHUMIDIFIER Always take these instructions for service and repair. Repair and replace immediately all electric service...
... develops, disconnect the power supply before servicing or moving the unit. Never operate this manual. If this Haier appliance. This easy-to-use manual will need it is likely to the appliance. PLEASE READ INSTRUCTIONS CAREFULLY BEFORE OPERATING DEHUMIDIFIER Always take these instructions for service and repair. Repair and replace immediately all electric service...
User Manual
Page 4
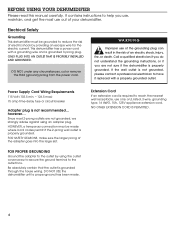
...not grounded, we strongly advise against using the outlet cover screw to secure the ground terminal to reduce the risk of your dehumidifier. HOWEVER, a temporary connection may be grounded to the outlet box. NO OTHER EXTENSION CORD IS PERMITTED. 4 Be absolutely certain... the outlet is not recommended... It contains instructions to have it replaced with a grounding wire and a grounded 3-prong plug. BEFORE USING YOUR DEHUMIDIFIER Please read this manual carefully. WA R N I N G Improper use only a UL-listed, 3-wire, grounding type, 16 AWG, 15A, 125V appliance extension ...
...not grounded, we strongly advise against using the outlet cover screw to secure the ground terminal to reduce the risk of your dehumidifier. HOWEVER, a temporary connection may be grounded to the outlet box. NO OTHER EXTENSION CORD IS PERMITTED. 4 Be absolutely certain... the outlet is not recommended... It contains instructions to have it replaced with a grounding wire and a grounded 3-prong plug. BEFORE USING YOUR DEHUMIDIFIER Please read this manual carefully. WA R N I N G Improper use only a UL-listed, 3-wire, grounding type, 16 AWG, 15A, 125V appliance extension ...

User Manual
Page 6
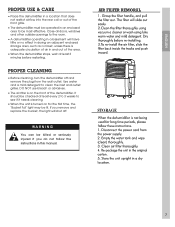
...humidity of the surrounding air. Wait a few minutes to allow the water to lift and remove the bucket. 4. Attach a standard garden hose 6 Empty the bucket manually When the water bucket is tightened before operating the unit. 2. Empty water through opening into a sink or tub. 5. IMPORTANT Make sure the drain cap is...1. Reinstall bucket. Use both side handles to stop dripping. 3. PROPER USE & CARE It is normal for the surrounding air to become slightly warmer as the dehumidifier operates. THERE ARE TWO WAYS TO REMOVE WATER FROM THE BUCKET: 1. YOU MUST turn the POWER off. 2.
...humidity of the surrounding air. Wait a few minutes to allow the water to lift and remove the bucket. 4. Attach a standard garden hose 6 Empty the bucket manually When the water bucket is tightened before operating the unit. 2. Empty water through opening into a sink or tub. 5. IMPORTANT Make sure the drain cap is...1. Reinstall bucket. Use both side handles to stop dripping. 3. PROPER USE & CARE It is normal for the surrounding air to become slightly warmer as the dehumidifier operates. THERE ARE TWO WAYS TO REMOVE WATER FROM THE BUCKET: 1. YOU MUST turn the POWER off. 2.
User Manual
Page 7
DO NOT use bleach or abrasives. • The air filter is turned on the front of the dehumidifier. It should be lit. If you do not follow the instructions in this manual. WA R N I N G You can be most effective. Use water and a mild detergent to see if it needs cleaning. • When the unit...
DO NOT use bleach or abrasives. • The air filter is turned on the front of the dehumidifier. It should be lit. If you do not follow the instructions in this manual. WA R N I N G You can be most effective. Use water and a mild detergent to see if it needs cleaning. • When the unit...


