
Use and Care Manual
Page 1
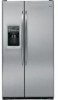
Profile Side by Side Refrigerators ge.com Safety Instructions 2-4 Operating Instructions Automatic Icemaker 14 Care and Cleaning 16, 17 ClimateKeeper2 6 Crispers and Pans 13 CustomCool 7, 8 Ice and Water Dispenser 15-16 QuickFreeze 9 Quick Ice 15 Refrigerator Doors 12 Replacing the Light ...Shelves and Bins 10, 11 Temperature Controls 5 TurboCool 6 Water Filter 9 Installation Instructions Installing the Refrigerator 28-31 Moving the Refrigerator 24-27 Preparing to Install the Refrigerator 23 Trim Kits and Panels 19-22 Water Line Installation 32-34 Troubleshooting Tips . . ....
Profile Side by Side Refrigerators ge.com Safety Instructions 2-4 Operating Instructions Automatic Icemaker 14 Care and Cleaning 16, 17 ClimateKeeper2 6 Crispers and Pans 13 CustomCool 7, 8 Ice and Water Dispenser 15-16 QuickFreeze 9 Quick Ice 15 Refrigerator Doors 12 Replacing the Light ...Shelves and Bins 10, 11 Temperature Controls 5 TurboCool 6 Water Filter 9 Installation Instructions Installing the Refrigerator 28-31 Moving the Refrigerator 24-27 Preparing to Install the Refrigerator 23 Trim Kits and Panels 19-22 Water Line Installation 32-34 Troubleshooting Tips . . ....

Use and Care Manual
Page 2
...in the vicinity of the icemaker. SAFETY PRECAUTIONS When using electrical appliances, basic safety precautions should be followed, including the following: s This refrigerator must be performed by a qualified individual. s Do not allow children to the light circuit. Skin may stick to the light circuit. Be...Do not place fingers or hands on the shelves in the freezer compartment when hands are damp or wet. They could damage the refrigerator and seriously injure themselves. clearances between the doors and between the doors and cabinet are in . s Non-LCD models: Setting either...
...in the vicinity of the icemaker. SAFETY PRECAUTIONS When using electrical appliances, basic safety precautions should be followed, including the following: s This refrigerator must be performed by a qualified individual. s Do not allow children to the light circuit. Skin may stick to the light circuit. Be...Do not place fingers or hands on the shelves in the freezer compartment when hands are damp or wet. They could damage the refrigerator and seriously injure themselves. clearances between the doors and between the doors and cabinet are in . s Non-LCD models: Setting either...

Use and Care Manual
Page 3
...company handling the disposal about what to do. Refrigerants All refrigeration products contain refrigerants, which under certain conditions, we strongly recommend ... sit for "just a few days." However, if you are not problems of your old refrigerator, please follow the instructions below to product disposal. Installation Instructions Troubleshooting Tips Consumer Support 3 s...volts. Before You Throw Away Your Old Refrigerator or Freezer: s Take off the doors. RISK OF CHILD ENTRAPMENT PROPER DISPOSAL OF THE REFRIGERATOR Child entrapment and suffocation are getting rid of...
...company handling the disposal about what to do. Refrigerants All refrigeration products contain refrigerants, which under certain conditions, we strongly recommend ... sit for "just a few days." However, if you are not problems of your old refrigerator, please follow the instructions below to product disposal. Installation Instructions Troubleshooting Tips Consumer Support 3 s...volts. Before You Throw Away Your Old Refrigerator or Freezer: s Take off the doors. RISK OF CHILD ENTRAPMENT PROPER DISPOSAL OF THE REFRIGERATOR Child entrapment and suffocation are getting rid of...

Use and Care Manual
Page 4
...INFORMATION CAREFULLY. Never unplug your personal responsibility and obligation to roll over or damage the power cord. When moving the refrigerator away from the wall, be properly grounded. Operating Instructions Safety Instructions IMPORTANT SAFETY INFORMATION. WARNING! The power cord of ...also prevents overloading house wiring circuits which mates with a standard 3-prong (grounding) wall outlet to make sure the outlet is your refrigerator by a qualified electrician to minimize the possibility of this appliance is a standard 2-prong outlet, it replaced with a 3-prong (grounding...
...INFORMATION CAREFULLY. Never unplug your personal responsibility and obligation to roll over or damage the power cord. When moving the refrigerator away from the wall, be properly grounded. Operating Instructions Safety Instructions IMPORTANT SAFETY INFORMATION. WARNING! The power cord of ...also prevents overloading house wiring circuits which mates with a standard 3-prong (grounding) wall outlet to make sure the outlet is your refrigerator by a qualified electrician to minimize the possibility of this appliance is a standard 2-prong outlet, it replaced with a 3-prong (grounding...

Use and Care Manual
Page 5
...the temperature controls. In Canada, contact us at geappliances.ca or call 800.GE.CARES. Non-LCD Models: Press and release the FREEZER TEMP/FRIDGE TEMP pad. Press to set the freezer and refrigerator temperatures to the preset points of the louvers on usage and operating environment.... and Settings > Cooling System Off To turn the unit back on the bottom portion of the following: ge.com Installation Instructions Non-LCD models LCD models NOTE: The refrigerator is displayed. When the unit is designed to maximize temperature control in both the SET temperature as well ...
...the temperature controls. In Canada, contact us at geappliances.ca or call 800.GE.CARES. Non-LCD Models: Press and release the FREEZER TEMP/FRIDGE TEMP pad. Press to set the freezer and refrigerator temperatures to the preset points of the louvers on usage and operating environment.... and Settings > Cooling System Off To turn the unit back on the bottom portion of the following: ge.com Installation Instructions Non-LCD models LCD models NOTE: The refrigerator is displayed. When the unit is designed to maximize temperature control in both the SET temperature as well ...

Use and Care Manual
Page 6
...is not affected during The ClimateKeeper2 system also reduces normal cooling operations.* the number of humidity in the Fresh Food section in the refrigerator compartment. Moisture sensitive foods such as different fresh longer and reduce freezer burn, while food loads and environmental conditions maintaining E star... Door Alarm and Water Filter. allowing fresh produce and other unsealed foods to more quickly cool foods. This pad is the industry's the refrigerator, you may come and go as fresh fruit, salads, rice, etc., can also be used to the original setting. It can now...
...is not affected during The ClimateKeeper2 system also reduces normal cooling operations.* the number of humidity in the Fresh Food section in the refrigerator compartment. Moisture sensitive foods such as different fresh longer and reduce freezer burn, while food loads and environmental conditions maintaining E star... Door Alarm and Water Filter. allowing fresh produce and other unsealed foods to more quickly cool foods. This pad is the industry's the refrigerator, you may come and go as fresh fruit, salads, rice, etc., can also be used to the original setting. It can now...

Use and Care Manual
Page 7
...in the pan. This will count down the time in the cycle (on some models) ge.com Installation Instructions LCD Models Only ExpressThaw™ ExpressChill ™ REFRIGERATOR OPTIONS CUSTOM COOL PAN BEVERAGE CENTER TURBOCOOL BACK Non-LCD Models Only How it Works The CustomCool...The default is a system of dampers, a fan, a temperature thermistor and a heater. Rotate all four swing locks by : Home > Options > Refrigerator Options > CustomCool Pan Non-LCD Models: Select the ExpressThaw™, ExpressChill™ or SelectTemp™ pad. To replace: Make sure all four swing ...
...in the pan. This will count down the time in the cycle (on some models) ge.com Installation Instructions LCD Models Only ExpressThaw™ ExpressChill ™ REFRIGERATOR OPTIONS CUSTOM COOL PAN BEVERAGE CENTER TURBOCOOL BACK Non-LCD Models Only How it Works The CustomCool...The default is a system of dampers, a fan, a temperature thermistor and a heater. Rotate all four swing locks by : Home > Options > Refrigerator Options > CustomCool Pan Non-LCD Models: Select the ExpressThaw™, ExpressChill™ or SelectTemp™ pad. To replace: Make sure all four swing ...

Use and Care Manual
Page 8
... hand. Operating Instructions Safety Instructions About CustomCool.™(on some models) CustomCool ™ Chart NOTE: Results may vary depending on adapter. Access by: Home > Options > Refrigerator Options > Beverage Center Activate by : Pressing OFF. Holding the bottom of beverage center in place. The beverage center will lock into place. Leave adapter in...
... hand. Operating Instructions Safety Instructions About CustomCool.™(on some models) CustomCool ™ Chart NOTE: Results may vary depending on adapter. Access by: Home > Options > Refrigerator Options > Beverage Center Activate by : Pressing OFF. Holding the bottom of beverage center in place. The beverage center will lock into place. Leave adapter in...

Use and Care Manual
Page 9
.... Filter Bypass Plug You must be removed before installing the cartridge. Use QuickFreeze to freeze items faster to select the time and pressing Enter. ge.com Some LCD Models Only: Access By: Home > Options > Freezer Options > QuickFreeze Activate By: Using the arrows to enhance food preservation... The dispenser and the icemaker will show in Canada should be used with water from the dispenser. Cartridge Holder Place the top of the refrigerator compartment. Access By: Home > Options > Dispenser Options > Reset Water Filter Non-LCD Models: There is only to be replaced when the...
.... Filter Bypass Plug You must be removed before installing the cartridge. Use QuickFreeze to freeze items faster to select the time and pressing Enter. ge.com Some LCD Models Only: Access By: Home > Options > Freezer Options > QuickFreeze Activate By: Using the arrows to enhance food preservation... The dispenser and the icemaker will show in Canada should be used with water from the dispenser. Cartridge Holder Place the top of the refrigerator compartment. Access By: Home > Options > Dispenser Options > Reset Water Filter Non-LCD Models: There is only to be replaced when the...

Use and Care Manual
Page 10
... models) Press tab and pull shelf forward to fit your needs. Not all models. Snugger Refrigerator bin Freezer tilt-out bin Refrigerator Door Bins and Freezer Door Tilt-Out Bins Bins Top Freezer Bins The larger refrigerator door bins and freezer tilt-out door bins are on the tab and slide the shelf...
... models) Press tab and pull shelf forward to fit your needs. Not all models. Snugger Refrigerator bin Freezer tilt-out bin Refrigerator Door Bins and Freezer Door Tilt-Out Bins Bins Top Freezer Bins The larger refrigerator door bins and freezer tilt-out door bins are on the tab and slide the shelf...

Use and Care Manual
Page 12
... two turns of the doors. If the door is loaded with food. The special door opening and closing feature makes sure the doors close the refrigerator door and check the alignment at the stop position will be reduced as the door is opened past this stop point, the door will stay... open and close all the way and are uneven, adjust the refrigerator door. The resistance you feel different than the ones you to load and unload food more easily. Door Alignment If doors are securely sealed. Installation...
... two turns of the doors. If the door is loaded with food. The special door opening and closing feature makes sure the doors close the refrigerator door and check the alignment at the stop position will be reduced as the door is opened past this stop point, the door will stay... open and close all the way and are uneven, adjust the refrigerator door. The resistance you feel different than the ones you to load and unload food more easily. Door Alignment If doors are securely sealed. Installation...

Use and Care Manual
Page 13
... cold air from fresh meats. Safety Instructions Operating Instructions About the crispers and pans. On some cases, when you roll the refrigerator out, you will need to move the refrigerator to slide the drawers out. the freezer compartment or fresh food compartment to flow to normal... to cold to convert the pan to the pan. If this does not offer enough clearance, the refrigerator will need to the HI setting Slide the control all models. ge.com Installation Instructions Troubleshooting Tips Consumer Support Adjustable Humidity Crispers HI LO Slide the control all the way ...
... cold air from fresh meats. Safety Instructions Operating Instructions About the crispers and pans. On some cases, when you roll the refrigerator out, you will need to move the refrigerator to slide the drawers out. the freezer compartment or fresh food compartment to flow to normal... to cold to convert the pan to the pan. If this does not offer enough clearance, the refrigerator will need to the HI setting Slide the control all models. ge.com Installation Instructions Troubleshooting Tips Consumer Support Adjustable Humidity Crispers HI LO Slide the control all the way ...

Use and Care Manual
Page 14
...Installation Instructions Consumer Support Troubleshooting Tips Lift and pull forward again to begin making one batch of ice. A newly installed refrigerator may take 12 to 24 hours to begin making ice cubes. If ice is heavy when full. Special note about dispenser ... interferes with water. On dispenser models, to the O (off . Operating Instructions Safety Instructions About the automatic icemaker. A newly installed refrigerator may hear the icemaker cycle multiple times when making ice. Power Switch Icemaker Green Power Light Feeler Arm NOTE: In homes with water ...
...Installation Instructions Consumer Support Troubleshooting Tips Lift and pull forward again to begin making one batch of ice. A newly installed refrigerator may take 12 to 24 hours to begin making ice cubes. If ice is heavy when full. Special note about dispenser ... interferes with water. On dispenser models, to the O (off . Operating Instructions Safety Instructions About the automatic icemaker. A newly installed refrigerator may hear the icemaker cycle multiple times when making ice. Power Switch Icemaker Green Power Light Feeler Arm NOTE: In homes with water ...

Use and Care Manual
Page 15
If no water is dispensed when the refrigerator is turned OFF. Dispenser Light The LIGHT pad turns the night light in the dispenser on some models) ge.com Spill Shelf To Use the Dispenser Select CUBED, CRUSHED or WATER. The alarm can be dispensed every 6 to 12 hours. Press ON/OFF and ...
If no water is dispensed when the refrigerator is turned OFF. Dispenser Light The LIGHT pad turns the night light in the dispenser on some models) ge.com Spill Shelf To Use the Dispenser Select CUBED, CRUSHED or WATER. The alarm can be dispensed every 6 to 12 hours. Press ON/OFF and ...

Use and Care Manual
Page 16
... the extreme temperature difference may be wiped dry. Dry with a clean, soft cloth. Dry and polish with a soft cloth. Unplug the refrigerator before cleaning. This both cleans and neutralizes odors. s Some crushed ice may cause them to the storage drawer. This happens occasionally when a...use of water. Do not wash any cleaning solution other than The chill/thaw tray is not practical, wring excess moisture out of the refrigerator. Clean with a cloth dampened with a commercially available stainless steel cleaner. Rinse thoroughly and wipe dry. about a tablespoon (15 ml) of...
... the extreme temperature difference may be wiped dry. Dry with a clean, soft cloth. Dry and polish with a soft cloth. Unplug the refrigerator before cleaning. This both cleans and neutralizes odors. s Some crushed ice may cause them to the storage drawer. This happens occasionally when a...use of water. Do not wash any cleaning solution other than The chill/thaw tray is not practical, wring excess moisture out of the refrigerator. Clean with a cloth dampened with a commercially available stainless steel cleaner. Rinse thoroughly and wipe dry. about a tablespoon (15 ml) of...

Use and Care Manual
Page 17
...refrigerator. This could damage the refrigerator. Moving the refrigerator in a side direction may result in an upright position during moving the refrigerator away from the sides of water. Leave the doors open. Handle only from the wall. Safety Instructions Operating Instructions ge.com Behind the Refrigerator... Be careful when moving . If the temperature can be damaged, particularly cushioned coverings and those with a baking soda solution of one quart (1 liter) of the refrigerator. Preparing to Move...
...refrigerator. This could damage the refrigerator. Moving the refrigerator in a side direction may result in an upright position during moving the refrigerator away from the sides of water. Leave the doors open. Handle only from the wall. Safety Instructions Operating Instructions ge.com Behind the Refrigerator... Be careful when moving . If the temperature can be damaged, particularly cushioned coverings and those with a baking soda solution of one quart (1 liter) of the refrigerator. Preparing to Move...

Use and Care Manual
Page 18
...-Upper Light Unplug the refrigerator. Operating Instructions Safety Instructions Replacing the light bulbs. Setting the controls to OFF does not remove power to be replaced, call GE Service at the top of the light shield will look like one of the shield and slide forward and out. Not all features are located...
...-Upper Light Unplug the refrigerator. Operating Instructions Safety Instructions Replacing the light bulbs. Setting the controls to OFF does not remove power to be replaced, call GE Service at the top of the light shield will look like one of the shield and slide forward and out. Not all features are located...

Use and Care Manual
Page 19
...that allow you are installing the pre-cut decorator panels, pre-cut black, white, bisque or stainless steel decorator panels from GE Parts and Accessories, 800.626.2002, or you need to permit clearances of panel perimeter be no thicker than 1/4″ ...) max 3/4″ (19 mm) 2″ (5.1 cm) Clearance Handle Side Appearance Panel 1/4″ (6 mm) Thick Backing 3/4″ (19 mm) Refrigerator Door Installation Instructions Troubleshooting Tips Consumer Support 19 For CustomStyle™ models Read these instructions completely and carefully. You can add wood panels to install...
...that allow you are installing the pre-cut decorator panels, pre-cut black, white, bisque or stainless steel decorator panels from GE Parts and Accessories, 800.626.2002, or you need to permit clearances of panel perimeter be no thicker than 1/4″ ...) max 3/4″ (19 mm) 2″ (5.1 cm) Clearance Handle Side Appearance Panel 1/4″ (6 mm) Thick Backing 3/4″ (19 mm) Refrigerator Door Installation Instructions Troubleshooting Tips Consumer Support 19 For CustomStyle™ models Read these instructions completely and carefully. You can add wood panels to install...

Use and Care Manual
Page 21
... behind the lip of each Top Trim piece, to the fresh food panel and top freezer panel. The Top Trim can be found inside the refrigerator compartment. Push the filler panel (required with some door panels) in behind the decorator panel. Repeat for fresh food panel. Insert the Bottom Freezer Panel...
... behind the lip of each Top Trim piece, to the fresh food panel and top freezer panel. The Top Trim can be found inside the refrigerator compartment. Push the filler panel (required with some door panels) in behind the decorator panel. Repeat for fresh food panel. Insert the Bottom Freezer Panel...

Use and Care Manual
Page 22
.... Install the Side Trim. Fit the bottom of the Side Trim until the Side Trim is fitted correctly and that you are tucked inside the refrigerator door handle. Top Trim Side Trim Side Trim Bottom Trim Installation Instructions Consumer Support Troubleshooting Tips 22 Do not remove the protective film on the...
.... Install the Side Trim. Fit the bottom of the Side Trim until the Side Trim is fitted correctly and that you are tucked inside the refrigerator door handle. Top Trim Side Trim Side Trim Bottom Trim Installation Instructions Consumer Support Troubleshooting Tips 22 Do not remove the protective film on the...


