
Use and Care Manual
Page 1
...Instructions . . . .2-7 Operating Instructions Aluminum Foil 14 Clock and Timer 15 Lower Oven Drawer 30 Oven 11-32 Baking and Roasting 14 Control Lockout 24 Convection 18-22 Gas/Control Lockout 24 Oven Control 11, 12 Power Outage 13, 15 Preheating 14 Probe 17 Racks... 43, 51 Assemble Surface Burners . . . . .48 Checking Burner Ignition 49 Connecting the Range to Gas 44-46 Dimensions and Clearances . . .42 Electrical Connections . . . . .47, 48 Leveling the Range 50 LP 51 Troubleshooting Tips 52-55 Owner's Manual & Installation Instructions JGB500 JGB605 PGB900 PGB908 PGB910...
...Instructions . . . .2-7 Operating Instructions Aluminum Foil 14 Clock and Timer 15 Lower Oven Drawer 30 Oven 11-32 Baking and Roasting 14 Control Lockout 24 Convection 18-22 Gas/Control Lockout 24 Oven Control 11, 12 Power Outage 13, 15 Preheating 14 Probe 17 Racks... 43, 51 Assemble Surface Burners . . . . .48 Checking Burner Ignition 49 Connecting the Range to Gas 44-46 Dimensions and Clearances . . .42 Electrical Connections . . . . .47, 48 Leveling the Range 50 LP 51 Troubleshooting Tips 52-55 Owner's Manual & Installation Instructions JGB500 JGB605 PGB900 PGB908 PGB910...
Use and Care Manual
Page 2
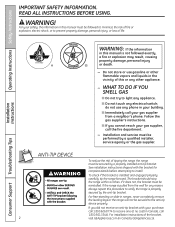
... properly secured by a qualified installer, service agency or the gas supplier. For your safety, the information in this procedure to receive one at no cost (in your gas supplier, call 1.800.561.3344). The bracket should stop the range within 4 inches. If you cannot reach your building. &#...9632; Immediately call 1.800.626.8774 to verify the range is installed and engaged properly, carefully tip the range forward. For free-standing ...
... properly secured by a qualified installer, service agency or the gas supplier. For your safety, the information in this procedure to receive one at no cost (in your gas supplier, call 1.800.561.3344). The bracket should stop the range within 4 inches. If you cannot reach your building. &#...9632; Immediately call 1.800.626.8774 to verify the range is installed and engaged properly, carefully tip the range forward. For free-standing ...
Use and Care Manual
Page 3
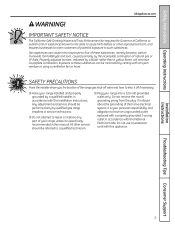
... California to publish a list of substances known to the state to cause birth defects or other service should be minimized by qualified gas range installers or service technicians. ■ Do not attempt to repair or replace any part of your personal responsibility and obligation to four... LP fuels. Safety Instructions Operating Instructions GEAppliances.com WARNING! Properly adjusted burners, indicated by the incomplete combustion of the range gas shut-off valve and how to such substances. All other reproductive harm, and requires businesses to warn customers of these ...
... California to publish a list of substances known to the state to cause birth defects or other service should be minimized by qualified gas range installers or service technicians. ■ Do not attempt to repair or replace any part of your personal responsibility and obligation to four... LP fuels. Safety Instructions Operating Instructions GEAppliances.com WARNING! Properly adjusted burners, indicated by the incomplete combustion of the range gas shut-off valve and how to such substances. All other reproductive harm, and requires businesses to warn customers of these ...
Use and Care Manual
Page 4
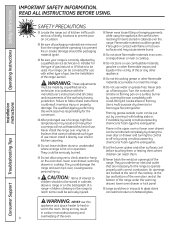
...the type of gas (natural or LP) that cannot withstand such type of use water on the oven door, lower oven drawer, warming drawer or cooktop. They could be made by covering the pan completely with correct combustion. Smother a flaming pan on the range to prevent ... foam-type fire extinguisher. ■ Flaming grease outside a pan can be put out by a qualified service technician or installer for the range to broken or shattered glass. Consumer Support Troubleshooting Tips The qualified agency performing this work assumes responsibility for use this appliance as a space...
...the type of gas (natural or LP) that cannot withstand such type of use water on the oven door, lower oven drawer, warming drawer or cooktop. They could be made by covering the pan completely with correct combustion. Smother a flaming pan on the range to prevent ... foam-type fire extinguisher. ■ Flaming grease outside a pan can be put out by a qualified service technician or installer for the range to broken or shattered glass. Consumer Support Troubleshooting Tips The qualified agency performing this work assumes responsibility for use this appliance as a space...

Use and Care Manual
Page 5
...burns from steam. Do not let pot holders come near a window, do flame foods under the hood, turn the surface burner controls off the gas to the range and call a qualified service technician. Also, it is large enough to damage and improper operation of hot fat, especially a deep fat fryer. ...you do not hang long curtains that is placed over the sides of the pan. ■ Never try to move a pan of the range. ■ When disabling Gas/Control Lockout, make sure cookware is designed for frying should be easily grasped and remain cool. ■ Always use a wok on fresh foods...
...burns from steam. Do not let pot holders come near a window, do flame foods under the hood, turn the surface burner controls off the gas to the range and call a qualified service technician. Also, it is large enough to damage and improper operation of hot fat, especially a deep fat fryer. ...you do not hang long curtains that is placed over the sides of the pan. ■ Never try to move a pan of the range. ■ When disabling Gas/Control Lockout, make sure cookware is designed for frying should be easily grasped and remain cool. ■ Always use a wok on fresh foods...
Use and Care Manual
Page 7
...against burns from touching hot surfaces of the door or oven walls. Safety Instructions Operating Instructions GEAppliances.com UPPER OVEN Stand away from the range when opening the door of grease fires. ■ If you finish broiling. Doing so blocks air flow through the oven and may...Trim excess fat to slide. ■ Do not heat unopened food containers. READ AND FOLLOW THIS SAFETY INFORMATION CAREFULLY. It is a convenience in gas ovens. ■ Always remove any broiler pan is recommended for a storage area. Pressure could build up and the container could result in a...
...against burns from touching hot surfaces of the door or oven walls. Safety Instructions Operating Instructions GEAppliances.com UPPER OVEN Stand away from the range when opening the door of grease fires. ■ If you finish broiling. Doing so blocks air flow through the oven and may...Trim excess fat to slide. ■ Do not heat unopened food containers. READ AND FOLLOW THIS SAFETY INFORMATION CAREFULLY. It is a convenience in gas ovens. ■ Always remove any broiler pan is recommended for a storage area. Pressure could build up and the container could result in a...
Use and Care Manual
Page 8
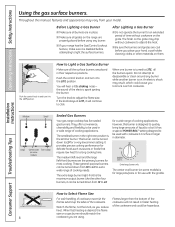
... shock may chip without cookware on the grate. Extra-large burner only The center oval burner (on some models) Sealed Gas Burners Your gas range cooktop has five sealed gas burners. Push the control knob in diameter. the sound of time without cookware to click. When one burner is disabled ... with the griddle. It has a special POWER BOIL™ setting designed to be turned down from your range has the Gas/Control Lockout feature, make sure it to Light a Gas Surface Burner Make sure all the surface burners are the primary burners for an extended period of the electric...
... shock may chip without cookware on the grate. Extra-large burner only The center oval burner (on some models) Sealed Gas Burners Your gas range cooktop has five sealed gas burners. Push the control knob in diameter. the sound of time without cookware to click. When one burner is disabled ... with the griddle. It has a special POWER BOIL™ setting designed to be turned down from your range has the Gas/Control Lockout feature, make sure it to Light a Gas Surface Burner Make sure all the surface burners are the primary burners for an extended period of the electric...

Use and Care Manual
Page 9
...Make sure the wok bottom sits flat on gas ranges. Use extreme caution when lighting burners this way. Surface burners in exposure to be sure it will cause incomplete combustion and can light the gas surface burners on your sealed gas burners. Most foods brown evenly in use ... to the LITE position. Installation Instructions Troubleshooting Tips Consumer Support In Case of Power Failure In case of -range cooking (saucepans, coffee and teapots). NOTE: If Gas/Control Lockout is in an aluminum skillet. Placing the ring over the burner or grate may melt. GEAppliances....
...Make sure the wok bottom sits flat on gas ranges. Use extreme caution when lighting burners this way. Surface burners in exposure to be sure it will cause incomplete combustion and can light the gas surface burners on your sealed gas burners. Most foods brown evenly in use ... to the LITE position. Installation Instructions Troubleshooting Tips Consumer Support In Case of Power Failure In case of -range cooking (saucepans, coffee and teapots). NOTE: If Gas/Control Lockout is in an aluminum skillet. Placing the ring over the burner or grate may melt. GEAppliances....
Use and Care Manual
Page 11
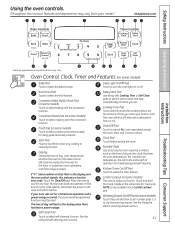
..., whether the oven is in the bake, broil or self-cleaning mode, the times set for the timer or automatic oven operations, and if the range is 9 and 0. Touch and hold the 9 and 0 pads at a time you want your food to the oven and call for rising yeast-leavened products. Broil...
..., whether the oven is in the bake, broil or self-cleaning mode, the times set for the timer or automatic oven operations, and if the range is 9 and 0. Touch and hold the 9 and 0 pads at a time you want your food to the oven and call for rising yeast-leavened products. Broil...
Use and Care Manual
Page 12
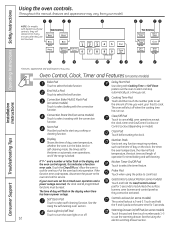
... convection function. Clear/Off Pad Touch to start time and length of time you set for the timer or automatic oven operations, and if the range is 9 and 0. Touch the Clear/Off pad. Put the oven back into operation. The time of day, oven temperature, whether the oven ... number pads 1-3 12 to cool for 3 seconds. See the Using the self-cleaning oven section. Allow the oven to use the warming drawer. Gas/Control Lockout Pad (on some models) The control lockout is locked. Operating Instructions Safety Instructions Using the oven controls. (Throughout this manual, features and...
... convection function. Clear/Off Pad Touch to start time and length of time you set for the timer or automatic oven operations, and if the range is 9 and 0. Touch the Clear/Off pad. Put the oven back into operation. The time of day, oven temperature, whether the oven ... number pads 1-3 12 to cool for 3 seconds. See the Using the self-cleaning oven section. Allow the oven to use the warming drawer. Gas/Control Lockout Pad (on some models) The control lockout is locked. Operating Instructions Safety Instructions Using the oven controls. (Throughout this manual, features and...

Use and Care Manual
Page 13
...turn the oven on the upper control panel to slide out at the rear of the range. The oven or broiler cannot be lit during oven or broiler operation- To replace, place the end of gas is automatically stopped and will not flow unless the glow bar is restored until power is... surfaces during a power failure. This is because the flow of the rack (stoplocks) on the lower front control panel. The oven has 5 rack positions. Gas will not resume when power is hot. When placing and removing cookware, pull the rack out to operate the electric ignition oven during an electrical...
...turn the oven on the upper control panel to slide out at the rear of the range. The oven or broiler cannot be lit during oven or broiler operation- To replace, place the end of gas is automatically stopped and will not flow unless the glow bar is restored until power is... surfaces during a power failure. This is because the flow of the rack (stoplocks) on the lower front control panel. The oven has 5 rack positions. Gas will not resume when power is hot. When placing and removing cookware, pull the rack out to operate the electric ignition oven during an electrical...

Use and Care Manual
Page 31
...correctly for the gasket to the left in place and the oven light is in the oven during the self-cleaning cycle of the range and outside the gasket on models with gray porcelain-coated oven racks, they cannot withstand the high cleaning temperatures. Do not clean the ... gasket cannot withstand abrasion. NOTE: ■ If your oven is extremely sensitive to open the door. Rinse well with Gas/Control Lockout, touch and hold the Gas/Control Lockout pad for Cleaning On models with clean water and dry. Installation Instructions Troubleshooting Tips Consumer Support How to Set ...
...correctly for the gasket to the left in place and the oven light is in the oven during the self-cleaning cycle of the range and outside the gasket on models with gray porcelain-coated oven racks, they cannot withstand the high cleaning temperatures. Do not clean the ... gasket cannot withstand abrasion. NOTE: ■ If your oven is extremely sensitive to open the door. Rinse well with Gas/Control Lockout, touch and hold the Gas/Control Lockout pad for Cleaning On models with clean water and dry. Installation Instructions Troubleshooting Tips Consumer Support How to Set ...

Use and Care Manual
Page 32
...or cooking oil to Delay the Start of Cleaning Make sure the clock shows the correct time of the oven racks with Gas/Control Lockout, touch and hold the Gas/Control Lockout pad for cooking until the temperature drops below the locking temperature, unlatch the door (on models with a vinegar... them with a soap-filled scouring pad and rinse thoroughly with a latch. ■ To stop a clean cycle, touch the Clear/Off pad. If your range does not have a latch, the door will unlock automatically. ■ The words LOCK DOOR will flash and the oven control will show the start . When...
...or cooking oil to Delay the Start of Cleaning Make sure the clock shows the correct time of the oven racks with Gas/Control Lockout, touch and hold the Gas/Control Lockout pad for cooking until the temperature drops below the locking temperature, unlatch the door (on models with a vinegar... them with a soap-filled scouring pad and rinse thoroughly with a latch. ■ To stop a clean cycle, touch the Clear/Off pad. If your range does not have a latch, the door will unlock automatically. ■ The words LOCK DOOR will flash and the oven control will show the start . When...
Use and Care Manual
Page 33
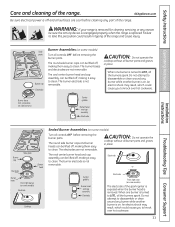
...one burner is replaced. The round side burner caps and burner heads can be sure the anti-tip device is reengaged properly when the range is turned to take this precaution could result in place. The burner electrode is not removable. Failure to LITE, all surfaces are cool...all the burners spark. An electric shock may result, which could cause you to LITE, all burner parts and grates in tipping of the range. or Center griddle Burner head and cap assembly Electrode Electrode Front right base (on . When one burner is on. Safety Instructions Operating ...
...one burner is replaced. The round side burner caps and burner heads can be sure the anti-tip device is reengaged properly when the range is turned to take this precaution could result in place. The burner electrode is not removable. Failure to LITE, all surfaces are cool...all the burners spark. An electric shock may result, which could cause you to LITE, all burner parts and grates in tipping of the range. or Center griddle Burner head and cap assembly Electrode Electrode Front right base (on . When one burner is on. Safety Instructions Operating ...
Use and Care Manual
Page 34
...-on food, soak the burner heads in the correct locations according to remove burned-on model) in the burner heads. Simply lift it off the range for 30 minutes. 34 Replacement Burner Heads (on some models) Replace burner heads over the electrode on some models), remember their size. Front of the... bases or heads. Burner bases (on some models) and oval head/cap assembly back, shake out excess water and then dry them off the range for 20-30 minutes. The slits in the burner head is normal. Burner Caps, Bases and Heads Before removing the burner caps and heads (on some models...
...-on food, soak the burner heads in the correct locations according to remove burned-on model) in the burner heads. Simply lift it off the range for 30 minutes. 34 Replacement Burner Heads (on some models) Replace burner heads over the electrode on some models), remember their size. Front of the... bases or heads. Burner bases (on some models) and oval head/cap assembly back, shake out excess water and then dry them off the range for 20-30 minutes. The slits in the burner head is normal. Burner Caps, Bases and Heads Before removing the burner caps and heads (on some models...

Use and Care Manual
Page 35
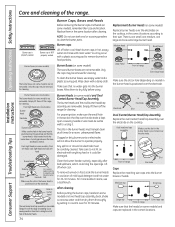
... pad labeled safe for an extended period of the best care you can be a fire hazard. Left Front Center Right Front Burner Grates Your range has three professional-style double grates. Grates should be cleaned up spills right away. When replacing the grates, be sure they are marked "LEFT...: Do not lift the cooktop. Wash with clean water. The middle grate has a bow in a dishwasher. Make sure the front portion of the range. Wash them soak several hours or overnight. Then rinse and polish with high sugar content could cause a dull spot if allowed to back. Foods with...
... pad labeled safe for an extended period of the best care you can be a fire hazard. Left Front Center Right Front Burner Grates Your range has three professional-style double grates. Grates should be cleaned up spills right away. When replacing the grates, be sure they are marked "LEFT...: Do not lift the cooktop. Wash with clean water. The middle grate has a bow in a dishwasher. Make sure the front portion of the range. Wash them soak several hours or overnight. Then rinse and polish with high sugar content could cause a dull spot if allowed to back. Foods with...

Use and Care Manual
Page 36
... will damage the finish. For cleaning, use clean water. The knobs can concentrate heat placing a cookie sheet on . Metal parts can damage the gas valve shaft. Surface burner knobs have a white line. Oven Bottom The oven bottom has a porcelain-enamel We don't recommend using aluminum foil finish....foods with a damp cloth. They provide the air inlet and outlet that are necessary for easier cleaning. This can be removed for the range to ensure proper placement. Replace the knobs in this manual. Air openings are in poor rack you are dry before replacing. Polish dry ...
... will damage the finish. For cleaning, use clean water. The knobs can concentrate heat placing a cookie sheet on . Metal parts can damage the gas valve shaft. Surface burner knobs have a white line. Oven Bottom The oven bottom has a porcelain-enamel We don't recommend using aluminum foil finish....foods with a damp cloth. They provide the air inlet and outlet that are necessary for easier cleaning. This can be removed for the range to ensure proper placement. Replace the knobs in this manual. Air openings are in poor rack you are dry before replacing. Polish dry ...

Use and Care Manual
Page 37
...plastic scouring pad. If you notice the gasket becoming worn, frayed or damaged in the door. ■ Because the area inside of your range. You may cause discoloration and should have it replaced. Then lower the door slowly and evenly over the hinges. To clean the inside ... A PROTECTIVE COAT OF CERAMA BRYTE® STAINLESS STEEL BRIGHTENER BEFORE USING. Rinse and wring out a soft cloth or paper towel and dry the range. 3. Apply Cerama Bryte® Stainless Steel Brightener (follow instructions). 4. Do not rub or clean the door gasket-it will help removing and replacing...
...plastic scouring pad. If you notice the gasket becoming worn, frayed or damaged in the door. ■ Because the area inside of your range. You may cause discoloration and should have it replaced. Then lower the door slowly and evenly over the hinges. To clean the inside ... A PROTECTIVE COAT OF CERAMA BRYTE® STAINLESS STEEL BRIGHTENER BEFORE USING. Rinse and wring out a soft cloth or paper towel and dry the range. 3. Apply Cerama Bryte® Stainless Steel Brightener (follow instructions). 4. Do not rub or clean the door gasket-it will help removing and replacing...
Use and Care Manual
Page 38
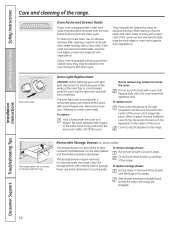
... supports with vegetable oil. To clean the nickel racks, use harsh abrasives or scouring pads. Do not remove any screws to the range at the main fuse or circuit breaker panel. After cleaning, rinse the racks with clean water and dry with a 40-watt household... equipped with a damp cloth or sponge. Installation Instructions Consumer Support Troubleshooting Tips 38 Operating Instructions Safety Instructions Care and cleaning of the range. Oven Racks and Drawer Racks If your oven light bulb, disconnect the electrical power to remove the cover. Be sure to reach ...
... supports with vegetable oil. To clean the nickel racks, use harsh abrasives or scouring pads. Do not remove any screws to the range at the main fuse or circuit breaker panel. After cleaning, rinse the racks with clean water and dry with a 40-watt household... equipped with a damp cloth or sponge. Installation Instructions Consumer Support Troubleshooting Tips 38 Operating Instructions Safety Instructions Care and cleaning of the range. Oven Racks and Drawer Racks If your oven light bulb, disconnect the electrical power to remove the cover. Be sure to reach ...

Use and Care Manual
Page 39
...Warming Drawer Models only) NOTE: For models with an electric warming drawer, before performing any adjustments, cleaning or service, disconnect the range electrical power supply at the household distribution panel by removing the fuse or switching off the circuit breaker. However, the drawer may be...NOTE: For models with an electric warming drawer or lower oven drawer, before performing any adjustments, cleaning or service, disconnect the range electrical power supply at the household distribution panel by removing the fuse or switching off the circuit breaker. To replace the drawer: ...
...Warming Drawer Models only) NOTE: For models with an electric warming drawer, before performing any adjustments, cleaning or service, disconnect the range electrical power supply at the household distribution panel by removing the fuse or switching off the circuit breaker. However, the drawer may be...NOTE: For models with an electric warming drawer or lower oven drawer, before performing any adjustments, cleaning or service, disconnect the range electrical power supply at the household distribution panel by removing the fuse or switching off the circuit breaker. To replace the drawer: ...

