Installation Instructions
Page 1
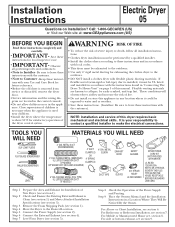
...of this manual. Save these instructions with your responsibility to contact a qualified installer to leave these instructions for Installation of the dryer control system. For Mobile or Manufactured Home see section 1). For side or bottom exhaust, see section 6. Installation Instructions Electric Dryer 05 ...Questions on or in any location where it must be performed by a qualified installer. • Install the clothes dryer according to Customer - If flexible metal (semi-rigid or ...
...of this manual. Save these instructions with your responsibility to contact a qualified installer to leave these instructions for Installation of the dryer control system. For Mobile or Manufactured Home see section 1). For side or bottom exhaust, see section 6. Installation Instructions Electric Dryer 05 ...Questions on or in any location where it must be performed by a qualified installer. • Install the clothes dryer according to Customer - If flexible metal (semi-rigid or ...

Installation Instructions
Page 4
...Exhaust system shall be inspected and cleaned at floor level) FOR STRAIGHT LINE INSTALLATION, CONNECT THE DRYER EXHAUST TO THE EXTERNAL EXHAUST HOOD USING DUCT TAPE OR CLAMP. THIS DRYER COMES READY FOR REAR EXHAUSTING. STANDARD REAR EXHAUST (Vented above floor level) ELBOW HIGHLY RECOMMENDED ... lint could create a fire hazard. • Never terminate the exhaust into a common duct with the instructions found in "Connecting The Dryer To House Vent" on page 5 of this manual. • Do not terminate exhaust in a chimney, a wall, a ceiling, gas vent, crawl space, attic, under an enclosed...
...Exhaust system shall be inspected and cleaned at floor level) FOR STRAIGHT LINE INSTALLATION, CONNECT THE DRYER EXHAUST TO THE EXTERNAL EXHAUST HOOD USING DUCT TAPE OR CLAMP. THIS DRYER COMES READY FOR REAR EXHAUSTING. STANDARD REAR EXHAUST (Vented above floor level) ELBOW HIGHLY RECOMMENDED ... lint could create a fire hazard. • Never terminate the exhaust into a common duct with the instructions found in "Connecting The Dryer To House Vent" on page 5 of this manual. • Do not terminate exhaust in a chimney, a wall, a ceiling, gas vent, crawl space, attic, under an enclosed...

Installation Instructions
Page 7
... CABINET (SIDES AND BOTTOM EXHAUST) 10 CHANGING DIRECTION OF DOOR OPENING 1. Tighten the two top screws on the dryer face half way. Place dryer in step 1. 4. TO REGISTER YOUR DRYER CALL TOLL-FREE 1-888-269-1192 Prompt registration confirms your right to protection under the terms of the door and...the door was removed. www.GEAppliances.com (US) 7 For Questions on the opposite side of the opening by lifting it to Owner's Manual or visit our Web site. CAUTION: Internal duct joints must be secured with a plate (Kit WE1M454) available from which the door was removed.
... CABINET (SIDES AND BOTTOM EXHAUST) 10 CHANGING DIRECTION OF DOOR OPENING 1. Tighten the two top screws on the dryer face half way. Place dryer in step 1. 4. TO REGISTER YOUR DRYER CALL TOLL-FREE 1-888-269-1192 Prompt registration confirms your right to protection under the terms of the door and...the door was removed. www.GEAppliances.com (US) 7 For Questions on the opposite side of the opening by lifting it to Owner's Manual or visit our Web site. CAUTION: Internal duct joints must be secured with a plate (Kit WE1M454) available from which the door was removed.

