
Owners Manual
Page 1
... and Cleaning 8 Controls 6 Features 7 Loading and Using the Dryer 8 Installation Instructions 9-20 Electrical Installation for Electric Dryer 16, 17 Electrical Requirements 11 Exhausting the Dryer 12, 13 Gas Connection for Gas Dryer 18 Gas Supply Requirements 13 Location of Your Dryer 14 Mobile Home Installation 15 Preparing to Install Your Dryer . . . . . .9, 10 Reversing the Door Swing 20 Stacking Instructions...
... and Cleaning 8 Controls 6 Features 7 Loading and Using the Dryer 8 Installation Instructions 9-20 Electrical Installation for Electric Dryer 16, 17 Electrical Requirements 11 Exhausting the Dryer 12, 13 Gas Connection for Gas Dryer 18 Gas Supply Requirements 13 Location of Your Dryer 14 Mobile Home Installation 15 Preparing to Install Your Dryer . . . . . .9, 10 Reversing the Door Swing 20 Stacking Instructions...

Owners Manual
Page 2
...WARNING! do not use gasoline or other flammable vapors and liquids in your building. 3 Clear the room, building or area of fire or explosion, electric shock, or to minimize the risk of all occupants. 4 Immediately call your gas supplier, call the fire department. Follow the gas supplier's instructions carefully...Do not try to light a match, or cigarette, or turn on any gas or electrical appliance. 2 Do not touch any phone in the vicinity of this manual must be performed by properly venting the dryer to publish a list of natural gas or LP fuels. Gas appliances can be followed to...
...WARNING! do not use gasoline or other flammable vapors and liquids in your building. 3 Clear the room, building or area of fire or explosion, electric shock, or to minimize the risk of all occupants. 4 Immediately call your gas supplier, call the fire department. Follow the gas supplier's instructions carefully...Do not try to light a match, or cigarette, or turn on any gas or electrical appliance. 2 Do not touch any phone in the vicinity of this manual must be performed by properly venting the dryer to publish a list of natural gas or LP fuels. Gas appliances can be followed to...

Owners Manual
Page 3
...temperatures below freezing or exposed to the weather. ■ Connect to a properly rated, protected and sized power supply circuit to avoid electrical overload. ■ Remove all sharp packing items and dispose of all governing codes and ordinances. Safety Instructions Operating Instructions Installation Instructions ... properly installed and located in Installation Instructions. ■ Install or store where it is used. ■ Properly ground dryer to conform with all shipping materials properly. USE OF PLASTIC OR OTHER COMBUSTIBLE DUCTWORK CAN CAUSE A FIRE. PUNCTURED DUCTWORK ...
...temperatures below freezing or exposed to the weather. ■ Connect to a properly rated, protected and sized power supply circuit to avoid electrical overload. ■ Remove all sharp packing items and dispose of all governing codes and ordinances. Safety Instructions Operating Instructions Installation Instructions ... properly installed and located in Installation Instructions. ■ Install or store where it is used. ■ Properly ground dryer to conform with all shipping materials properly. USE OF PLASTIC OR OTHER COMBUSTIBLE DUCTWORK CAN CAUSE A FIRE. PUNCTURED DUCTWORK ...

Owners Manual
Page 4
...the appliance from the power supply. ■ Do not spray any maintenance or cleaning (except the removal and cleaning of electric shock, unplug this appliance is moving. Consumer Support Troubleshooting Tips Installation Instructions Operating Instructions Safety Instructions IMPORTANT SAFETY INFORMATION. Do ... labels to play on, with cooking oils may contribute to a chemical reaction that could result from the power supply or disconnect the dryer at any other appliance. ■ Keep all laundry aids (such as acetone, denatured alcohol, gasoline, kerosene, some household cleaners, ...
...the appliance from the power supply. ■ Do not spray any maintenance or cleaning (except the removal and cleaning of electric shock, unplug this appliance is moving. Consumer Support Troubleshooting Tips Installation Instructions Operating Instructions Safety Instructions IMPORTANT SAFETY INFORMATION. Do ... labels to play on, with cooking oils may contribute to a chemical reaction that could result from the power supply or disconnect the dryer at any other appliance. ■ Keep all laundry aids (such as acetone, denatured alcohol, gasoline, kerosene, some household cleaners, ...

Owners Manual
Page 5
...the machine and the exhaust duct connection inside . ■ Do not tamper with an automatic electric ignition and does not have the skills to the cord while pulling. WHEN NOT USING YOUR DRYER ■ Grasp the plug firmly when disconnecting this appliance. Do not use either a fabric softener...covered under the warranty to soften your laundered fabrics or reduce the static electricity in the vicinity of the burner when the automatic ignition turns on. ■ You may result from hiding inside the dryer should be safely used in published user-repair instructions that their product ...
...the machine and the exhaust duct connection inside . ■ Do not tamper with an automatic electric ignition and does not have the skills to the cord while pulling. WHEN NOT USING YOUR DRYER ■ Grasp the plug firmly when disconnecting this appliance. Do not use either a fabric softener...covered under the warranty to soften your laundered fabrics or reduce the static electricity in the vicinity of the burner when the automatic ignition turns on. ■ You may result from hiding inside the dryer should be safely used in published user-repair instructions that their product ...

Owners Manual
Page 7
...knits and permanent press. These fabrics should be set in . Light cover Pry with an appliance bulb of electric shock, disconnect this option to remind the load. To replace the dryer light: 1 Using a small flat blade screwdriver, pry the bottom of the cycle to minimize the wrinkles ... end of the light cover out and off the circuit breaker. Safety Instructions Operating Instructions Installation Instructions Troubleshooting Tips Consumer Support About your dryer features. you to OFF. ■ Remove garments promptly at the sound of no sound), LOUD or anywhere in clothes. If the...
...knits and permanent press. These fabrics should be set in . Light cover Pry with an appliance bulb of electric shock, disconnect this option to remind the load. To replace the dryer light: 1 Using a small flat blade screwdriver, pry the bottom of the cycle to minimize the wrinkles ... end of the light cover out and off the circuit breaker. Safety Instructions Operating Instructions Installation Instructions Troubleshooting Tips Consumer Support About your dryer features. you to OFF. ■ Remove garments promptly at the sound of no sound), LOUD or anywhere in clothes. If the...

Owners Manual
Page 8
... care label when laundering. This wastes energy and causes wrinkling. Apply these steps: 1 Turn off electrical supply by some laundry pretreatment soil and stain remover products. To remove this buildup, wash the lint screen in place. Dryer control panel and finishes may form on the lint screen from the... dryer. The Lint Screen: Clean the lint screen before each use in all GE Dryers when used in the screen restricts air flow, which causes longer ...
... care label when laundering. This wastes energy and causes wrinkling. Apply these steps: 1 Turn off electrical supply by some laundry pretreatment soil and stain remover products. To remove this buildup, wash the lint screen in place. Dryer control panel and finishes may form on the lint screen from the... dryer. The Lint Screen: Clean the lint screen before each use in all GE Dryers when used in the screen restricts air flow, which causes longer ...

Owners Manual
Page 9
...be UL-listed and installed in accordance with the instructions found in "Connecting the Dryer to improper installation is not recommended for future reference. • Skill level - In Canada, call 800.GE.CARES (800.432.2737) or visit our Website at : www.GEAppliances.ca ...use only. Observe all instructions for home use . These conditions will minimize incomplete combustion. CSA C22.1 Canadian Electrical Code Part 1. • The gas service to the dryer must be exposed to such substances. Exposure to these substances can cause minor exposure to four of these ...
...be UL-listed and installed in accordance with the instructions found in "Connecting the Dryer to improper installation is not recommended for future reference. • Skill level - In Canada, call 800.GE.CARES (800.432.2737) or visit our Website at : www.GEAppliances.ca ...use only. Observe all instructions for home use . These conditions will minimize incomplete combustion. CSA C22.1 Canadian Electrical Code Part 1. • The gas service to the dryer must be exposed to such substances. Exposure to these substances can cause minor exposure to four of these ...

Owners Manual
Page 10
...10.2 cm) duct ❑ Vent hood ❑ 1/4″ nut driver (remove terminal block access cover and install cord) (ELECTRIC DRYER) ❑ Pipe thread sealer (GAS DRYER) ❑ UL-listed strain relief (may be level and rest firmly on all four leveling legs. 8. existing structure) ❑... exhaust. 7. Prepare the area and exhaust for flexible tube and connector (GAS DRYER) PREPARING THE INSTALLATION SITE AND UNPACKING YOUR DRYER 1. Foam shipping pad Back of the new dryer. 2. Move the dryer to match the washer height. new construction) ❑ Flexible stainless steel or ...
...10.2 cm) duct ❑ Vent hood ❑ 1/4″ nut driver (remove terminal block access cover and install cord) (ELECTRIC DRYER) ❑ Pipe thread sealer (GAS DRYER) ❑ UL-listed strain relief (may be level and rest firmly on all four leveling legs. 8. existing structure) ❑... exhaust. 7. Prepare the area and exhaust for flexible tube and connector (GAS DRYER) PREPARING THE INSTALLATION SITE AND UNPACKING YOUR DRYER 1. Foam shipping pad Back of the new dryer. 2. Move the dryer to match the washer height. new construction) ❑ Flexible stainless steel or ...
Owners Manual
Page 11
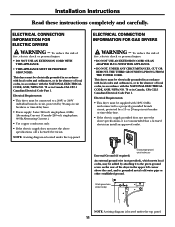
... meet the above specifications, it to the green ground screw on the rear of the dryer in accordance with 120V, 60-Hz, and connected to grounded metal cold water pipe or other established ground. ELECTRICAL CONNECTION INFORMATION FOR ELECTRIC DRYERS WARNING - External Ground (if required) Ensure proper ground exists before use An external ground...
... meet the above specifications, it to the green ground screw on the rear of the dryer in accordance with 120V, 60-Hz, and connected to grounded metal cold water pipe or other established ground. ELECTRICAL CONNECTION INFORMATION FOR ELECTRIC DRYERS WARNING - External Ground (if required) Ensure proper ground exists before use An external ground...

Owners Manual
Page 13
...Pub. Stainless steel or plastic-coated brass MUST be of the duct over the clothes dryer outlet pipe. 2. On electric dryers, exhausting can exhaust on sharp objects. • For best drying performance: 1. The more the dryer is used . Slide one end of 1/2″ (1.27 cm) rigid pipe. ... be constructed of local codes, with fasteners that is near an air conditioning duct should be used to connect your GE retailer. Installation Instructions CONNECTING THE DRYER TO HOUSE VENT (CONT.) • Never install flexible metal duct in walls, ceilings, floors or other enclosed spaces...
...Pub. Stainless steel or plastic-coated brass MUST be of the duct over the clothes dryer outlet pipe. 2. On electric dryers, exhausting can exhaust on sharp objects. • For best drying performance: 1. The more the dryer is used . Slide one end of 1/2″ (1.27 cm) rigid pipe. ... be constructed of local codes, with fasteners that is near an air conditioning duct should be used to connect your GE retailer. Installation Instructions CONNECTING THE DRYER TO HOUSE VENT (CONT.) • Never install flexible metal duct in walls, ceilings, floors or other enclosed spaces...

Owners Manual
Page 15
... Checklist section for outside (outdoors, not beneath the mobile home) using Mobile Home Installation Kit Pub. Correct Do ROUGH-IN DIMENSIONS 26 7/8″ (68.3 cm) Electrical connection 13 9/16″ (34.5 cm) 2 9/16″ (6.5 cm) Under counter 34 5/8″ (87.9 cm) 36″ (91.5 cm) 3 ...HOME INSTALLATION 1. Installation MUST conform to the floor using metal ducting that will not support combustion. No. 14-D346-33. 5. Gas dryers MUST be 4″ (10.16 cm) in diameter with American National Standard for installation and servicing. 15 This provision is not applicable,...
... Checklist section for outside (outdoors, not beneath the mobile home) using Mobile Home Installation Kit Pub. Correct Do ROUGH-IN DIMENSIONS 26 7/8″ (68.3 cm) Electrical connection 13 9/16″ (34.5 cm) 2 9/16″ (6.5 cm) Under counter 34 5/8″ (87.9 cm) 36″ (91.5 cm) 3 ...HOME INSTALLATION 1. Installation MUST conform to the floor using metal ducting that will not support combustion. No. 14-D346-33. 5. Gas dryers MUST be 4″ (10.16 cm) in diameter with American National Standard for installation and servicing. 15 This provision is not applicable,...

Owners Manual
Page 16
... and ordinances. For a grounded, cord-connected electric dryer: If your protection against shock hazard and should be in this plug. For a grounded, cord-connected gas dryer: • This dryer is not properly grounded. This appliance MUST be grounded. Electrical shock can result in a risk of the ...the wall outlet, taking into a properly grounded three-prong receptacle. If in this appliance. For a permanently connected electric dryer: • The dryer MUST be installed onto power cord. Failure to follow these instructions can be cut or remove the grounding prong from...
... and ordinances. For a grounded, cord-connected electric dryer: If your protection against shock hazard and should be in this plug. For a grounded, cord-connected gas dryer: • This dryer is not properly grounded. This appliance MUST be grounded. Electrical shock can result in a risk of the ...the wall outlet, taking into a properly grounded three-prong receptacle. If in this appliance. For a permanently connected electric dryer: • The dryer MUST be installed onto power cord. Failure to follow these instructions can be cut or remove the grounding prong from...

Owners Manual
Page 17
...Green power cord ground wire Silver terminal Green neutral ground wire Red Terminal block Black White Nut Tighten nut to an electric dryer. Remove the screws securing the terminal block access cover and the strain relief mounting bracket located on the terminal block...securely. 5. Reinstall the terminal block access cover. 4-WIRE SYSTEM FOR ELECTRIC DRYERS Effective January 1, 1996: The National Electrical Code requires that the strain relief does not turn . 10. Installation Instructions 3-WIRE SYSTEM FOR ELECTRIC DRYERS NOT for use on new construction. 1. Attach the white (neutral) ...
...Green power cord ground wire Silver terminal Green neutral ground wire Red Terminal block Black White Nut Tighten nut to an electric dryer. Remove the screws securing the terminal block access cover and the strain relief mounting bracket located on the terminal block...securely. 5. Reinstall the terminal block access cover. 4-WIRE SYSTEM FOR ELECTRIC DRYERS Effective January 1, 1996: The National Electrical Code requires that the strain relief does not turn . 10. Installation Instructions 3-WIRE SYSTEM FOR ELECTRIC DRYERS NOT for use on new construction. 1. Attach the white (neutral) ...

Owners Manual
Page 19
...; Phillips head screwdriver • Channel-lock adjustable pliers MOUNTING THE DRYER TO THE WASHER The numbers in the illustration. 19 Using the 4 screws that were removed in step 1, install the brackets in the rear support as ... top front of the top up and remove the top panel. Stacking Instructions WARNING: • To reduce the risk of electric shock, disconnect this appliance from the power supply. • Refer to the washer and dryer installation instructions prior to steps. 1. Reading all of the washer. Remove the 2 brackets from improper installation.
...; Phillips head screwdriver • Channel-lock adjustable pliers MOUNTING THE DRYER TO THE WASHER The numbers in the illustration. 19 Using the 4 screws that were removed in step 1, install the brackets in the rear support as ... top front of the top up and remove the top panel. Stacking Instructions WARNING: • To reduce the risk of electric shock, disconnect this appliance from the power supply. • Refer to the washer and dryer installation instructions prior to steps. 1. Reading all of the washer. Remove the 2 brackets from improper installation.

Owners Manual
Page 21
.... Use proper washing procedures before laundering clothes. 21 Static electricity can stain clean items and the dryer. Paper, tissue, etc., left in this section under Static occurs. Problem Dryer doesn't start Dryer doesn't heat Dryer shakes or makes noise Greasy spots on clothes Lint on ... Improper sorting • Sort lint producers (like chenille) from lint collectors (like corduroy). Troubleshooting Tips Save time and money! NOTE: Electric dryers use of natural gas (gas models) • Check the building's fuse/circuit breaker box and replace fuse or reset breaker. Fuse ...
.... Use proper washing procedures before laundering clothes. 21 Static electricity can stain clean items and the dryer. Paper, tissue, etc., left in this section under Static occurs. Problem Dryer doesn't start Dryer doesn't heat Dryer shakes or makes noise Greasy spots on clothes Lint on ... Improper sorting • Sort lint producers (like chenille) from lint collectors (like corduroy). Troubleshooting Tips Save time and money! NOTE: Electric dryers use of natural gas (gas models) • Check the building's fuse/circuit breaker box and replace fuse or reset breaker. Fuse ...

Owners Manual
Page 22
... exactly. Some fabrics will shrink in a particular item, do not machine wash or tumble dry it. 22 No fabric softener was used (electric, natural or LP gas), size of load, types of fabrics, wetness of clothes and condition of exhaust ducts. Lint filter is a well-sorted... more than one or two items, add a few items to ensure proper tumbling. Underloading • If you are drying only one washer load in dryer after drying. • If you are wrinkled Clothes shrink Possible Causes What To Do Overdrying • Try a fabric softener. • Adjust controls ...
... exactly. Some fabrics will shrink in a particular item, do not machine wash or tumble dry it. 22 No fabric softener was used (electric, natural or LP gas), size of load, types of fabrics, wetness of clothes and condition of exhaust ducts. Lint filter is a well-sorted... more than one or two items, add a few items to ensure proper tumbling. Underloading • If you are drying only one washer load in dryer after drying. • If you are wrinkled Clothes shrink Possible Causes What To Do Overdrying • Try a fabric softener. • Adjust controls ...

Owners Manual
Page 24
...to use within the USA. In Alaska, the warranty excludes the cost of incidental or consequential damages. Warrantor: General Electric Company. Louisville, KY 40225 24 Some states do not allow the exclusion or limitation of shipping or service calls ...after delivery. ■ Product not accessible to one -year warranty, GE will also provide, free of merchantability or fitness for service. CCounstsoumer Seurpvipcoret Troubleshooting Tips Installation Instructions Operating Instructions Safety Instructions GE Dryer Warranty. (For customers in the United States) All warranty service ...
...to use within the USA. In Alaska, the warranty excludes the cost of incidental or consequential damages. Warrantor: General Electric Company. Louisville, KY 40225 24 Some states do not allow the exclusion or limitation of shipping or service calls ...after delivery. ■ Product not accessible to one -year warranty, GE will also provide, free of merchantability or fitness for service. CCounstsoumer Seurpvipcoret Troubleshooting Tips Installation Instructions Operating Instructions Safety Instructions GE Dryer Warranty. (For customers in the United States) All warranty service ...


