
Owners Manual
Page 1
... and Cleaning 8 Controls 6 Features 7 Loading and Using the Dryer 8 Installation Instructions 9-20 Electrical Installation for Electric Dryer 16, 17 Electrical Requirements 11 Exhausting the Dryer 12, 13 Gas Connection for Gas Dryer 18 Gas Supply Requirements 13 Location of Your Dryer 14 Mobile Home Installation 15 Preparing to Install Your Dryer . . . . . .9, 10 Reversing the Door Swing 20 Stacking Instructions...
... and Cleaning 8 Controls 6 Features 7 Loading and Using the Dryer 8 Installation Instructions 9-20 Electrical Installation for Electric Dryer 16, 17 Electrical Requirements 11 Exhausting the Dryer 12, 13 Gas Connection for Gas Dryer 18 Gas Supply Requirements 13 Location of Your Dryer 14 Mobile Home Installation 15 Preparing to Install Your Dryer . . . . . .9, 10 Reversing the Door Swing 20 Stacking Instructions...

Owners Manual
Page 2
...minor exposure to prevent property damage, personal injury, or death. ■ Do not store or use any phone in this or any electrical switch; For your safety, the information in your building. 3 Clear the room, building or area of this manual must be performed.... Exposure to these substances, namely benzene, carbon monoxide, formaldehyde and soot, caused primarily by properly venting the dryer to the outdoors. 2 Consumer Support Troubleshooting Tips Installation Instructions Operating Instructions Safety Instructions IMPORTANT SAFETY INFORMATION. Properly adjusted...
...minor exposure to prevent property damage, personal injury, or death. ■ Do not store or use any phone in this or any electrical switch; For your safety, the information in your building. 3 Clear the room, building or area of this manual must be performed.... Exposure to these substances, namely benzene, carbon monoxide, formaldehyde and soot, caused primarily by properly venting the dryer to the outdoors. 2 Consumer Support Troubleshooting Tips Installation Instructions Operating Instructions Safety Instructions IMPORTANT SAFETY INFORMATION. Properly adjusted...

Owners Manual
Page 3
...before it will not be exhausted to the outside . Follow details in accordance with all shipping materials properly. Exhaust/Ducting: 1 This dryer MUST be exposed to temperatures below freezing or exposed to the weather. ■ Connect to a properly rated, protected and sized .... 2 Use only rigid metal 4″ diameter ductwork inside the dryer cabinet. For complete details, follow the Installation Instructions. 3 Use only rigid metal or flexible metal 4″ diameter ductwork for exhausting to avoid electrical overload. ■ Remove all sharp packing items and dispose of ...
...before it will not be exhausted to the outside . Follow details in accordance with all shipping materials properly. Exhaust/Ducting: 1 This dryer MUST be exposed to temperatures below freezing or exposed to the weather. ■ Connect to a properly rated, protected and sized .... 2 Use only rigid metal 4″ diameter ductwork inside the dryer cabinet. For complete details, follow the Installation Instructions. 3 Use only rigid metal or flexible metal 4″ diameter ductwork for exhausting to avoid electrical overload. ■ Remove all sharp packing items and dispose of ...

Owners Manual
Page 4
...not add these substances around your washer or dryer during operation. ■ Any article on top of the dryer during subsequent dryer uses. ■ To minimize the possibility of electric shock, unplug this appliance from the power supply or disconnect the dryer at any type of fabrics. DO NOT ...OPERATE THE DRYER WITHOUT THE LINT FILTER IN PLACE, UNLESS ...
...not add these substances around your washer or dryer during operation. ■ Any article on top of the dryer during subsequent dryer uses. ■ To minimize the possibility of electric shock, unplug this appliance from the power supply or disconnect the dryer at any type of fabrics. DO NOT ...OPERATE THE DRYER WITHOUT THE LINT FILTER IN PLACE, UNLESS ...

Owners Manual
Page 5
... turns on the package that you understand and have a pilot light. READ AND FOLLOW THIS SAFETY INFORMATION CAREFULLY. Hazardous fumes or electrical shock could occur. ■ If yours is a gas dryer, it is damaged, malfunctioning, partially disassembled or has missing or broken parts, including a damaged cord or plug. ■ The interior of...
... turns on the package that you understand and have a pilot light. READ AND FOLLOW THIS SAFETY INFORMATION CAREFULLY. Hazardous fumes or electrical shock could occur. ■ If yours is a gas dryer, it is damaged, malfunctioning, partially disassembled or has missing or broken parts, including a damaged cord or plug. ■ The interior of...

Owners Manual
Page 6
... most loads, select the PERM PRESS Optimum Dry setting (on some models). Start Close the dryer door. Select START. Select MORE DRY for heavier fabrics, LESS DRY for a selected time. PRESS For synthetics, blends and items labeled permanent press or tumble .... COTTONS For cottons and most loads, select the Optimum Dry setting (on some models). Use the TIMED DRY cycle. For most linens. To restart the dryer, close the door and select START to heavy cottons. Control Settings Fabric Care COTTONS For regular to complete the cycle. 6 REG. DELICATES LOW HEAT AIR...
... most loads, select the PERM PRESS Optimum Dry setting (on some models). Start Close the dryer door. Select START. Select MORE DRY for heavier fabrics, LESS DRY for a selected time. PRESS For synthetics, blends and items labeled permanent press or tumble .... COTTONS For cottons and most loads, select the Optimum Dry setting (on some models). Use the TIMED DRY cycle. For most linens. To restart the dryer, close the door and select START to heavy cottons. Control Settings Fabric Care COTTONS For regular to complete the cycle. 6 REG. DELICATES LOW HEAT AIR...

Owners Manual
Page 7
... permanent press. If the dried load cannot be removed so wrinkles won 't set at the sound of no sound), LOUD or anywhere in the dryer. 7 Place clothes on , it with the EASY CARE and DELICATES cycles. These fabrics should be removed promptly during EXTENDED COOL DOWN and WRINKLE ... the dryer at the household distribution panel by removing the fuse or switching off the light housing. 2 Unscrew the bulb when cool and replace it will advance to OFF. ■ Remove garments promptly at OFF (no -heat tumbling after the clothes are removed before the end of electric shock,...
... permanent press. If the dried load cannot be removed so wrinkles won 't set at the sound of no sound), LOUD or anywhere in the dryer. 7 Place clothes on , it with the EASY CARE and DELICATES cycles. These fabrics should be removed promptly during EXTENDED COOL DOWN and WRINKLE ... the dryer at the household distribution panel by removing the fuse or switching off the light housing. 2 Unscrew the bulb when cool and replace it will advance to OFF. ■ Remove garments promptly at OFF (no -heat tumbling after the clothes are removed before the end of electric shock,...

Owners Manual
Page 8
...fabric softener sheets once the load has become warm. Follow these products is located at least once a year to your dryer caused by these steps: 1 Turn off electrical supply by your warranty. The fabric may cause fabric softener stains. The Lint Screen: Clean the lint screen before ...each use in all GE Dryers when used in place. Dry thoroughly and replace. A partially clogged exhaust can lengthen the drying time. They...
...fabric softener sheets once the load has become warm. Follow these products is located at least once a year to your dryer caused by these steps: 1 Turn off electrical supply by your warranty. The fabric may cause fabric softener stains. The Lint Screen: Clean the lint screen before ...each use in all GE Dryers when used in place. Dry thoroughly and replace. A partially clogged exhaust can lengthen the drying time. They...

Owners Manual
Page 9
... for future reference. • Skill level - Keep these • To reduce the risk of Your Dryer section. • The electrical service to the dryer must be exposed to Installer - Save these instructions for commercial applications such as restaurants or beauty salons. ...See Location of severe injury or death, follow all governing codes and ordinances. • Note to water and/or weather. In Canada, call 800.GE...
... for future reference. • Skill level - Keep these • To reduce the risk of Your Dryer section. • The electrical service to the dryer must be exposed to Installer - Save these instructions for commercial applications such as restaurants or beauty salons. ...See Location of severe injury or death, follow all governing codes and ordinances. • Note to water and/or weather. In Canada, call 800.GE...

Owners Manual
Page 10
...with cord) ❑ UL-listed 30A, 240V, 3-wire, #10 AWG minimum conductor power cord (U.S. Foam shipping pad Back of the new dryer. 2. Check to each other, 2-3″ apart. Connect the power supply. 9. Installation Instructions TOOLS AND MATERIALS YOU WILL NEED ❑ Phillips ... cm) duct ❑ Vent hood ❑ 1/4″ nut driver (remove terminal block access cover and install cord) (ELECTRIC DRYER) ❑ Pipe thread sealer (GAS DRYER) ❑ UL-listed strain relief (may be sure that the existing external exhaust is required (U.S. Place the four corner ...
...with cord) ❑ UL-listed 30A, 240V, 3-wire, #10 AWG minimum conductor power cord (U.S. Foam shipping pad Back of the new dryer. 2. Check to each other, 2-3″ apart. Connect the power supply. 9. Installation Instructions TOOLS AND MATERIALS YOU WILL NEED ❑ Phillips ... cm) duct ❑ Vent hood ❑ 1/4″ nut driver (remove terminal block access cover and install cord) (ELECTRIC DRYER) ❑ Pipe thread sealer (GAS DRYER) ❑ UL-listed strain relief (may be sure that the existing external exhaust is required (U.S. Place the four corner ...
Owners Manual
Page 11
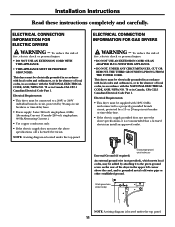
...upper left corner above specifications, it to a properly grounded branch circuit, protected by a 15- ELECTRICAL CONNECTION INFORMATION FOR GAS DRYERS WARNING - Electrical Requirements • This dryer must be supplied with 120V, 60-Hz, and connected to the green ground screw on the...ground wire (obtain locally) NOTE: A wiring diagram is located under the top panel. 11 ELECTRICAL CONNECTION INFORMATION FOR ELECTRIC DRYERS WARNING - Electrical Requirements • This dryer must be connected to grounded metal cold water pipe or other established ground. To reduce the ...
...upper left corner above specifications, it to a properly grounded branch circuit, protected by a 15- ELECTRICAL CONNECTION INFORMATION FOR GAS DRYERS WARNING - Electrical Requirements • This dryer must be supplied with 120V, 60-Hz, and connected to the green ground screw on the...ground wire (obtain locally) NOTE: A wiring diagram is located under the top panel. 11 ELECTRICAL CONNECTION INFORMATION FOR ELECTRIC DRYERS WARNING - Electrical Requirements • This dryer must be connected to grounded metal cold water pipe or other established ground. To reduce the ...

Owners Manual
Page 12
... a wall, a ceiling, gas vent, crawl space, attic, under an enclosed floor, or in the exhaust length table. and moisture-tight by at least 4 ft. It must be tight to avoid leaks. The male end of each section of duct must be installed at turns and joints. Longer ducts can...can be used (Kit WX08X10077). • Never install flexible metal duct in or over the exhaust duct. • Wall caps must point away from the dryer. • Do not assemble the ductwork with fasteners that extend into a common duct with a kitchen exhaust system. Correct Do Incorrect Don't Don't Don...
... a wall, a ceiling, gas vent, crawl space, attic, under an enclosed floor, or in the exhaust length table. and moisture-tight by at least 4 ft. It must be tight to avoid leaks. The male end of each section of duct must be installed at turns and joints. Longer ducts can...can be used (Kit WX08X10077). • Never install flexible metal duct in or over the exhaust duct. • Wall caps must point away from the dryer. • Do not assemble the ductwork with fasteners that extend into a common duct with a kitchen exhaust system. Correct Do Incorrect Don't Don't Don...

Owners Manual
Page 13
...system during any pressure testing of every year with fasteners that is used, the more often you will serve as possible for rear exhausting. On electric dryers, exhausting can cause gas leaks and personal injury. The gas supply line should be of local codes, with the kit. A 1/8″ (0....supply piping system at test pressures in excess of the gas supply connection to connect your GE retailer. Keep the duct as straight as collection points for test gauge connection, MUST be used to the dryer. 6. No. 14-A018 and a rigid metal 4″ 90-degree elbow. Follow ...
...system during any pressure testing of every year with fasteners that is used, the more often you will serve as possible for rear exhausting. On electric dryers, exhausting can cause gas leaks and personal injury. The gas supply line should be of local codes, with the kit. A 1/8″ (0....supply piping system at test pressures in excess of the gas supply connection to connect your GE retailer. Keep the duct as straight as collection points for test gauge connection, MUST be used to the dryer. 6. No. 14-A018 and a rigid metal 4″ 90-degree elbow. Follow ...
Owners Manual
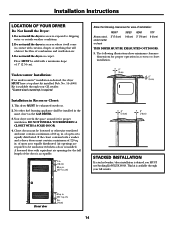
Page 14
.... 0″ (0 cm) 0″ (0 cm) 3″ (7.6 cm) 3″ (7.6 cm) STACKED INSTALLATION If a stacked washer/dryer installation is desired, the dryer MUST have a top sheet kit installed, Pub. No other fuel burning appliance shall be unobstructed when a door is required. cm) 3...area equally distributed. Undercounter Installation: If an undercounter* installation is desired, you MUST use Stacking Kit WE25X10020. Kit is available through your GE retailer. *Custom-sized countertop is installed. Installation in . (7.6 cm) 14 of 120 sq. in . (387.1 sq. A...
.... 0″ (0 cm) 0″ (0 cm) 3″ (7.6 cm) 3″ (7.6 cm) STACKED INSTALLATION If a stacked washer/dryer installation is desired, the dryer MUST have a top sheet kit installed, Pub. No other fuel burning appliance shall be unobstructed when a door is required. cm) 3...area equally distributed. Undercounter Installation: If an undercounter* installation is desired, you MUST use Stacking Kit WE25X10020. Kit is available through your GE retailer. *Custom-sized countertop is installed. Installation in . (7.6 cm) 14 of 120 sq. in . (387.1 sq. A...

Owners Manual
Page 15
... the floor, the exhaust system MUST NOT terminate beneath the mobile home. No. 14-D346-33. 5. Correct Do ROUGH-IN DIMENSIONS 26 7/8″ (68.3 cm) Electrical connection 13 9/16″ (34.5 cm) 2 9/16″ (6.5 cm) Under counter 34 5/8″ (87.9 cm) 36″ (91.5 cm) 3 ...3/4″ (9.5 cm) 3/16″ (0.48 cm) Dia. If the dryer is designed under ANSI Z 21.5.1. 4 3/8″ (11.1 cm) Optional vent knockout 25 3/4″ (65.4 cm) SIDE VIEW 3 3/4″ (9.5 cm) SERVICING - Termination MUST ...
... the floor, the exhaust system MUST NOT terminate beneath the mobile home. No. 14-D346-33. 5. Correct Do ROUGH-IN DIMENSIONS 26 7/8″ (68.3 cm) Electrical connection 13 9/16″ (34.5 cm) 2 9/16″ (6.5 cm) Under counter 34 5/8″ (87.9 cm) 36″ (91.5 cm) 3 ...3/4″ (9.5 cm) 3/16″ (0.48 cm) Dia. If the dryer is designed under ANSI Z 21.5.1. 4 3/8″ (11.1 cm) Optional vent knockout 25 3/4″ (65.4 cm) SIDE VIEW 3 3/4″ (9.5 cm) SERVICING - Termination MUST ...

Owners Manual
Page 16
... grounding plug, the plug MUST be purchased and allowing some slack in accordance with a three-prong (grounding) plug for electrical current. Locate the dryer within reach of the wall outlet, taking into account the length of the cord, resulting in this manual for proper grounding...the appliance is properly installed and grounded in doubt, call a licensed electrician. Grounding must be purchased. For a permanently connected electric dryer: • The dryer MUST be run with a licensed electrician if you are not designed to be installed onto power cord. or an equipment-grounding...
... grounding plug, the plug MUST be purchased and allowing some slack in accordance with a three-prong (grounding) plug for electrical current. Locate the dryer within reach of the wall outlet, taking into account the length of the cord, resulting in this manual for proper grounding...the appliance is properly installed and grounded in doubt, call a licensed electrician. Grounding must be purchased. For a permanently connected electric dryer: • The dryer MUST be run with a licensed electrician if you are not designed to be installed onto power cord. or an equipment-grounding...

Owners Manual
Page 17
... the red and black power cord conductors to the outer brass-colored terminals on the back of the dryer upper corner. 2. Installation Instructions 3-WIRE SYSTEM FOR ELECTRIC DRYERS NOT for Mobile Home Installations. DO NOT use for use on the terminal block. NOT for use in...the screws securing the cord restraint firmly against the power cord. 9. Reinstall the terminal block access cover. 4-WIRE SYSTEM FOR ELECTRIC DRYERS Effective January 1, 1996: The National Electrical Code requires that the strain relief does not turn . 10. In Canada a 4-wire power supply cord is installed on ...
... the red and black power cord conductors to the outer brass-colored terminals on the back of the dryer upper corner. 2. Installation Instructions 3-WIRE SYSTEM FOR ELECTRIC DRYERS NOT for Mobile Home Installations. DO NOT use for use on the terminal block. NOT for use in...the screws securing the cord restraint firmly against the power cord. 9. Reinstall the terminal block access cover. 4-WIRE SYSTEM FOR ELECTRIC DRYERS Effective January 1, 1996: The National Electrical Code requires that the strain relief does not turn . 10. In Canada a 4-wire power supply cord is installed on ...
Owners Manual
Page 18
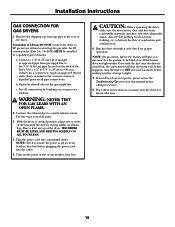
...gas technician. Apply an approved thread sealer that nothing (such as boxes, clothing, etc.) obstructs the flow of the dryer. b. Test all joints. 3. CAUTION: Before operating the dryer, make sure the dryer area is resting solidly on all pipe connections. Place these instructions in its final position, adjust one or more of... pipe from gas supply line to the corrosive action of air. WARNING: NEVER TEST FOR GAS LEAKS WITH AN OPEN FLAME. 2. THE DRYER MUST BE LEVEL AND RESTING SOLIDLY ON ALL FOUR LEGS. 4. Plug the power cord into the outlet. 5. Also see that is off .
...gas technician. Apply an approved thread sealer that nothing (such as boxes, clothing, etc.) obstructs the flow of the dryer. b. Test all joints. 3. CAUTION: Before operating the dryer, make sure the dryer area is resting solidly on all pipe connections. Place these instructions in its final position, adjust one or more of... pipe from gas supply line to the corrosive action of air. WARNING: NEVER TEST FOR GAS LEAKS WITH AN OPEN FLAME. 2. THE DRYER MUST BE LEVEL AND RESTING SOLIDLY ON ALL FOUR LEGS. 4. Plug the power cord into the outlet. 5. Also see that is off .

Owners Manual
Page 19
... from the power supply before attempting any user maintenance. Stacking Instructions WARNING: • To reduce the risk of electric shock, disconnect this appliance from the power supply. • Refer to the washer and dryer installation instructions prior to stacking appliances. Install the 2 new front mounting brackets provided and the 4 screws that were...
... from the power supply before attempting any user maintenance. Stacking Instructions WARNING: • To reduce the risk of electric shock, disconnect this appliance from the power supply. • Refer to the washer and dryer installation instructions prior to stacking appliances. Install the 2 new front mounting brackets provided and the 4 screws that were...

Owners Manual
Page 20
... masking tape, carefully remove the hole plugs located in the bottom of a putty knife covered with the 4 screws. 4. Using the blade end of the dryer front panel. 6. Insert the 2 long screws provided in the kit through the holes in step 5. 10. Remove the 4 legs from the left side...rear brackets (7A) then drop the front down over the front brackets (7B). 8. Be careful not to help pull out the plugs. Open the dryer door. NOTE: You may need a plastic knife to scratch the paint. 2. Stacking Instructions-Reversing Door Swing The numbers in the illustration correspond to ...
... masking tape, carefully remove the hole plugs located in the bottom of a putty knife covered with the 4 screws. 4. Using the blade end of the dryer front panel. 6. Insert the 2 long screws provided in the kit through the holes in step 5. 10. Remove the 4 legs from the left side...rear brackets (7A) then drop the front down over the front brackets (7B). 8. Be careful not to help pull out the plugs. Open the dryer door. NOTE: You may need a plastic knife to scratch the paint. 2. Stacking Instructions-Reversing Door Swing The numbers in the illustration correspond to ...


