
Owners Manual
Page 1
Profile Dryers GEAppliances.com Safety Instructions 2-5 Operating Instructions Controls 6 Cycle Options 8 Dryer Features 15 Help 13, 14 Loading and Using the Dryer 16, 17 "My Cycles 11, 12 Quick Start Guide 7 Summary Screen 9, 10 Troubleshooter 13 Installation Instructions Before You Begin 18-20 Connecting a Gas Dryer 21-24 Connecting an Electric Dryer 25-27 Exhausting the Dryer... 28-32 Final Setup 33, 34 Reversing the Door Swing . . . . . .35, 36 Switching the Washer and Dryer Backsplashes 37...
Profile Dryers GEAppliances.com Safety Instructions 2-5 Operating Instructions Controls 6 Cycle Options 8 Dryer Features 15 Help 13, 14 Loading and Using the Dryer 16, 17 "My Cycles 11, 12 Quick Start Guide 7 Summary Screen 9, 10 Troubleshooter 13 Installation Instructions Before You Begin 18-20 Connecting a Gas Dryer 21-24 Connecting an Electric Dryer 25-27 Exhausting the Dryer... 28-32 Final Setup 33, 34 Reversing the Door Swing . . . . . .35, 36 Switching the Washer and Dryer Backsplashes 37...

Owners Manual
Page 2
.... Gas appliances can cause minor exposure to four of fire or explosion, electric shock, or to the outdoors. 2 IMPORTANT SAFETY INSTRUCTIONS READ ALL INSTRUCTIONS BEFORE USING. Properly adjusted dryers will minimize incomplete combustion. Exposure to such substances. WARNING! For your safety, the ... customers of potential exposure to these substances, namely benzene, carbon monoxide, formaldehyde and soot, caused primarily by properly venting the dryer to prevent property damage, personal injury, or loss of life. • Do not store or use gasoline or other flammable...
.... Gas appliances can cause minor exposure to four of fire or explosion, electric shock, or to the outdoors. 2 IMPORTANT SAFETY INSTRUCTIONS READ ALL INSTRUCTIONS BEFORE USING. Properly adjusted dryers will minimize incomplete combustion. Exposure to such substances. WARNING! For your safety, the ... customers of potential exposure to these substances, namely benzene, carbon monoxide, formaldehyde and soot, caused primarily by properly venting the dryer to prevent property damage, personal injury, or loss of life. • Do not store or use gasoline or other flammable...

Owners Manual
Page 3
Exhaust/Ducting: 1 Gas dryers MUST be properly installed and located in accordance with...properly. For complete details, follow the Installation Instructions. Follow details in this manual. • Properly ground dryer to conform with the Installation Instructions before it will not be followed to minimize the risk of fire or... free from being blown into the room. 3 Use only rigid metal 4″ diameter ductwork inside the dryer cabinet. Installation Instructions are included in a locked cabinet. IMPORTANT SAFETY INSTRUCTIONS READ ALL INSTRUCTIONS BEFORE USING. ...
Exhaust/Ducting: 1 Gas dryers MUST be properly installed and located in accordance with...properly. For complete details, follow the Installation Instructions. Follow details in this manual. • Properly ground dryer to conform with the Installation Instructions before it will not be followed to minimize the risk of fire or... free from being blown into the room. 3 Use only rigid metal 4″ diameter ductwork inside the dryer cabinet. Installation Instructions are included in a locked cabinet. IMPORTANT SAFETY INSTRUCTIONS READ ALL INSTRUCTIONS BEFORE USING. ...

Owners Manual
Page 4
... in, soaked in or spotted with cooking oils may contribute to a chemical reaction that could result from the power supply or disconnect the dryer at the building's distribution panel by spontaneous combustion. • Do not store plastic, paper or clothing that may burn or melt on which...materials, when heated, can reduce the flame retardancy of electric shock, unplug this manual must not be followed to minimize the risk of the dryer during operation. • Garments labeled Dry Away from the power supply. 4 These substances give off the circuit breaker before each load to ...
... in, soaked in or spotted with cooking oils may contribute to a chemical reaction that could result from the power supply or disconnect the dryer at the building's distribution panel by spontaneous combustion. • Do not store plastic, paper or clothing that may burn or melt on which...materials, when heated, can reduce the flame retardancy of electric shock, unplug this manual must not be followed to minimize the risk of the dryer during operation. • Garments labeled Dry Away from the power supply. 4 These substances give off the circuit breaker before each load to ...

Owners Manual
Page 5
See the Loading and Using the Dryer section. • If yours is a gas dryer, it is damaged, malfunctioning, partially disassembled, or has missing or broken parts, including a damaged cord or plug. • The interior of this appliance. WHEN NOT USING YOUR DRYER • Grasp the plug firmly ...personal injury, or loss of fire or explosion, electric shock, or to soften your laundered fabrics or reduce the static electricity in your dryer. We recommend you understand and have a pilot light. DO NOT ATTEMPT TO LIGHT WITH A MATCH. WARNING! Service or performance problems caused...
See the Loading and Using the Dryer section. • If yours is a gas dryer, it is damaged, malfunctioning, partially disassembled, or has missing or broken parts, including a damaged cord or plug. • The interior of this appliance. WHEN NOT USING YOUR DRYER • Grasp the plug firmly ...personal injury, or loss of fire or explosion, electric shock, or to soften your laundered fabrics or reduce the static electricity in your dryer. We recommend you understand and have a pilot light. DO NOT ATTEMPT TO LIGHT WITH A MATCH. WARNING! Service or performance problems caused...

Owners Manual
Page 6
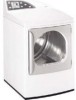
... is running, pressing once will be dark. Press to return to start a dry cycle. If the dryer is active, press to find help using the Touch Screen or to put the dryer into standby mode, and the display will go into standby mode. BACK HELP HOME START STOP MY CYCLES... enter standby mode and the current dry cycle will pause the dryer. NOTE: If the dryer is paused and the cycle is inactive for common dryer problems. 6 NOTE: Pressing POWER does not disconnect the appliance from your model. Dryer Control Panel GEAppliances.com WARNING! You may vary from the power supply. 2 MY...
... is running, pressing once will be dark. Press to return to start a dry cycle. If the dryer is active, press to find help using the Touch Screen or to put the dryer into standby mode, and the display will go into standby mode. BACK HELP HOME START STOP MY CYCLES... enter standby mode and the current dry cycle will pause the dryer. NOTE: If the dryer is paused and the cycle is inactive for common dryer problems. 6 NOTE: Pressing POWER does not disconnect the appliance from your model. Dryer Control Panel GEAppliances.com WARNING! You may vary from the power supply. 2 MY...

Owners Manual
Page 7
...OPTIONS DRYNESS TEMP TIME 0:36 Close the door and press START. After the wash cycle is complete, communication begins once either the washer or dryer Touch Screen is closed. NOTE: For some communicated wash cycles, your load. See "Final Setup" in the Installation Instructions for attaching the ...cycles, as desired. IMPORTANT: Clean the lint filter each time you to access the dry cycles menu. Once the information is received, your dryer can then change the End-of the automatic settings, if desired, by pressing the Touch Screen and following the on-screen instructions. You ...
...OPTIONS DRYNESS TEMP TIME 0:36 Close the door and press START. After the wash cycle is complete, communication begins once either the washer or dryer Touch Screen is closed. NOTE: For some communicated wash cycles, your load. See "Final Setup" in the Installation Instructions for attaching the ...cycles, as desired. IMPORTANT: Clean the lint filter each time you to access the dry cycles menu. Once the information is received, your dryer can then change the End-of the automatic settings, if desired, by pressing the Touch Screen and following the on-screen instructions. You ...

Owners Manual
Page 8
...; Silks (Washable) • Delicates BY FABRIC Select By Garment to dry loads sorted by Garment Type Drying Using the Special Cycles Drying Using Timed Dry Dryer Cycles GEAppliances.com If the Touch Screen is also recommended for small loads. 1 Press TIMED DRY. 2 Use the arrows to set more or less time...
...; Silks (Washable) • Delicates BY FABRIC Select By Garment to dry loads sorted by Garment Type Drying Using the Special Cycles Drying Using Timed Dry Dryer Cycles GEAppliances.com If the Touch Screen is also recommended for small loads. 1 Press TIMED DRY. 2 Use the arrows to set more or less time...

Owners Manual
Page 10
..., select DELAY TIME or EXTENDED TUMBLE; To change the delay start and extended tumble times. COOL DOWN - The new volume will be removed (the dryer will be turned off . then choose the time you wish to select drying options. EXTENDED TUMBLE - After selecting any drying options, press OK to... so wrinkles won't set a delay time of -Cycle Signal Alerts you press START, a Cycle Status screen will appear to indicate what cycle the dryer is changed, the dryness sensor will continue to blow cool air for up to turn the feature on or off . DRYING - The clothes should ...
..., select DELAY TIME or EXTENDED TUMBLE; To change the delay start and extended tumble times. COOL DOWN - The new volume will be removed (the dryer will be turned off . then choose the time you wish to select drying options. EXTENDED TUMBLE - After selecting any drying options, press OK to... so wrinkles won't set a delay time of -Cycle Signal Alerts you press START, a Cycle Status screen will appear to indicate what cycle the dryer is changed, the dryness sensor will continue to blow cool air for up to turn the feature on or off . DRYING - The clothes should ...

Owners Manual
Page 13
... for the problem and follow the on-screen instructions to find a solution. Touch any other screen allows you to locate troubleshooting tips for common dryer problems: 1 Press the HELP button. 2 On the Touch Screen, select TROUBLE SHOOTER. 3 On the Touch Screen, select the problem description... screen to set machine preferences. Press HELP; Using the Troubleshooter Finding Help Using the Home Screen To locate Troubleshooting Tips for common dryer problems, to find additional information on features found on any pad on that screen. To exit the feature, press the BACK button...
... for the problem and follow the on-screen instructions to find a solution. Touch any other screen allows you to locate troubleshooting tips for common dryer problems: 1 Press the HELP button. 2 On the Touch Screen, select TROUBLE SHOOTER. 3 On the Touch Screen, select the problem description... screen to set machine preferences. Press HELP; Using the Troubleshooter Finding Help Using the Home Screen To locate Troubleshooting Tips for common dryer problems, to find additional information on features found on any pad on that screen. To exit the feature, press the BACK button...

Owners Manual
Page 14
...Washer Recommended Cycle" button appear on the control panel or Touch Screen. MACHINE PREFERENCES LANGUAGE BUTTON BEEP END OF CYCLE SIGNAL WASHER/DRYER COMMUNICATION 3 Select WASHER/DRYER COMMUNICATION from the Touch Screen. 4 Touch the pad at the bottom of the Touch Screen to select ON or OFF. 5.../PREFERENCIAS DE LA MÁQUINA from the Touch Screen. 3 Select LANGUAGE/IDIOMA from the Touch Screen. 4 Select either the washer or dryer Touch Screen is activated or washer lid is sent, your load. Once the information is up. Setting the Machine Preferences 14 Help GEAppliances....
...Washer Recommended Cycle" button appear on the control panel or Touch Screen. MACHINE PREFERENCES LANGUAGE BUTTON BEEP END OF CYCLE SIGNAL WASHER/DRYER COMMUNICATION 3 Select WASHER/DRYER COMMUNICATION from the Touch Screen. 4 Touch the pad at the bottom of the Touch Screen to select ON or OFF. 5.../PREFERENCIAS DE LA MÁQUINA from the Touch Screen. 3 Select LANGUAGE/IDIOMA from the Touch Screen. 4 Select either the washer or dryer Touch Screen is activated or washer lid is sent, your load. Once the information is up. Setting the Machine Preferences 14 Help GEAppliances....

Owners Manual
Page 15
... items such as washable sweaters. Changing the Drum Lamp Using the Drying Rack Dryer Features GEAppliances.com Before replacing the drum lamp, be sure to unplug the dryer power cord or disconnect the dryer at the top left of the door frame. 1 Remove the screw holding ...the drum lamp shield in the dryer. A handy drying rack may be used with a 15-watt, 120-volt candelabra-base bulb. 4 Replace the lamp shield and ... DRY or RACK DRY cycles. Hook the rack over the lint filter so the rack extends into the dryer drum. Screw 15
... items such as washable sweaters. Changing the Drum Lamp Using the Drying Rack Dryer Features GEAppliances.com Before replacing the drum lamp, be sure to unplug the dryer power cord or disconnect the dryer at the top left of the door frame. 1 Remove the screw holding ...the drum lamp shield in the dryer. A handy drying rack may be used with a 15-watt, 120-volt candelabra-base bulb. 4 Replace the lamp shield and ... DRY or RACK DRY cycles. Hook the rack over the lint filter so the rack extends into the dryer drum. Screw 15

Owners Manual
Page 16
...fabric care label "symbols" that affect the clothing you will be laundering. Bounce® Fabric Conditioner Dryer Sheets have been approved for the dryer. Sorting and Loading Hints Fabric Care Labels Loading and Using the Dryer GEAppliances.com Always follow fabric manufacturer's care label when laundering. This wastes energy and causes wrinkling. ... become warm. Dry Labels Tumble dry Dry Normal Permanent Press/ wrinkle resistant Gentle/ delicate Do not dry Do not tumble dry (used in all GE Dryers when used with do not dry a sheet with the manufacturer's instructions.
...fabric care label "symbols" that affect the clothing you will be laundering. Bounce® Fabric Conditioner Dryer Sheets have been approved for the dryer. Sorting and Loading Hints Fabric Care Labels Loading and Using the Dryer GEAppliances.com Always follow fabric manufacturer's care label when laundering. This wastes energy and causes wrinkling. ... become warm. Dry Labels Tumble dry Dry Normal Permanent Press/ wrinkle resistant Gentle/ delicate Do not dry Do not tumble dry (used in all GE Dryers when used with do not dry a sheet with the manufacturer's instructions.

Owners Manual
Page 17
...the lint from the dryer. Stainless Steel: To clean stainless steel surfaces, use a damp cloth with sharp objects. If the dryer drum should be cleaned once a year by these products away from the dryer lint filter area if you notice a change in a GE dryer. These surface blemishes ...will not rust or corrode. Damage to make the dryer drum provides the highest reliability available in dryer performance. Remove the cleaner residue, and then dry ...
...the lint from the dryer. Stainless Steel: To clean stainless steel surfaces, use a damp cloth with sharp objects. If the dryer drum should be cleaned once a year by these products away from the dryer lint filter area if you notice a change in a GE dryer. These surface blemishes ...will not rust or corrode. Damage to make the dryer drum provides the highest reliability available in dryer performance. Remove the cleaner residue, and then dry ...

Owners Manual
Page 18
... the temperature is the responsibility of gas appliances in accordance with flexible plastic ducting materials. Properly adjusted dryers will obstruct dryer airflow and increase the risk of this manual. Exposure to leave these instructions completely and carefully. • IMPORTANT - Call 800.GE.CARES (800.432.2737) or visit our Web site at: GEAppliances.com...
... the temperature is the responsibility of gas appliances in accordance with flexible plastic ducting materials. Properly adjusted dryers will obstruct dryer airflow and increase the risk of this manual. Exposure to leave these instructions completely and carefully. • IMPORTANT - Call 800.GE.CARES (800.432.2737) or visit our Web site at: GEAppliances.com...

Owners Manual
Page 19
LOCATION OF YOUR DRYER IMPORTANT: Gas dryers are : • 0 inch clearance both sides • 1 inch front • 3 inches rear Consideration must be given to remove all of the foam pieces around the legs. DRYER DIMENSIONS MINIMUM CLEARANCE OTHER THAN ALCOVE OR CLOSET INSTALLATION Minimum clearance ...the sides and breaking them away from the dryer legs. Be sure to provide adequate clearance for the washer and dryer before making exhaust or utility connections (see "Switching the Washer and Dryer Backsplashes"). SWITCH WASHER AND DRYER BACKSPLASHES (optional) If necessary, switch the ...
LOCATION OF YOUR DRYER IMPORTANT: Gas dryers are : • 0 inch clearance both sides • 1 inch front • 3 inches rear Consideration must be given to remove all of the foam pieces around the legs. DRYER DIMENSIONS MINIMUM CLEARANCE OTHER THAN ALCOVE OR CLOSET INSTALLATION Minimum clearance ...the sides and breaking them away from the dryer legs. Be sure to provide adequate clearance for the washer and dryer before making exhaust or utility connections (see "Switching the Washer and Dryer Backsplashes"). SWITCH WASHER AND DRYER BACKSPLASHES (optional) If necessary, switch the ...

Owners Manual
Page 20
... is: 0" either side 3" front and rear • Minimum vertical space from floor to overhead shelves, cabinets, ceilings, etc., is approved for gas dryers). 20 See EXHAUST INFORMATION. • The installation must contain a minimum of 120 square inches of local codes, with the NATIONAL ELECTRICAL CODE, ANSI.../NFPA NO. 70 (for electric dryers) or NATIONAL FUEL GAS CODE, ANSI Z223 (for installation in the same closet with local codes or, in the absence of open area equally distributed...
... is: 0" either side 3" front and rear • Minimum vertical space from floor to overhead shelves, cabinets, ceilings, etc., is approved for gas dryers). 20 See EXHAUST INFORMATION. • The installation must contain a minimum of 120 square inches of local codes, with the NATIONAL ELECTRICAL CODE, ANSI.../NFPA NO. 70 (for electric dryers) or NATIONAL FUEL GAS CODE, ANSI Z223 (for installation in the same closet with local codes or, in the absence of open area equally distributed...

Owners Manual
Page 21
... legs) ❒ Pipe wrench for holding dryer gas inlet while attaching adapter elbow ❒ Adjustable wrenches (2) for electric dryers) TOOLS AND MATERIALS YOU WILL NEED FOR CONNECTING THE GAS SUPPLY ❒ Flat- Be sure the dryer cord is unplugged from the wall. ❒... the OFF position. Shut-off Valve Disconnect and discard old flexible gas connector and ducting material. 21 Installation Instructions CONNECTING A GAS DRYER (skip for tightening connections Turn the dryer's gas shut-off the circuit breaker(s) or remove the dryer's circuit fuse(s) at the electrical box.
... legs) ❒ Pipe wrench for holding dryer gas inlet while attaching adapter elbow ❒ Adjustable wrenches (2) for electric dryers) TOOLS AND MATERIALS YOU WILL NEED FOR CONNECTING THE GAS SUPPLY ❒ Flat- Be sure the dryer cord is unplugged from the wall. ❒... the OFF position. Shut-off Valve Disconnect and discard old flexible gas connector and ducting material. 21 Installation Instructions CONNECTING A GAS DRYER (skip for tightening connections Turn the dryer's gas shut-off the circuit breaker(s) or remove the dryer's circuit fuse(s) at the electrical box.

Owners Manual
Page 22
... (8.2 cm) 23⁄8" (6 cm) 3/8" NPT MALE THREAD GAS SUPPLY NOTE: Add to vertical dimension the distance between cabinet bottom to the dryer. elevation. For operation at a rate of 4 percent for each 1000 ft. GAS SUPPLY • A 1/8" National Pipe Taper thread plugged tapping, accessible... for use Teflon® tape. • Connect flexible metal connector to dryer and gas supply. ADJUSTING FOR ELEVATION • Gas clothes dryers input ratings are based on the installation...
... (8.2 cm) 23⁄8" (6 cm) 3/8" NPT MALE THREAD GAS SUPPLY NOTE: Add to vertical dimension the distance between cabinet bottom to the dryer. elevation. For operation at a rate of 4 percent for each 1000 ft. GAS SUPPLY • A 1/8" National Pipe Taper thread plugged tapping, accessible... for use Teflon® tape. • Connect flexible metal connector to dryer and gas supply. ADJUSTING FOR ELEVATION • Gas clothes dryers input ratings are based on the installation...

Owners Manual
Page 23
NOTE: Apply pipe compound or Teflon® tape to the dryer gas line shut-off valve. 23 Adapter Elbow Dryer Gas Inlet CONNECTING THE DRYER TO THE GAS SUPPLY (cont.) D Install a 1/8" NPT plugged tapping to the threads of the dryer gas inlet to all connections using two adjustable wrenches. Install a flare...pipe wrench to securely hold on to the end of the adapter and dryer gas inlet. Apply pipe compound or Teflon® tape to prevent twisting the inlet. F Open the gas shut-off valve for checking gas inlet pressure. NOTE: Apply pipe compound or Teflon® tape to...
NOTE: Apply pipe compound or Teflon® tape to the dryer gas line shut-off valve. 23 Adapter Elbow Dryer Gas Inlet CONNECTING THE DRYER TO THE GAS SUPPLY (cont.) D Install a 1/8" NPT plugged tapping to the threads of the dryer gas inlet to all connections using two adjustable wrenches. Install a flare...pipe wrench to securely hold on to the end of the adapter and dryer gas inlet. Apply pipe compound or Teflon® tape to prevent twisting the inlet. F Open the gas shut-off valve for checking gas inlet pressure. NOTE: Apply pipe compound or Teflon® tape to...


