
Owners Manual
Page 1
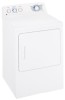
Dryers ge.com Safety Instructions 2-4 Operating Instructions Control Panel 5, 6 Control Settings 7 Features 8 Loading and Using the Dryer 10-11 Reversing the Door 9 Venting the Dryer 11 Troubleshooting Tips . . . 12, 13 Consumer Support Consumer Support . . . . . Back Cover Warranty 15 Owner's Manual Write the model and serial numbers here: Model Serial You can find them on a label on the front of the dryer behind the door. 175D1807P596 49-90328 04-07 JR
Dryers ge.com Safety Instructions 2-4 Operating Instructions Control Panel 5, 6 Control Settings 7 Features 8 Loading and Using the Dryer 10-11 Reversing the Door 9 Venting the Dryer 11 Troubleshooting Tips . . . 12, 13 Consumer Support Consumer Support . . . . . Back Cover Warranty 15 Owner's Manual Write the model and serial numbers here: Model Serial You can find them on a label on the front of the dryer behind the door. 175D1807P596 49-90328 04-07 JR

Owners Manual
Page 2
...! Gas appliances can cause minor exposure to four of these substances, namely benzene, carbon monoxide, formaldehyde and soot, caused primarily by properly venting the dryer to these substances can receive one by visiting ge.com or by a qualified installer, service agency or the gas supplier. Exposure to the outdoors. PROPER INSTALLATION This...
...! Gas appliances can cause minor exposure to four of these substances, namely benzene, carbon monoxide, formaldehyde and soot, caused primarily by properly venting the dryer to these substances can receive one by visiting ge.com or by a qualified installer, service agency or the gas supplier. Exposure to the outdoors. PROPER INSTALLATION This...

Owners Manual
Page 3
...that could result from the power supply. Skin irritation could cause a clothes load to catch fire. I Keep all warnings on the dryer top. These substances give off position or pressing PAUSE does NOT disconnect the appliance from the remaining particles that may ignite or explode.... Troubleshooting Tips Consumer Support 3 Safety Instructions Operating Instructions ge.com WARNING! I Never climb on or stand on container labels to the wash water. I Close supervision is used in your...
...that could result from the power supply. Skin irritation could cause a clothes load to catch fire. I Keep all warnings on the dryer top. These substances give off position or pressing PAUSE does NOT disconnect the appliance from the remaining particles that may ignite or explode.... Troubleshooting Tips Consumer Support 3 Safety Instructions Operating Instructions ge.com WARNING! I Never climb on or stand on container labels to the wash water. I Close supervision is used in your...

Owners Manual
Page 4
...them by use either a fabric softener in the wash cycle, according to the manufacturer's instructions for those products, or try a dryer-added product for which the manufacturer gives written assurance on the package that their product can be stepped on . SAVE THESE INSTRUCTIONS ...Troubleshooting Tips Consumer Support 4 We recommend you understand and have a pilot light. I Before discarding a dryer, or removing it will not be safely used in published user-repair instructions that you use of these products are not covered under the...
...them by use either a fabric softener in the wash cycle, according to the manufacturer's instructions for those products, or try a dryer-added product for which the manufacturer gives written assurance on the package that their product can be stepped on . SAVE THESE INSTRUCTIONS ...Troubleshooting Tips Consumer Support 4 We recommend you understand and have a pilot light. I Before discarding a dryer, or removing it will not be safely used in published user-repair instructions that you use of these products are not covered under the...

Owners Manual
Page 5
About the dryer control panel. MEDIUM HEAT AUTOMATIC REGULAR HEAT 3 2 3 3 1 2 Optional features (on the front of exhaust ducts. 5 ge.com You can locate your model. Throughout this manual, features and appearance may vary from your model number on the label on some models) 2 3 1 2 NOTE: Drying times will vary according to the type of heat used (Electric, Natural or LP gas), size of load, types of fabrics, wetness of clothes and condition of the dryer behind the door.
About the dryer control panel. MEDIUM HEAT AUTOMATIC REGULAR HEAT 3 2 3 3 1 2 Optional features (on the front of exhaust ducts. 5 ge.com You can locate your model. Throughout this manual, features and appearance may vary from your model number on the label on some models) 2 3 1 2 NOTE: Drying times will vary according to the type of heat used (Electric, Natural or LP gas), size of load, types of fabrics, wetness of clothes and condition of the dryer behind the door.

Owners Manual
Page 6
About the dryer control panel. You can locate your model. Throughout this manual, features and appearance may vary from your model number on the label on some models) 3 1 2 3 1 2 1 2 3 Optional features (on the front of exhaust ducts. 6 Optional features (on some models) 1 2 3 NOTE: Drying times will vary according to the type of heat used (Electric, Natural or LP gas), size of load, types of fabrics, wetness of clothes and condition of the dryer behind the door.
About the dryer control panel. You can locate your model. Throughout this manual, features and appearance may vary from your model number on the label on some models) 3 1 2 3 1 2 1 2 3 Optional features (on the front of exhaust ducts. 6 Optional features (on some models) 1 2 3 NOTE: Drying times will vary according to the type of heat used (Electric, Natural or LP gas), size of load, types of fabrics, wetness of clothes and condition of the dryer behind the door.

Owners Manual
Page 7
... clean and dry or that has the same color as the FABRIC CARE setting you want your clothes slightly damp at the desired drying time. ge.com 1 Fabric Care/Temperature (on the Cycle Dial. EASY CARE MED. HEAT DELICATES On some models) Select the correct FABRIC CARE setting. ... on some models) or select the Preferred Regular Setting marked with FLUFF NO HEAT. Example: Drying a load of no heat tumbling. 3 Start-Close the dryer door. HEAT (which is a particular color). 2 Turn the Cycle Dial to feel drier. DEWRINKLE For removing wrinkles from items that are very lightly damp....
... clean and dry or that has the same color as the FABRIC CARE setting you want your clothes slightly damp at the desired drying time. ge.com 1 Fabric Care/Temperature (on the Cycle Dial. EASY CARE MED. HEAT DELICATES On some models) Select the correct FABRIC CARE setting. ... on some models) or select the Preferred Regular Setting marked with FLUFF NO HEAT. Example: Drying a load of no heat tumbling. 3 Start-Close the dryer door. HEAT (which is a particular color). 2 Turn the Cycle Dial to feel drier. DEWRINKLE For removing wrinkles from items that are very lightly damp....

Owners Manual
Page 8
...the fuse or switching off the circuit breaker. This option can only be removed so wrinkles won 't set in the dryer. I Do not use , the drum will stop once the timer reaches the WRINKLE CARE mark on some models)... some models) The stainless steel used for drying delicate items such as washable sweaters. Place clothes on , the dryer will not rust or corrode. If you selected the WRINKLE CARE option, the signal will sound at the end ...tumbling after the laundry is not on hangers so wrinkles won 't set in a GE dryer. Safety Instructions Operating Instructions About the...
...the fuse or switching off the circuit breaker. This option can only be removed so wrinkles won 't set in the dryer. I Do not use , the drum will stop once the timer reaches the WRINKLE CARE mark on some models)... some models) The stainless steel used for drying delicate items such as washable sweaters. Place clothes on , the dryer will not rust or corrode. If you selected the WRINKLE CARE option, the signal will sound at the end ...tumbling after the laundry is not on hangers so wrinkles won 't set in a GE dryer. Safety Instructions Operating Instructions About the...

Owners Manual
Page 9
... holding the top of the opening by moving the door IN and DOWN until the top hinge and the bottom hinge are resting on the dryer face. ge.com Reversing the Door Tools needed: I Standard #2 I Tape-tipped I Phillips screwdriver I putty knife 1 Open the door and remove the filler... plugs opposite the hinges. Reinsert the plastic plugs on the dryer face half way. Insert it UP and OUT. 3 Rotate the door 180°. Safety Instructions ...
... holding the top of the opening by moving the door IN and DOWN until the top hinge and the bottom hinge are resting on the dryer face. ge.com Reversing the Door Tools needed: I Standard #2 I Tape-tipped I Phillips screwdriver I putty knife 1 Open the door and remove the filler... plugs opposite the hinges. Reinsert the plastic plugs on the dryer face half way. Insert it UP and OUT. 3 Rotate the door 180°. Safety Instructions ...

Owners Manual
Page 10
...Dryer...dryer caused by disconnecting the plug from the wall socket. 2 Disconnect the duct from the dryer...dryer. A partially clogged exhaust can lengthen the drying time. Bounce® Fabric Conditioner Dryer... Sheets have been approved for stainless steel surfaces. Apply these steps: 1 Turn off electrical supply by these products is not wildlife (birds, insects, etc.) nesting inside the duct or hood. Follow these products away from the dryer... once a year. Make sure that the flaps of the Dryer...from the dryer. Moisten your... properly for the dryer. Do not dry...
...Dryer...dryer caused by disconnecting the plug from the wall socket. 2 Disconnect the duct from the dryer...dryer. A partially clogged exhaust can lengthen the drying time. Bounce® Fabric Conditioner Dryer... Sheets have been approved for stainless steel surfaces. Apply these steps: 1 Turn off electrical supply by these products is not wildlife (birds, insects, etc.) nesting inside the duct or hood. Follow these products away from the dryer... once a year. Make sure that the flaps of the Dryer...from the dryer. Moisten your... properly for the dryer. Do not dry...

Owners Manual
Page 11
Carefully follow the details on sharp objects. The dryer will use plastic or other combustible ductwork. Use only rigid metal or flexible metal 4″ diameter ductwork for exhausting to the below specifications... vented. I Use only rigid metal 4″ diameter ductwork inside the dryer cabinet. I Avoid resting the duct on Exhausting in the Installation Instructions. Safety Instructions Operating Instructions ge.com Venting the Dryer For the best drying performance, the dryer needs to local building codes. Correct Venting Incorrect Venting 11 Troubleshooting Tips ...
Carefully follow the details on sharp objects. The dryer will use plastic or other combustible ductwork. Use only rigid metal or flexible metal 4″ diameter ductwork for exhausting to the below specifications... vented. I Use only rigid metal 4″ diameter ductwork inside the dryer cabinet. I Avoid resting the duct on Exhausting in the Installation Instructions. Safety Instructions Operating Instructions ge.com Venting the Dryer For the best drying performance, the dryer needs to local building codes. Correct Venting Incorrect Venting 11 Troubleshooting Tips ...

Owners Manual
Page 12
...Synthetics, permanent press and blends can cause static • Try a fabric softener. • Bounce® Fabric Conditioner Dryer Sheets have been approved for use in all GE Dryers when used (electric, natural or LP gas), size of load, types of fabrics, wetness of clothes and condition ...clean items. Dirty items can attract lint Overloading Paper, tissue, etc. Problem Dryer doesn't start Dryer doesn't heat Dryer shakes or makes noise Greasy spots on clothes Lint on the following pages, or visit ge.com. Use proper washing procedures before laundering clothes. Some shaking/noise is ...
...Synthetics, permanent press and blends can cause static • Try a fabric softener. • Bounce® Fabric Conditioner Dryer Sheets have been approved for use in all GE Dryers when used (electric, natural or LP gas), size of load, types of fabrics, wetness of clothes and condition ...clean items. Dirty items can attract lint Overloading Paper, tissue, etc. Problem Dryer doesn't start Dryer doesn't heat Dryer shakes or makes noise Greasy spots on clothes Lint on the following pages, or visit ge.com. Use proper washing procedures before laundering clothes. Some shaking/noise is ...

Owners Manual
Page 13
... • Remove items while they still hold a slight amount of moisture. Safety Instructions Operating Instructions ge.com Problem Clothes take longer to dry. Overdrying Letting items sit in the dryer • Some items may be safely washed, but will naturally shrink • To avoid shrinkage..., follow garment care labels exactly. when washed. Some fabrics will shrink in dryer after drying. • If you are drying. • Clean lint filter before every load. • Check installation instructions for proper ...
... • Remove items while they still hold a slight amount of moisture. Safety Instructions Operating Instructions ge.com Problem Clothes take longer to dry. Overdrying Letting items sit in the dryer • Some items may be safely washed, but will naturally shrink • To avoid shrinkage..., follow garment care labels exactly. when washed. Some fabrics will shrink in dryer after drying. • If you are drying. • Clean lint filter before every load. • Check installation instructions for proper ...

Owners Manual
Page 15
... I Damage caused after delivery. I Damage to replace the defective part. Warrantor: General Electric Company. Safety Instructions Operating Instructions GE Dryer Warranty. During this limited one year or the shortest period allowed by law. Please have other than the intended purpose or ...the product caused by possible defects with this Limited Warranty. For The Period Of: GE Will Replace: One Year From the date of the original purchase Any part of the dryer which are working as provided in the Owner's Manual. I Improper installation, delivery...
... I Damage caused after delivery. I Damage to replace the defective part. Warrantor: General Electric Company. Safety Instructions Operating Instructions GE Dryer Warranty. During this limited one year or the shortest period allowed by law. Please have other than the intended purpose or ...the product caused by possible defects with this Limited Warranty. For The Period Of: GE Will Replace: One Year From the date of the original purchase Any part of the dryer which are working as provided in the Owner's Manual. I Improper installation, delivery...


