
Use and Care Manual
Page 20
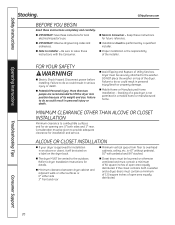
... Installation must be vented to lift the dryer into position because of open area equally distributed. n Electric Shock Hazard. DO NOT place the washer on the dryer back. Stacking of the dryer. ALCOVE OR CLOSET INSTALLATION n If your dryer is approved for air opening are recommended ...distributed. Failure to dryer Installation Instructions for installation and service. Troubleshooting Tips Consumer Support 20 n Proper installation is : 0″ either side 3″ front and rear n Closet doors must contain a minimum of 60 square inches of its weight and size. Failure...
... Installation must be vented to lift the dryer into position because of open area equally distributed. n Electric Shock Hazard. DO NOT place the washer on the dryer back. Stacking of the dryer. ALCOVE OR CLOSET INSTALLATION n If your dryer is approved for air opening are recommended ...distributed. Failure to dryer Installation Instructions for installation and service. Troubleshooting Tips Consumer Support 20 n Proper installation is : 0″ either side 3″ front and rear n Closet doors must contain a minimum of 60 square inches of its weight and size. Failure...
Use and Care Manual
Page 23
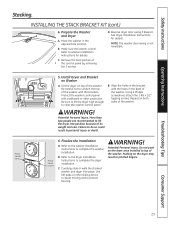
...B. Carefully slide or walk the stacked washer and dryer into position because of its weight and size. Use felt pads or other protection. Pushing on the dryer may result in the approximate location. Place the washer in pinched fingers. D. Install Dryer and Bracket on both sides of the washer. More...washer is not reversible. 5. Remove the back portion of the washer with the holes in personal injury or death. Be sure to lift the dryer high enough to complete the washer installation. Using a Phillips screwdriver, attach the 2 #8 x 1/2″ tapping screws. Refer to the washer ...
...B. Carefully slide or walk the stacked washer and dryer into position because of its weight and size. Use felt pads or other protection. Pushing on the dryer may result in the approximate location. Place the washer in pinched fingers. D. Install Dryer and Bracket on both sides of the washer. More...washer is not reversible. 5. Remove the back portion of the washer with the holes in personal injury or death. Be sure to lift the dryer high enough to complete the washer installation. Using a Phillips screwdriver, attach the 2 #8 x 1/2″ tapping screws. Refer to the washer ...