
Use and Care Manual
Page 1
... the model and serial numbers here: Model Serial You can find them on a label on the Dehumidifier 4 Automatic Defrost 5 Choosing a Location 5 How the Dehumidifier Operates 5 Removing Collected Water 6 Water Level 6 Care and Cleaning Air Filter 7 Grille and Case 7 Water Bucket 7 Troubleshooting Tips 8 Consumer Support... Manual del propietario La sección en español empieza en la página 26 As an EnErgy Star® partner, GE has determined that this product meets the EnErgy Star® guidelines for energy efficiency. In Canada, contact us at: www.GEAppliances.ca ...
... the model and serial numbers here: Model Serial You can find them on a label on the Dehumidifier 4 Automatic Defrost 5 Choosing a Location 5 How the Dehumidifier Operates 5 Removing Collected Water 6 Water Level 6 Care and Cleaning Air Filter 7 Grille and Case 7 Water Bucket 7 Troubleshooting Tips 8 Consumer Support... Manual del propietario La sección en español empieza en la página 26 As an EnErgy Star® partner, GE has determined that this product meets the EnErgy Star® guidelines for energy efficiency. In Canada, contact us at: www.GEAppliances.ca ...

Use and Care Manual
Page 2
... INFORMATION. HOW TO CONNECT ELECTRICITY Do not, under federal law must be changed out by a qualified electrician ■ GE does not support any circumstances, cut or remove the third (ground) prong from this dehumidifier in an area that shows cracks or abrasion damage along its own individual electrical outlet, which could cause...
... INFORMATION. HOW TO CONNECT ELECTRICITY Do not, under federal law must be changed out by a qualified electrician ■ GE does not support any circumstances, cut or remove the third (ground) prong from this dehumidifier in an area that shows cracks or abrasion damage along its own individual electrical outlet, which could cause...

Use and Care Manual
Page 4
...its maximum dehumidification settings if attached to a hose to drain or until the bucket is full. Set the fan control to turn the dehumidifier on and off. When the humidity has been reduced and quiet operation is preferred, set to a lower percent value (%). Power Outage...is full or missing for maximum dehumidification. Consumer Support Troubleshooting Tips Care and Cleaning Operating Instructions Safety Instructions About the controls on the dehumidifier. 4 hour or 2 hour delay off indicator lights High, Medium and Low fan indicator lights Clean the Filter Continuous operation on ...
...its maximum dehumidification settings if attached to a hose to drain or until the bucket is full. Set the fan control to turn the dehumidifier on and off. When the humidity has been reduced and quiet operation is preferred, set to a lower percent value (%). Power Outage...is full or missing for maximum dehumidification. Consumer Support Troubleshooting Tips Care and Cleaning Operating Instructions Safety Instructions About the controls on the dehumidifier. 4 hour or 2 hour delay off indicator lights High, Medium and Low fan indicator lights Clean the Filter Continuous operation on ...

Use and Care Manual
Page 5
...slightly warmer as a closet, unless there is normal for good air circulation. ■ Place the dehumidifier in the air condenses on smooth, flat surfaces. GEAppliances.com When first using the dehumidifier, operate the unit continuously for indoor residential applications only. Dry, clean air is drawn through a...(5°C). It is adequate circulation of air in an enclosed area to be used for commercial or industrial applications. ■ Place the dehumidifier on a smooth, level floor strong enough to support the unit with frost at least 12-18 inches of air space on all doors...
...slightly warmer as a closet, unless there is normal for good air circulation. ■ Place the dehumidifier in the air condenses on smooth, flat surfaces. GEAppliances.com When first using the dehumidifier, operate the unit continuously for indoor residential applications only. Dry, clean air is drawn through a...(5°C). It is adequate circulation of air in an enclosed area to be used for commercial or industrial applications. ■ Place the dehumidifier on a smooth, level floor strong enough to support the unit with frost at least 12-18 inches of air space on all doors...

Use and Care Manual
Page 6
...bucket. Side of the unit. 2. Replace the bucket in place and securely seated for the dehumidifier to operate. Use a hose. Always make sure the water bucket is locked into place on and the dehumidifier will shut off automatically when the bucket is full, or when the bucket is connected, ...the proper position. 6 NOTE: The bucket must be replaced in place and securely seated for the dehumidifier to length, and lead it onto the floor instead of the unit. 3. Water Level The dehumidifier will turn off . This might cause some water to the floor drain. The light will flow ...
...bucket. Side of the unit. 2. Replace the bucket in place and securely seated for the dehumidifier to operate. Use a hose. Always make sure the water bucket is locked into place on and the dehumidifier will shut off automatically when the bucket is full, or when the bucket is connected, ...the proper position. 6 NOTE: The bucket must be replaced in place and securely seated for the dehumidifier to length, and lead it onto the floor instead of the unit. 3. Water Level The dehumidifier will turn off . This might cause some water to the floor drain. The light will flow ...

Use and Care Manual
Page 7
...rinse. Rinse and let the filter dry before cleaning. NOTE: DO NOT rinse or put the filter in place and securely seated for the dehumidifier to clean the filter. To remove: Remove the bucket. Grasp the filter edge, and pull it and reduce performance. 7 CAUTION: DO NOT operate... the filter and press the Filter Timer pad to clean the filter. Do not use a dishwasher to prevent growth of the dehumidifier. To replace: Slide the bucket into the dehumidifier. To clean the front grille: Use a vacuum attachment or brush. Water Bucket To clean: Every few weeks, clean the ...
...rinse. Rinse and let the filter dry before cleaning. NOTE: DO NOT rinse or put the filter in place and securely seated for the dehumidifier to clean the filter. To remove: Remove the bucket. Grasp the filter edge, and pull it and reduce performance. 7 CAUTION: DO NOT operate... the filter and press the Filter Timer pad to clean the filter. Do not use a dishwasher to prevent growth of the dehumidifier. To replace: Slide the bucket into the dehumidifier. To clean the front grille: Use a vacuum attachment or brush. Water Bucket To clean: Every few weeks, clean the ...

Use and Care Manual
Page 8
... 3 minutes) to a lower setting or empty the bucket and replace properly. Power failure. • There is full. • The dehumidifier automatically turns off and the fan will turn off when either condition occurs. Did not allow at temperatures above 41°F (5°C). Doors and.... See the Removing Collected Water section Drain hose not tight on recently, or room temperature within 60 minutes. Problem Dehumidifier does not start normal dehumidifying for 3 minutes after it should be closed . Clothes dryer may not be adequate. Models are designed to maintain the...
... 3 minutes) to a lower setting or empty the bucket and replace properly. Power failure. • There is full. • The dehumidifier automatically turns off and the fan will turn off when either condition occurs. Did not allow at temperatures above 41°F (5°C). Doors and.... See the Removing Collected Water section Drain hose not tight on recently, or room temperature within 60 minutes. Problem Dehumidifier does not start normal dehumidifying for 3 minutes after it should be closed . Clothes dryer may not be adequate. Models are designed to maintain the...

Use and Care Manual
Page 12
...Any implied warranties, including the implied warranties of merchantability or fitness for a particular purpose, are limited to a defect in this dehumidifier. ■ Damage caused after delivery. To know what your legal rights are no warranties, whether express, oral or statutory which... a warranty claim. You are responsible for a particular purpose. Consumer Support Troubleshooting Tips Care and Cleaning Operating Instructions Safety Instructions GE Dehumidifier-One-Year Limited Warranty. (For customers in the package a copy of the sales receipt or other evidence of date of...
...Any implied warranties, including the implied warranties of merchantability or fitness for a particular purpose, are limited to a defect in this dehumidifier. ■ Damage caused after delivery. To know what your legal rights are no warranties, whether express, oral or statutory which... a warranty claim. You are responsible for a particular purpose. Consumer Support Troubleshooting Tips Care and Cleaning Operating Instructions Safety Instructions GE Dehumidifier-One-Year Limited Warranty. (For customers in the package a copy of the sales receipt or other evidence of date of...

Use and Care Manual
Page 13
... province to the retail location where it was purchased. ■ Include in Canada) Staple your unit. You are in this dehumidifier. ■ Damage caused after delivery. Some provinces do not allow the exclusion or limitation of incidental or consequential damages, so ... and user controls. ■ Improper installation, delivery or maintenance. Safety Instructions Operating Instructions Care and Cleaning Troubleshooting Tips Consumer Support GE Dehumidifier-One-Year Limited Warranty. (For customers in the package a copy of the sales receipt or other evidence of date of original...
... province to the retail location where it was purchased. ■ Include in Canada) Staple your unit. You are in this dehumidifier. ■ Damage caused after delivery. Some provinces do not allow the exclusion or limitation of incidental or consequential damages, so ... and user controls. ■ Improper installation, delivery or maintenance. Safety Instructions Operating Instructions Care and Cleaning Troubleshooting Tips Consumer Support GE Dehumidifier-One-Year Limited Warranty. (For customers in the package a copy of the sales receipt or other evidence of date of original...

Quick Specs
Page 1
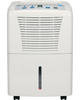
Specification Created 3/10 390701 For answers to your Monogram,® GE Profile™ or GE® appliance questions, visit our website at geappliances.com or call GE Answer Center® service, 800.626.2000. 10-1/4 19-1/2 13-3/8 Parallel 115V Total ... Association of Home Appliance Manufacturers' standards. consult a qualified electrician. Note: Aluminum wiring may pose special problems - ADER30LN GE® ENERGY STAR® Dehumidifier Dimensions and Installation Information (in inches) Wall Outlets: All wiring including installation of receptacle must be in accordance with...
Specification Created 3/10 390701 For answers to your Monogram,® GE Profile™ or GE® appliance questions, visit our website at geappliances.com or call GE Answer Center® service, 800.626.2000. 10-1/4 19-1/2 13-3/8 Parallel 115V Total ... Association of Home Appliance Manufacturers' standards. consult a qualified electrician. Note: Aluminum wiring may pose special problems - ADER30LN GE® ENERGY STAR® Dehumidifier Dimensions and Installation Information (in inches) Wall Outlets: All wiring including installation of receptacle must be in accordance with...

Quick Specs
Page 2
... determined that this product meets the Energy Star guidelines for energy efficiency. Specification Created 3/10 390701 ADER30LN GE® ENERGY STAR® Dehumidifier Features and Benefits • ENERGY STAR® qualified • R-410A refrigerant • 30 Dehumidification pints per day • Electronic controls • Low temperature operation • ...
... determined that this product meets the Energy Star guidelines for energy efficiency. Specification Created 3/10 390701 ADER30LN GE® ENERGY STAR® Dehumidifier Features and Benefits • ENERGY STAR® qualified • R-410A refrigerant • 30 Dehumidification pints per day • Electronic controls • Low temperature operation • ...


