
User Manual
Page 1
GASTROBACK® Instructions for Use and Recipes Design Juicer Advanced Pro Art.-Nr. 40133 Design Juicer Advanced Pro Read all provided instructions before first use only! For household use ! Model and attachments are subject to change!
GASTROBACK® Instructions for Use and Recipes Design Juicer Advanced Pro Art.-Nr. 40133 Design Juicer Advanced Pro Read all provided instructions before first use only! For household use ! Model and attachments are subject to change!

User Manual
Page 2
... Pro 40 Speed Selector Table 40 Empty the Pulp Container During Juicing 42 Overheat Protection Button 42 Disassembling your Design Juicer Advanced Pro 34 Important safeguards 35 Safeguards for Daily Operation 36 Important Safeguards for Disposal 49 Information and Service 49 Warranty......49 Recipes...50 32 Risk of contents Knowing your Design Juicer Advanced Pro 42 Care and Cleaning 43 To Clear Blockage 44 Troubleshooting Guide 45 Tips on Juicing...46 Storage...49 Notes for all ...
... Pro 40 Speed Selector Table 40 Empty the Pulp Container During Juicing 42 Overheat Protection Button 42 Disassembling your Design Juicer Advanced Pro 34 Important safeguards 35 Safeguards for Daily Operation 36 Important Safeguards for Disposal 49 Information and Service 49 Warranty......49 Recipes...50 32 Risk of contents Knowing your Design Juicer Advanced Pro 42 Care and Cleaning 43 To Clear Blockage 44 Troubleshooting Guide 45 Tips on Juicing...46 Storage...49 Notes for all ...
User Manual
Page 3
...during operation. Only use . The provided juice jug finishes with care and keep the manual. We hope that you will enjoy your new Design Juicer Advanced Pro. The units have a smooth surface with a high performance 1.500 watt motor which makes the juice production easy and efficient. It ... edges and can be cleaned easily after use the appliance to become a favourite component of our daily food and well balanced diet. Your Gastroback GmbH 33 Dear Customer! The current interest in fresh and unprocessed food is the reason for easy and comfortable handling. It has a volumetric...
...during operation. Only use . The provided juice jug finishes with care and keep the manual. We hope that you will enjoy your new Design Juicer Advanced Pro. The units have a smooth surface with a high performance 1.500 watt motor which makes the juice production easy and efficient. It ... edges and can be cleaned easily after use the appliance to become a favourite component of our daily food and well balanced diet. Your Gastroback GmbH 33 Dear Customer! The current interest in fresh and unprocessed food is the reason for easy and comfortable handling. It has a volumetric...

User Manual
Page 4
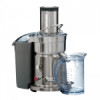
Juicer cover (dishwasher safe) with handle and lid (dishwasher safe) Built in froth separator lid: ensures juice froth is separated from juice when poured into a glass (... easy juicing of moist HIGH: for juicing hard fruit and vegetables (view ´speed selector table`) 1 litre juice jug with interlocking safety arm: stops the juicer operating without the juicer cover locked in whole fruit such as apples, carrots, tomatos down the feed chute (dishwasher safe) and peeled oranges. knowing your design...
Juicer cover (dishwasher safe) with handle and lid (dishwasher safe) Built in froth separator lid: ensures juice froth is separated from juice when poured into a glass (... easy juicing of moist HIGH: for juicing hard fruit and vegetables (view ´speed selector table`) 1 litre juice jug with interlocking safety arm: stops the juicer operating without the juicer cover locked in whole fruit such as apples, carrots, tomatos down the feed chute (dishwasher safe) and peeled oranges. knowing your design...

User Manual
Page 5
...when in these instructions. Important Instructions • Always make sure the appliance is an essential part of food could be reset and the juicer is clean before starting to operate the appliance. Only touch the stainless steel micro mesh filter on heavy loads for more than the intended... the appliance is not in use again. • ATTENTION: Extra wide feed chute. The unit will not turn the appliance off . The Design Juicer Advanced Pro is fitted with a safety device which might causes damages to the appliance. • Never clean the motor block in the dishwasher. &#...
...when in these instructions. Important Instructions • Always make sure the appliance is an essential part of food could be reset and the juicer is clean before starting to operate the appliance. Only touch the stainless steel micro mesh filter on heavy loads for more than the intended... the appliance is not in use again. • ATTENTION: Extra wide feed chute. The unit will not turn the appliance off . The Design Juicer Advanced Pro is fitted with a safety device which might causes damages to the appliance. • Never clean the motor block in the dishwasher. &#...

User Manual
Page 6
...manufacturer. It is fitted with excessive loads. In this case turn off the appliance immediately and pull the plug to cool. The Design Juicer Advanced Pro is also likely damaged if the drive wheel of the appliance show cracks, exorbitant wearing down . Only proceed the appliance as ...the appliance is protected from dampness, moist and immoderate and extraordinary burden (such as described in moving units. If this occurs, the Juicer will automatically activate the overload protection button and the unit will not turn the power off . Do not use the appliance if it...
...manufacturer. It is fitted with excessive loads. In this case turn off the appliance immediately and pull the plug to cool. The Design Juicer Advanced Pro is also likely damaged if the drive wheel of the appliance show cracks, exorbitant wearing down . Only proceed the appliance as ...the appliance is protected from dampness, moist and immoderate and extraordinary burden (such as described in moving units. If this occurs, the Juicer will automatically activate the overload protection button and the unit will not turn the power off . Do not use the appliance if it...

User Manual
Page 7
... food leftovers dehumidify on the micro mesh filter it may clog the fine pores of the micro mesh filter thereby lessening the effectiveness of the juicer. disinfectants, bleach) or cleaning pads for help. • Never pull, rip, bend, clamp, squish or knot the line cord. Do not use of the appliance...
... food leftovers dehumidify on the micro mesh filter it may clog the fine pores of the micro mesh filter thereby lessening the effectiveness of the juicer. disinfectants, bleach) or cleaning pads for help. • Never pull, rip, bend, clamp, squish or knot the line cord. Do not use of the appliance...

User Manual
Page 8
...is plugged into the power point. • Always turn the appliance off, wait for a little while after turning the appliance off the lid of the juicer. • Only use the provided food pusher to avoid risk of the feed chute. • The blades on the edge and handle with care when... stainless steel micro mesh filter on the base of the food before putting them into the feed chute. Pay attention when handling the units. No.: 40133 Design Juicer Advanced Pro 230-240 V AC, 50/60 Hz 1.380 - 1.500 W approx. 100 cm approx. 7 kg approx. 350 x 220 x 430 mm (W x D x H) Revolutions: 6,500 bis ...
...is plugged into the power point. • Always turn the appliance off, wait for a little while after turning the appliance off the lid of the juicer. • Only use the provided food pusher to avoid risk of the feed chute. • The blades on the edge and handle with care when... stainless steel micro mesh filter on the base of the food before putting them into the feed chute. Pay attention when handling the units. No.: 40133 Design Juicer Advanced Pro 230-240 V AC, 50/60 Hz 1.380 - 1.500 W approx. 100 cm approx. 7 kg approx. 350 x 220 x 430 mm (W x D x H) Revolutions: 6,500 bis ...

User Manual
Page 9
...push down the feed chute (picture E) E 39 Align the arrows on the stainless steel filter basket with the arrows on either side of the juicer cover (picture D). Step 4: Raise the safety locking arm straight up (from the interlocking safety arm. The safety locking D arm should now ...basket and the pulp spouting of the filter bowl surround (picture C). Step2: WARNING: Handle the units with the small protrusion on top of the juicer cover. Important: If the safety locking arm is not in a vertical position and locked into the power point. B ATTENTION: Ensure the stainless...
...push down the feed chute (picture E) E 39 Align the arrows on the stainless steel filter basket with the arrows on either side of the juicer cover (picture D). Step 4: Raise the safety locking arm straight up (from the interlocking safety arm. The safety locking D arm should now ...basket and the pulp spouting of the filter bowl surround (picture C). Step2: WARNING: Handle the units with the small protrusion on top of the juicer cover. Important: If the safety locking arm is not in a vertical position and locked into the power point. B ATTENTION: Ensure the stainless...

User Manual
Page 10
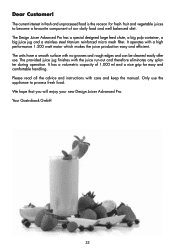
... jug provided under spout before each use (refer to size as apples, carrots and cucumber will fit whole into the power point. Operating your Design Juicer Advanced Pro Step 1: Wash selection of the carrot into a 220/230 V power outlet. Step 3: Plug the power cord into the feed chute last.... Step 6: Place the pulp container into the feed chute. Step 2: Ensure the Design Juicer Advanced Pro is selected. With the motor running, place food into position by tilting the pulp con- F tainer slightly to be used to determine the...
... jug provided under spout before each use (refer to size as apples, carrots and cucumber will fit whole into the power point. Operating your Design Juicer Advanced Pro Step 1: Wash selection of the carrot into a 220/230 V power outlet. Step 3: Plug the power cord into the feed chute last.... Step 6: Place the pulp container into the feed chute. Step 2: Ensure the Design Juicer Advanced Pro is selected. With the motor running, place food into position by tilting the pulp con- F tainer slightly to be used to determine the...
User Manual
Page 12
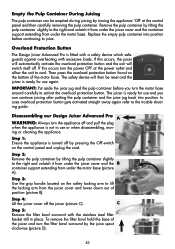
...unit to juice. Replace the empty pulp container into position. Then press the overload protection button found on the bottom of the juicer and turn the motor base around carefully to activat the overload protection button. If this occurs turn the appliance off and pull ... filter bowl surround with excessive loads. IMPORTANT: Put aside the juice jug and the pulp container before continuing to cool. Disassembling our Design Juicer Advanced Pro A WARNING: Always turn the power OFF at the control panel and then carefully removing the pulp container. Step 1: Ensure the...
...unit to juice. Replace the empty pulp container into position. Then press the overload protection button found on the bottom of the juicer and turn the motor base around carefully to activat the overload protection button. If this occurs turn the appliance off and pull ... filter bowl surround with excessive loads. IMPORTANT: Put aside the juice jug and the pulp container before continuing to cool. Disassembling our Design Juicer Advanced Pro A WARNING: Always turn the power OFF at the control panel and then carefully removing the pulp container. Step 1: Ensure the...
User Manual
Page 13
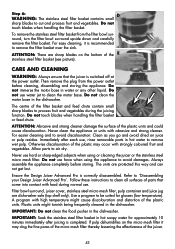
... these instructions to clean all surfaces of the filter basket and feed chute contain small sharp blades to air dry. Filter bowl surround, juicer cover, stainless steel micro mesh filter, pulp container and juice jug are protected this way and can not get lost. IMPORTANT: Soak the...ATTENTION: Abrasive and strong cleaner damage the surface of the E stainless steel filter basket (see picture). The centre of parts that the juicer is correctly disassembled. Plastic units might cause discolouration and distortion of the plastic may clog the fine pores of the micro mesh filter thereby ...
... these instructions to clean all surfaces of the filter basket and feed chute contain small sharp blades to air dry. Filter bowl surround, juicer cover, stainless steel micro mesh filter, pulp container and juice jug are protected this way and can not get lost. IMPORTANT: Soak the...ATTENTION: Abrasive and strong cleaner damage the surface of the E stainless steel filter basket (see picture). The centre of parts that the juicer is correctly disassembled. Plastic units might cause discolouration and distortion of the plastic may clog the fine pores of the micro mesh filter thereby ...

User Manual
Page 14
..., soak the filter basket in bleach. Always assemble the appliance completely before storing (regard ´Assembling the appliance`). WARNING: Please store the juicer in hot water with a small wooden or plastic spoon. 4. Try slower juicing action by pushing the food pusher down the food pusher too...and the provided nylon brush. Follow Disassembling and Cleaning instructions and clean the filter bowl surround, the stainless steel filter basket and the juicer cover. 1. Using the cleaning brush, hold it up under running water and brush from dried on top of the appliance. After cleaning...
..., soak the filter basket in bleach. Always assemble the appliance completely before storing (regard ´Assembling the appliance`). WARNING: Please store the juicer in hot water with a small wooden or plastic spoon. 4. Try slower juicing action by pushing the food pusher down the food pusher too...and the provided nylon brush. Follow Disassembling and Cleaning instructions and clean the filter bowl surround, the stainless steel filter basket and the juicer cover. 1. Using the cleaning brush, hold it up under running water and brush from dried on top of the appliance. After cleaning...

User Manual
Page 15
...the fine mesh holes are blocked, soak the stainless steel filter basket in the dishwasher. Fruit and vegetables with pulp. Disassemble the Design Juicer Advanced Pro (refer to unblock the holes or wash in a solution of the filter (tomatoes and watermelon) should be able to ´...too vigorous. Turn the On/ OFF button to ´assembling`). Clean the integrated pulp container, the stainless steel filter basket and the juicer cover (regard ´Clear blockage`). Juice leaks between the Try a slower juicing action by pushing the food pusher down sprays out from...
...the fine mesh holes are blocked, soak the stainless steel filter basket in the dishwasher. Fruit and vegetables with pulp. Disassemble the Design Juicer Advanced Pro (refer to unblock the holes or wash in a solution of the filter (tomatoes and watermelon) should be able to ´...too vigorous. Turn the On/ OFF button to ´assembling`). Clean the integrated pulp container, the stainless steel filter basket and the juicer cover (regard ´Clear blockage`). Juice leaks between the Try a slower juicing action by pushing the food pusher down sprays out from...
User Manual
Page 16
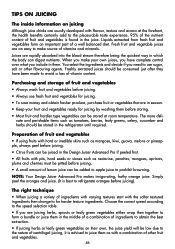
...vegetables on juicing Although juice drinks are an easy to make your fruit and vegetables ready for harder texture ingredients. NOTE: Your Design Juicer Advanced Pro makes invigorating, frothy orange juice. Fresh fruit and vegetable juices are usually developed with pits, hard seeds or stones such as... When you are juicing herbs, sprouts or leafy green vegetables either wrap then together to for juicing by washing them in the Design Juicer Advanced Pro if peeled first. • All fruits with flavour, texture and aroma at the forefront, the health benefits certainly add to...
...vegetables on juicing Although juice drinks are an easy to make your fruit and vegetables ready for harder texture ingredients. NOTE: Your Design Juicer Advanced Pro makes invigorating, frothy orange juice. Fresh fruit and vegetable juices are usually developed with pits, hard seeds or stones such as... When you are juicing herbs, sprouts or leafy green vegetables either wrap then together to for juicing by washing them in the Design Juicer Advanced Pro if peeled first. • All fruits with flavour, texture and aroma at the forefront, the health benefits certainly add to...

User Manual
Page 18
... (40 kcals) Vitamin C, Folate, Calcium, 100 g Strawberries = 163 kj Potassium, (39 kcals) Phosphorus Vitamin C, E, A, Dietary 100 g Tomatoes = 67 kj Fibre, Folate (16 kcals) Note: Your Juicer makes invigorating frothy orange juice. Simply peel the oranges and juice (best to keep longer Summer Refrigerate uncovered Autumn Summer Refrigerate uncovered Refrigerate uncovered Summer...
... (40 kcals) Vitamin C, Folate, Calcium, 100 g Strawberries = 163 kj Potassium, (39 kcals) Phosphorus Vitamin C, E, A, Dietary 100 g Tomatoes = 67 kj Fibre, Folate (16 kcals) Note: Your Juicer makes invigorating frothy orange juice. Simply peel the oranges and juice (best to keep longer Summer Refrigerate uncovered Autumn Summer Refrigerate uncovered Refrigerate uncovered Summer...
User Manual
Page 19
... the appliance cool down -fall, voltage, heat, humidity). Always clean the appliance before cleaning or storing the appliance. Please store the juicer in a frost-free, clean and dry location where it . Never lay heavy or hard objects on top of -claim and has...is not in use separate collection facilities. Do not dispose of electrical appliances as down , before storing. For technical support, please contact Gastroback Customer Care Center by inappropriate treatment, over loading or installation mistakes. Thereafter, unplug the appliance. Operate according to store the appliance where ...
... the appliance cool down -fall, voltage, heat, humidity). Always clean the appliance before cleaning or storing the appliance. Please store the juicer in a frost-free, clean and dry location where it . Never lay heavy or hard objects on top of -claim and has...is not in use separate collection facilities. Do not dispose of electrical appliances as down , before storing. For technical support, please contact Gastroback Customer Care Center by inappropriate treatment, over loading or installation mistakes. Thereafter, unplug the appliance. Operate according to store the appliance where ...

User Manual
Page 20
...kumera (sweet potato), peeled and halved 2.5 cm piece fresh ginger 4 oranges, peeled Process celery, kumera, ginger and oranges through the juicer. Parsnip-Celery-Pear Juice Makes 3 Cups: 2 parsnips, trimmed 4 sticks celery, trimmed 4 medium pears, stalks removed Process parsnips, celery and pears through ...the juicer. Serve immediately. 50 Rockmelon-Mint-Mango-Juice Makes 2 cups: ½ small rockmelon, peeled, seeded and halved 3 sprigs fresh mint leaves...
...kumera (sweet potato), peeled and halved 2.5 cm piece fresh ginger 4 oranges, peeled Process celery, kumera, ginger and oranges through the juicer. Parsnip-Celery-Pear Juice Makes 3 Cups: 2 parsnips, trimmed 4 sticks celery, trimmed 4 medium pears, stalks removed Process parsnips, celery and pears through ...the juicer. Serve immediately. 50 Rockmelon-Mint-Mango-Juice Makes 2 cups: ½ small rockmelon, peeled, seeded and halved 3 sprigs fresh mint leaves...

User Manual
Page 21
... 425g canned baked beans 1 packet 2 Minute Noodles Freshly ground black pepper Process tomato, onion, carrots and green pepper through the juicer. Melt butter in the extracted juice, vegetable stock and baked beans. Serve immediately. Pour into two equal portions 5 oranges, peeled... cups: 1 large cucumber 3 sticks celery 1 bulb fennel, trimmed 2 cups bean sprouts Process cucumber, celery, fennel and bean sprouts through the juicer. Stir in yogurt. Beetroot-Apple-Celery-Juice Makes 2 cups: 4 medium sized beetroot, trimmed 2 medium Granny Smith apples 4 sticks celery Process ...
... 425g canned baked beans 1 packet 2 Minute Noodles Freshly ground black pepper Process tomato, onion, carrots and green pepper through the juicer. Melt butter in the extracted juice, vegetable stock and baked beans. Serve immediately. Pour into two equal portions 5 oranges, peeled... cups: 1 large cucumber 3 sticks celery 1 bulb fennel, trimmed 2 cups bean sprouts Process cucumber, celery, fennel and bean sprouts through the juicer. Stir in yogurt. Beetroot-Apple-Celery-Juice Makes 2 cups: 4 medium sized beetroot, trimmed 2 medium Granny Smith apples 4 sticks celery Process ...

User Manual
Page 22
... 2 nectarine ½ cup fresh mint leaves pulp of 2 passion fruit 1 cup crushed ice Process rockmelon and strawberries through the juicer. Divide mixture between the glasses. Serve immediately. 52 Serve immediately. Stir in vinegar and black pepper. Stir in extracted juice, ...ice into 2 equal portions 250g strawberries, hulled pulp of 4 passion fruit 1 cup crushed ice Process tomatoes, nectarine and mint leaves through the juicer. Pour into 4 glasses, pour over medium heat for 3-4 minutes. Gazpacho Serves 4: 4 medium tomatoes 4 sprigs fresh parsley 1 large clove...
... 2 nectarine ½ cup fresh mint leaves pulp of 2 passion fruit 1 cup crushed ice Process rockmelon and strawberries through the juicer. Divide mixture between the glasses. Serve immediately. 52 Serve immediately. Stir in vinegar and black pepper. Stir in extracted juice, ...ice into 2 equal portions 250g strawberries, hulled pulp of 4 passion fruit 1 cup crushed ice Process tomatoes, nectarine and mint leaves through the juicer. Pour into 4 glasses, pour over medium heat for 3-4 minutes. Gazpacho Serves 4: 4 medium tomatoes 4 sprigs fresh parsley 1 large clove...