
Installation Instructions
Page 1
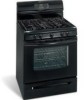
...;ol - Installation and service must be installed. OVERALL DIMENSIONS 25 3/4" 30" 29 1/4" incl. Check for Cabinets Above Range Top. 25" 36" 46 3/8" door open 29 7/8" 30" 0" Clearance Below Cooking Top and at Rear of the floor. 2. 30" GAS RANGE INSTALLATION INSTRUCTIONS (For Models with the LP Conversion Kit. IMPORTANT: SAVE FOR LOCAL ELECTRICAL INSPECTOR'S USE. Do not store or...
...;ol - Installation and service must be installed. OVERALL DIMENSIONS 25 3/4" 30" 29 1/4" incl. Check for Cabinets Above Range Top. 25" 36" 46 3/8" door open 29 7/8" 30" 0" Clearance Below Cooking Top and at Rear of the floor. 2. 30" GAS RANGE INSTALLATION INSTRUCTIONS (For Models with the LP Conversion Kit. IMPORTANT: SAVE FOR LOCAL ELECTRICAL INSPECTOR'S USE. Do not store or...

Installation Instructions
Page 4
...an additional 4 to 7 inches clearance from the floor. Seal wall openings. Provide an adequate gas supply. If the LP/Propane conversion kit has been used, follow instructions provided with a wrench. Note: A minimum clearance of 1/8" is inserted into position. Connect the range to check your adjustments....back side of the range (some models). Care must be at least 5 inches; Examples: If regulator is connected to the manifold and MUST be taken during installation of range not to obstruct the flow of combustion and ventilation air. 30" GAS RANGE INSTALLATION INSTRUCTIONS (For...
...an additional 4 to 7 inches clearance from the floor. Seal wall openings. Provide an adequate gas supply. If the LP/Propane conversion kit has been used, follow instructions provided with a wrench. Note: A minimum clearance of 1/8" is inserted into position. Connect the range to check your adjustments....back side of the range (some models). Care must be at least 5 inches; Examples: If regulator is connected to the manifold and MUST be taken during installation of range not to obstruct the flow of combustion and ventilation air. 30" GAS RANGE INSTALLATION INSTRUCTIONS (For...


