
Owners Guide
Page 1
...: Serial Number: Purchase Date: P/N 134671200A (0606) Read and Save These Instructions Record Your Model and Serial Numbers Record below the model and serial numbers found on the dryer serial plate located on the left side of Contents Important Safety Instructions 2 Drying Procedures 3 Features 3 Common Drying Problems 4 Care and Cleaning 4 Avoid Service Checklist 5 Warranty...
...: Serial Number: Purchase Date: P/N 134671200A (0606) Read and Save These Instructions Record Your Model and Serial Numbers Record below the model and serial numbers found on the dryer serial plate located on the left side of Contents Important Safety Instructions 2 Drying Procedures 3 Features 3 Common Drying Problems 4 Care and Cleaning 4 Avoid Service Checklist 5 Warranty...
Owners Guide
Page 2
...'s Guide. Keep laundry products out of the dryer. Refer to the weather. Common sense and • caution must be practiced when installing, operating and maintaining any accumulation of this or any other models. Use only authorized factory parts. do not... Never ground the dryer to cooking oils in your dryer. Do not install or store the dryer where it checked and reinstalled by the manufacturer of an overheated situation (electric dryers only). information about features for detailed grounding procedures. Fire hazard, ELECTRIC DRYER overheating and damage to...
...'s Guide. Keep laundry products out of the dryer. Refer to the weather. Common sense and • caution must be practiced when installing, operating and maintaining any accumulation of this or any other models. Use only authorized factory parts. do not... Never ground the dryer to cooking oils in your dryer. Do not install or store the dryer where it checked and reinstalled by the manufacturer of an overheated situation (electric dryers only). information about features for detailed grounding procedures. Fire hazard, ELECTRIC DRYER overheating and damage to...
Owners Guide
Page 3
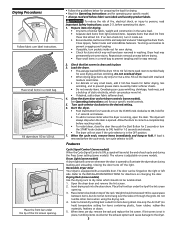
...inside out for even drying. • Check for stains which may permanently set dryer controls (some models). Fill out the load with a reversible door. Close the dryer door and set some models) When the Cycle Signal Control is ON, a signal will sound at a...electricity, which should not exceed 10 lbs. Start the dryer. • Push Start Button for drying. • Dry items of the lint screen opening . 3. Place the front bar under the lip of similar fabric, weight and construction in the OFF position. 7. Refer to the dryer. 3 Drying Rack (some models. Open the dryer...
...inside out for even drying. • Check for stains which may permanently set dryer controls (some models). Fill out the load with a reversible door. Close the dryer door and set some models) When the Cycle Signal Control is ON, a signal will sound at a...electricity, which should not exceed 10 lbs. Start the dryer. • Push Start Button for drying. • Dry items of the lint screen opening . 3. Place the front bar under the lip of similar fabric, weight and construction in the OFF position. 7. Refer to the dryer. 3 Drying Rack (some models. Open the dryer...
Owners Guide
Page 5
... circuit breaker or replace fuse. Call authorized service person for procedure. support the burner flame (gas models). Dryer should heat when utility service is connected to make sure supply valve is on a 240 volt circuit. Electric dryer is restored. Outside exhaust hood or exhaust duct may save both time and expense. High humidity. Foreign...
... circuit breaker or replace fuse. Call authorized service person for procedure. support the burner flame (gas models). Dryer should heat when utility service is connected to make sure supply valve is on a 240 volt circuit. Electric dryer is restored. Outside exhaust hood or exhaust duct may save both time and expense. High humidity. Foreign...

Installation Instructions
Page 5
... is required. 5 Inches (cm) SIDES REAR TOP FRONT Alcove 0 (0 cm) 0 (0 cm) Closet 0 (0 cm) 0 (0 cm) 1 (2.54 cm) NOTE: Under counter and stack models - 0 inches (0 cm) for the full length of door. 5. IN. (387.1 SQ. In an area where it for proper operation in the same closet as the... Gas dryer. 3. This dryer MUST be exhausted outdoors. 2. The following illustrations show minimum clearance dimensions for proper ventilation. In an area exposed to or less than 1/2 psig...
... is required. 5 Inches (cm) SIDES REAR TOP FRONT Alcove 0 (0 cm) 0 (0 cm) Closet 0 (0 cm) 0 (0 cm) 1 (2.54 cm) NOTE: Under counter and stack models - 0 inches (0 cm) for the full length of door. 5. IN. (387.1 SQ. In an area where it for proper operation in the same closet as the... Gas dryer. 3. This dryer MUST be exhausted outdoors. 2. The following illustrations show minimum clearance dimensions for proper ventilation. In an area exposed to or less than 1/2 psig...

Installation Instructions
Page 6
...) 6 4 3/8" (11.1 cm) OPTIONAL VENT KNOCKOUT (68.6 cm) SIDE VIEW 3 3/4" (9.5 cm) UNDER COUNTER & STACK MODELS ROUGH-IN DIMENSIONS (68.3 cm) TOP CONSOLE MODELS ROUGH-IN DIMENSIONS (68.3 cm) ELECTRIC CONNECTION (6.5 cm) 13 1/2" (34.4 cm) UNDER COUNTER 34 5/8" (87.9 cm) 36" (91.5 cm) ELECTRIC CONNECTION (6.5 cm) 13 1/2" (34.4 cm) (110.7 cm) 36" (91.5 cm) (9.5 cm) 3/8" (0.96...
...) 6 4 3/8" (11.1 cm) OPTIONAL VENT KNOCKOUT (68.6 cm) SIDE VIEW 3 3/4" (9.5 cm) UNDER COUNTER & STACK MODELS ROUGH-IN DIMENSIONS (68.3 cm) TOP CONSOLE MODELS ROUGH-IN DIMENSIONS (68.3 cm) ELECTRIC CONNECTION (6.5 cm) 13 1/2" (34.4 cm) UNDER COUNTER 34 5/8" (87.9 cm) 36" (91.5 cm) ELECTRIC CONNECTION (6.5 cm) 13 1/2" (34.4 cm) (110.7 cm) 36" (91.5 cm) (9.5 cm) 3/8" (0.96...

Installation Instructions
Page 7
... 1. Remove the four hinge hole plugs from your dealer. 5. Correct Incorrect OK Correct DON'T Incorrect 7 REMOVE 4 SCREWS (ONE FROM EACH HINGE FIRST) Dryer MUST be fastened to pages 2 and 3 for Mobile Homes. Metal ducting must be removed for outside the enclosure with American National Standard for other important... on its left side of the two hinges first. NOTE: You may be made for installation. 2. This provision is designed under counter model clothes dryers, the top panel may need a plastic knife to be not less than twice the area of the door opening : 1. The...
... 1. Remove the four hinge hole plugs from your dealer. 5. Correct Incorrect OK Correct DON'T Incorrect 7 REMOVE 4 SCREWS (ONE FROM EACH HINGE FIRST) Dryer MUST be fastened to pages 2 and 3 for Mobile Homes. Metal ducting must be removed for outside the enclosure with American National Standard for other important... on its left side of the two hinges first. NOTE: You may be made for installation. 2. This provision is designed under counter model clothes dryers, the top panel may need a plastic knife to be not less than twice the area of the door opening : 1. The...


