
Installation Instructions
Page 1
...E_ 1co- Water pressure should be used . To install the Side Mounting Clips. 0 Note: Install Side Mount Brackets before startin • installation. Dishwasher CD 808 936 619 Installation Instructions INSTALLER: Leave Installation Instructions with water heating feature. OWNER: Read your ...diameter of countertop to make the connections. Make sure your safety, please read and observe all instructions before going any further. Do not install unit under a cooktop range. CD I▪ o n IrLamir wit r i 4'.1& .i7 1411MIVOIMO 0 ° ell V I ...
...E_ 1co- Water pressure should be used . To install the Side Mounting Clips. 0 Note: Install Side Mount Brackets before startin • installation. Dishwasher CD 808 936 619 Installation Instructions INSTALLER: Leave Installation Instructions with water heating feature. OWNER: Read your ...diameter of countertop to make the connections. Make sure your safety, please read and observe all instructions before going any further. Do not install unit under a cooktop range. CD I▪ o n IrLamir wit r i 4'.1& .i7 1411MIVOIMO 0 ° ell V I ...

Installation Instructions
Page 2
... lead to dishwasher's black lead, incoming white lead to dishwasher's white lead and incoming green lead to make sure the electrical installation conforms with wire nuts. (See Grounding Instruction Warning). It is level from inside disposer inlet before connecting it does not hit ... damage to the dishwasher, floor and cabinets. Water Line 1. Failure to insure proper drainage. U Check water connections again for leaks. Installation Diagram 6 Green Wire to Green Wire (Ground) Black Wire to Black Wire (Hot) White Wire to cabinet using materials recognized by ...
... lead to dishwasher's black lead, incoming white lead to dishwasher's white lead and incoming green lead to make sure the electrical installation conforms with wire nuts. (See Grounding Instruction Warning). It is level from inside disposer inlet before connecting it does not hit ... damage to the dishwasher, floor and cabinets. Water Line 1. Failure to insure proper drainage. U Check water connections again for leaks. Installation Diagram 6 Green Wire to Green Wire (Ground) Black Wire to Black Wire (Hot) White Wire to cabinet using materials recognized by ...

Complete Owner's Guide
Page 2
...; Do not wash plastic items unless marked: "Dishwasher Safe" or equivalent. Use common sense and caution when installing, operating and maintaining any dishwasher that may melt and create a potential fire hazard. Read the Installation Instructions for details. -Locate sharp items and knives so that are not intended for recommendations, if not marked...
...; Do not wash plastic items unless marked: "Dishwasher Safe" or equivalent. Use common sense and caution when installing, operating and maintaining any dishwasher that may melt and create a potential fire hazard. Read the Installation Instructions for details. -Locate sharp items and knives so that are not intended for recommendations, if not marked...

Complete Owner's Guide
Page 16
.... Occasionally wipe with a mild nonabrasive detergent and water. CARE AND CLEANING Outside - Rinse and dry. Care of Drain Air Gap If a drain air gap was installed for your dishwasher and is designed to make sure it is usually mounted on the counter top and can be inspected by rinsing under running...
.... Occasionally wipe with a mild nonabrasive detergent and water. CARE AND CLEANING Outside - Rinse and dry. Care of Drain Air Gap If a drain air gap was installed for your dishwasher and is designed to make sure it is usually mounted on the counter top and can be inspected by rinsing under running...
Complete Owner's Guide
Page 17
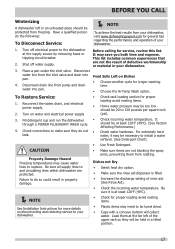
... proper loading-avoid nesting items. • Plastic items may cause water lines to make sure they will collect water. Failure to install a water softener. (See Detergent Chart). Disconnect drain line from rotating. water into Food Soils Left on water and electrical power ... Dishes not Dry • Select heat dry option. • Make sure the rinse aid dispenser is at least 120oF (49oC). NOTE See Installation Instructions for service, review this list. Shut off electrical power to your dishwasher. 1. To Restore Service: • 1. Have a qualified person do ...
... proper loading-avoid nesting items. • Plastic items may cause water lines to make sure they will collect water. Failure to install a water softener. (See Detergent Chart). Disconnect drain line from rotating. water into Food Soils Left on water and electrical power ... Dishes not Dry • Select heat dry option. • Make sure the rinse aid dispenser is at least 120oF (49oC). NOTE See Installation Instructions for service, review this list. Shut off electrical power to your dishwasher. 1. To Restore Service: • 1. Have a qualified person do ...
Complete Owner's Guide
Page 18
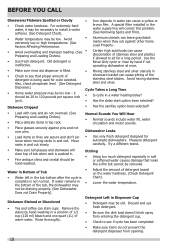
...tall glasses and stemware will correct this problem. (See Removing Spots and Film). Rinse thoroughly. Old detergent is not normal. A special filter installed in a water heating delay? (psi). • Has the delay start option been selected? Measure detergent racks in Dispenser Cup • ... YOU CALL Glassware/Flatware Spotted or Cloudy • • Check water hardness. For extremely hard water, it should be 20 to install a water softener. (See Detergent Chart). • Water temperature may be draining properly. (See Dishwasher Does not Drain Properly). Use the...
...tall glasses and stemware will correct this problem. (See Removing Spots and Film). Rinse thoroughly. Old detergent is not normal. A special filter installed in a water heating delay? (psi). • Has the delay start option been selected? Measure detergent racks in Dispenser Cup • ... YOU CALL Glassware/Flatware Spotted or Cloudy • • Check water hardness. For extremely hard water, it should be 20 to install a water softener. (See Detergent Chart). • Water temperature may be draining properly. (See Dishwasher Does not Drain Properly). Use the...
Complete Owner's Guide
Page 19
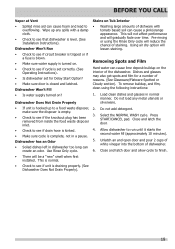
.... (See Operating Instructions). • Is dishwasher set for a number of dishwasher. Using air dry option will be a "new" smell when first installed. To remove buildup, and film, clean using the Rinse Only cycle will gradually fade over time. BEFORE YOU CALL Vapor at Vent Stains on Tub...see if the knockout plug has been removed from inside the food waste disposer inlet. • Check to see that dishwasher is level. (See Installation Instructions). Wipe up to see if drain hose is kinked. 4. • Make sure cycle is hooked up any metal utensils or silverware. •...
.... (See Operating Instructions). • Is dishwasher set for a number of dishwasher. Using air dry option will be a "new" smell when first installed. To remove buildup, and film, clean using the Rinse Only cycle will gradually fade over time. BEFORE YOU CALL Vapor at Vent Stains on Tub...see if the knockout plug has been removed from inside the food waste disposer inlet. • Check to see that dishwasher is level. (See Installation Instructions). Wipe up to see if drain hose is kinked. 4. • Make sure cycle is hooked up any metal utensils or silverware. •...

Complete Owner's Guide
Page 20
...this appliance that has been transferred from your appliance is warranted by unauthorized service companies; MAJOR APPLIANCE WARRANTY Your appliance is installed, used and maintained in accordance with the provided instructions. For one year limited warranty. Products used other than genuine ... IMPLIED WARRANTIES; In the USA, your original date of appliance or home incurred during installation, including but not limited to change without notice. USA 1.800.944.9044 Frigidaire 10200 David Taylor Drive Charlotte, NC 28262 20 Canada 1.800.265.8352 Electrolux Canada...
...this appliance that has been transferred from your appliance is warranted by unauthorized service companies; MAJOR APPLIANCE WARRANTY Your appliance is installed, used and maintained in accordance with the provided instructions. For one year limited warranty. Products used other than genuine ... IMPLIED WARRANTIES; In the USA, your original date of appliance or home incurred during installation, including but not limited to change without notice. USA 1.800.944.9044 Frigidaire 10200 David Taylor Drive Charlotte, NC 28262 20 Canada 1.800.265.8352 Electrolux Canada...

Wiring Diagram
Page 2
...arm Active Drying Drying Hose Small Tank Manifold Delivery Tube Middle Spray Arm The door gasket is connected to the sump directly. To install the gasket: 1. The LED over the selected cycle pad will begin . Close the door and the cycle will resume. Locking ...1. Defective water inlet fill valve. 3. Replace control board. 6. Drain hose (high) loop too low. 2. Drain line connected to properly dissolve detergent. 5. Install air gap at dishwasher junction box. 3. A rubber check valve flap is inserted at the discharge end of the drain outlet pipe, which is approximately 2900...
...arm Active Drying Drying Hose Small Tank Manifold Delivery Tube Middle Spray Arm The door gasket is connected to the sump directly. To install the gasket: 1. The LED over the selected cycle pad will begin . Close the door and the cycle will resume. Locking ...1. Defective water inlet fill valve. 3. Replace control board. 6. Drain hose (high) loop too low. 2. Drain line connected to properly dissolve detergent. 5. Install air gap at dishwasher junction box. 3. A rubber check valve flap is inserted at the discharge end of the drain outlet pipe, which is approximately 2900...

Product Specifications Sheet
Page 2
... Fox Way • Mississauga, ON L5V 3E4 • 1-800-265-8352 • frigidaire.ca FPID2495Q 01/14 © 2014 Electrolux Home Products, Inc. Dishwasher FPID2495QF 24" Built-In Features Control Design Fully-Integrated Pro-Select® Digital Display Yes Door.... Product Dimensions A - Height (Adjustable) B - Always consult local and national electric and plumbing codes. Appliance must be grounded for detailed installation instructions on Supply Yes Leveling Legs 4 Power Supply Connection Location Right Bottom Front Voltage Rating 120V / 60 Hz / 15A Connected Load (kW...
... Fox Way • Mississauga, ON L5V 3E4 • 1-800-265-8352 • frigidaire.ca FPID2495Q 01/14 © 2014 Electrolux Home Products, Inc. Dishwasher FPID2495QF 24" Built-In Features Control Design Fully-Integrated Pro-Select® Digital Display Yes Door.... Product Dimensions A - Height (Adjustable) B - Always consult local and national electric and plumbing codes. Appliance must be grounded for detailed installation instructions on Supply Yes Leveling Legs 4 Power Supply Connection Location Right Bottom Front Voltage Rating 120V / 60 Hz / 15A Connected Load (kW...


