

Complete Owner's Guide (English)
Page 2
... use this page to serve you. Safety items throughout this manual are labelled with Frigidaire enhances our ability to record important product information. Obey all safety messages that follow this symbol to install or operate this appliance until you have read the safety instructions in this manual. ... part of our commitment to potential personal injury hazards. To ensure our ability to continue serving you, please use 05 Parts supplied 05 Installing the hood 05-11 For toll-free telephone support in the U.S.: 1-800944-4044 or Canada: 1-800-265-8352 For online support and...
... use this page to serve you. Safety items throughout this manual are labelled with Frigidaire enhances our ability to record important product information. Obey all safety messages that follow this symbol to install or operate this appliance until you have read the safety instructions in this manual. ... part of our commitment to potential personal injury hazards. To ensure our ability to continue serving you, please use 05 Parts supplied 05 Installing the hood 05-11 For toll-free telephone support in the U.S.: 1-800944-4044 or Canada: 1-800-265-8352 For online support and...
Complete Owner's Guide (English)
Page 3
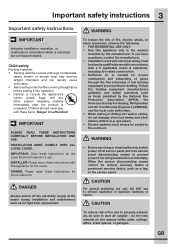
...manufacturer. When the service disconnecting means cannot be vented to the outdoors. IMPORTANT PLEASE READ THESE INSTRUCTIONS CAREFULLY BEFORE INSTALLATION AND USE. To reduce the risk of suffocation! WARNING • Before servicing or cleaning the unit, switch ... material immediately after the product is important but not hazard-related. Important safety instructions 3 Important safety instructions WARNING IMPORTANT Indicates installation, operation, or maintenance information which is unpacked. Child safety Packing materials: • Packing cartons covered with a ll applicable...
...manufacturer. When the service disconnecting means cannot be vented to the outdoors. IMPORTANT PLEASE READ THESE INSTRUCTIONS CAREFULLY BEFORE INSTALLATION AND USE. To reduce the risk of suffocation! WARNING • Before servicing or cleaning the unit, switch ... material immediately after the product is important but not hazard-related. Important safety instructions 3 Important safety instructions WARNING IMPORTANT Indicates installation, operation, or maintenance information which is unpacked. Child safety Packing materials: • Packing cartons covered with a ll applicable...

Complete Owner's Guide (English)
Page 4
...high heat or when flambéing food (i.e. Boilovers cause smoking and greasy spillovers that the electrical installation is the customer's responsibility: • to contact a qualified electrical installer. • to assure that may ignite. Be careful to an exit. Without these components, ...or CSA Standards C22.1-94, Canadian Electrical Code, Part 1 and C22.2 No.0-M91-latest edition** and all governing codes and ordinances. Install this hood with National Electrical Code, ANSI/NFPA 70 - Grease should not be allowed to persons, in conformance with any external solid ...
...high heat or when flambéing food (i.e. Boilovers cause smoking and greasy spillovers that the electrical installation is the customer's responsibility: • to contact a qualified electrical installer. • to assure that may ignite. Be careful to an exit. Without these components, ...or CSA Standards C22.1-94, Canadian Electrical Code, Part 1 and C22.2 No.0-M91-latest edition** and all governing codes and ordinances. Install this hood with National Electrical Code, ANSI/NFPA 70 - Grease should not be allowed to persons, in conformance with any external solid ...

Complete Owner's Guide (English)
Page 5
The range hood must be 12 used over indoor grills. Do not use . latest edition** and all local codes and ordinances. 6 A U.L.- Installing the hood 5 IMPORTANT 3 Save installation instructions for exhaust operation only. Wire sizes must be provided at each end of the power supply conduit (at the range hood and at the ...
The range hood must be 12 used over indoor grills. Do not use . latest edition** and all local codes and ordinances. 6 A U.L.- Installing the hood 5 IMPORTANT 3 Save installation instructions for exhaust operation only. Wire sizes must be provided at each end of the power supply conduit (at the range hood and at the ...

Complete Owner's Guide (English)
Page 6
...from the owner of the exhaust hose when planning the wall breakthrough. Limit use to the procedure described in the same room, Ducting installation guidelines • For safety reasons, ducting should vent directly outdoors (not into an attic, underneath the house, into the garage ...Use the shortest and straightest duct route possible. • The wall breakthrough must be used when no other duct fitting exists. 6 Installing the hood Installing the hood IMPORTANT We recommend that performs the wall breakthrough. • If open fireplaces are operated in the assembly...
...from the owner of the exhaust hose when planning the wall breakthrough. Limit use to the procedure described in the same room, Ducting installation guidelines • For safety reasons, ducting should vent directly outdoors (not into an attic, underneath the house, into the garage ...Use the shortest and straightest duct route possible. • The wall breakthrough must be used when no other duct fitting exists. 6 Installing the hood Installing the hood IMPORTANT We recommend that performs the wall breakthrough. • If open fireplaces are operated in the assembly...

Complete Owner's Guide (English)
Page 7
...that no cables or pipes will become damaged (e.g. Roof pitch with flashing and cap Sidewall cap Recirculator Pipe Collar Pipe Collar Pipe Collar Installing the hood 7 fig. IMPORTANT This range hood is present, mark the screw hole locations. • Cut away enough drywall to ...from the diagram (fig. ). • Upper/Lower bracket (3, 4): Insert 4 wall plugs (9) into the 4 drilled holes. • Range hood (1): Installation is depending on wall type: Wall type Required fasteners Wood No wall plugs (9) required Brick/Concrete 4 wall plugs (9) GB Adequate structure and support must ...
...that no cables or pipes will become damaged (e.g. Roof pitch with flashing and cap Sidewall cap Recirculator Pipe Collar Pipe Collar Pipe Collar Installing the hood 7 fig. IMPORTANT This range hood is present, mark the screw hole locations. • Cut away enough drywall to ...from the diagram (fig. ). • Upper/Lower bracket (3, 4): Insert 4 wall plugs (9) into the 4 drilled holes. • Range hood (1): Installation is depending on wall type: Wall type Required fasteners Wood No wall plugs (9) required Brick/Concrete 4 wall plugs (9) GB Adequate structure and support must ...

Complete Owner's Guide (English)
Page 8
Long screws Ceiling 2.95" 5.1" 0.86" Wood screws 15.67" 5.9" 8.3" 1.5" 15.98"-FHWC3055L 23.86"-FHWC3655L Wall Dimension A (see table) • Insert 2 screws (8 or 11) in the chart represents the height from the duct (fig. ). *1: with 10...). In the example below a round metal duct furnace pipe has been used. Please call Frigidaire at 1.800.944.9044 to where the bottom screw mounting holes would be located. *3: Recommended mounting height *4: Recirculation Kit cannot be installed. fig. 0.08" GB Desired range hood distance above a 36" high cook top Ceiling...
Long screws Ceiling 2.95" 5.1" 0.86" Wood screws 15.67" 5.9" 8.3" 1.5" 15.98"-FHWC3055L 23.86"-FHWC3655L Wall Dimension A (see table) • Insert 2 screws (8 or 11) in the chart represents the height from the duct (fig. ). *1: with 10...). In the example below a round metal duct furnace pipe has been used. Please call Frigidaire at 1.800.944.9044 to where the bottom screw mounting holes would be located. *3: Recommended mounting height *4: Recirculation Kit cannot be installed. fig. 0.08" GB Desired range hood distance above a 36" high cook top Ceiling...

Complete Owner's Guide (English)
Page 9
...). • Fix it with 2 screws (12) (fig. ). fig. fig. All fittings must be installed by 90 degrees, into the lower chimney (3) from the junction box (fig. ). Installing the hood 9 Electrical connections DANGER Danger of the upper bracket. fig. Step 5: • Insert the upper... chimney (2) into the lower bracket notch and mount to provide grounding (fig. ). fig. ffigig.. IMPORTANT Always switch off at the mains during installation, cleaning and maintenance. L (live) = Black N (neutral) = White (ground) = Green L N • Pull the upper chimney (2) ...
...). • Fix it with 2 screws (12) (fig. ). fig. fig. All fittings must be installed by 90 degrees, into the lower chimney (3) from the junction box (fig. ). Installing the hood 9 Electrical connections DANGER Danger of the upper bracket. fig. Step 5: • Insert the upper... chimney (2) into the lower bracket notch and mount to provide grounding (fig. ). fig. ffigig.. IMPORTANT Always switch off at the mains during installation, cleaning and maintenance. L (live) = Black N (neutral) = White (ground) = Green L N • Pull the upper chimney (2) ...

Complete Owner's Guide (English)
Page 10
... applicable to appliances that proper ventilation measures are fed back into the room through a separate ventilating duct that is only for recirculated air operation. 10 Installing the hood GB fig. • The air must not be discharged into a flue that is used at 1.800.944.9044 to order this kit.... filter. The chimney skirts may have some sharp edges. gas, oil or coal heaters), the oxygen they require is being observed. Please call Frigidaire at the same time as appliances burning gas or other fuels (not applicable to ensure a fresh supply of injury. fig.
... applicable to appliances that proper ventilation measures are fed back into the room through a separate ventilating duct that is only for recirculated air operation. 10 Installing the hood GB fig. • The air must not be discharged into a flue that is used at 1.800.944.9044 to order this kit.... filter. The chimney skirts may have some sharp edges. gas, oil or coal heaters), the oxygen they require is being observed. Please call Frigidaire at the same time as appliances burning gas or other fuels (not applicable to ensure a fresh supply of injury. fig.

Complete Owner's Guide (English)
Page 11
... low speed for normal use of the intake and filters. GB every 4 - 6 months Monthly Regularly Use a soft cloth moistened with household cleaning detergent. Please call Frigidaire at the mains during installation, cleaning and maintenance such as for high speed. Operation / Cleaning and maintenance 11 fig.
... low speed for normal use of the intake and filters. GB every 4 - 6 months Monthly Regularly Use a soft cloth moistened with household cleaning detergent. Please call Frigidaire at the mains during installation, cleaning and maintenance such as for high speed. Operation / Cleaning and maintenance 11 fig.

Complete Owner's Guide (English)
Page 13
... WARRANTY GIVES YOU SPECIFIC LEGAL RIGHTS. Electrolux authorizes no person to use of Electrolux Home Products, Inc. Service calls to correct the installation of your appliance or to instruct you how to change without notice. Damages to obtain and keep all costs for servicing, such as... For one year limited warranty. Products with the provided instructions. Food loss due to any parts of appliance or home incurred during installation, including but not limited to, any obligations under this warranty must be obtained by this appliance that prove to another party or ...
... WARRANTY GIVES YOU SPECIFIC LEGAL RIGHTS. Electrolux authorizes no person to use of Electrolux Home Products, Inc. Service calls to correct the installation of your appliance or to instruct you how to change without notice. Damages to obtain and keep all costs for servicing, such as... For one year limited warranty. Products with the provided instructions. Food loss due to any parts of appliance or home incurred during installation, including but not limited to, any obligations under this warranty must be obtained by this appliance that prove to another party or ...