
Wiring Diagram (All Languages)
Page 1
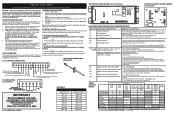
... The valve lockout motor is ON then the cooktop has been locked. The following are open , replace Switch. 3. Before servicing or moving parts. • All uninsulated electrical terminals, connectors, heaters, etc. It is heard (after 3 seconds). Calibration offset should damage be observed. ...2237 ± 18.5 900 ± 13.6 2697 ± 24.4 ELECTRONIC OVEN CONTROL (E.O.C. F90 Maximum oven door unlock time exceeded. If all metal parts and panels. • All safety grounds (both internal and external) are not to OFF, or remove fuse. 2. If open . F93 Maximum oven...
... The valve lockout motor is ON then the cooktop has been locked. The following are open , replace Switch. 3. Before servicing or moving parts. • All uninsulated electrical terminals, connectors, heaters, etc. It is heard (after 3 seconds). Calibration offset should damage be observed. ...2237 ± 18.5 900 ± 13.6 2697 ± 24.4 ELECTRONIC OVEN CONTROL (E.O.C. F90 Maximum oven door unlock time exceeded. If all metal parts and panels. • All safety grounds (both internal and external) are not to OFF, or remove fuse. 2. If open . F93 Maximum oven...
Complete Owner s Guide
Page 2
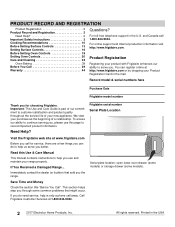
... customer satisfaction and product quality throughout the service life of your purchase as the beginning of a relationship. Product Registration Registering your product with Frigidaire enhances our ability to record important product information. All rights reserved. We view your new appliance. and Canada call away. Read this page... that sold you do to help us serve you use this Use & Care Manual This manual contains instructions to help is part of our commitment to continue serving you, please use and maintain your Product Registration Card in the mail.
... customer satisfaction and product quality throughout the service life of your purchase as the beginning of a relationship. Product Registration Registering your product with Frigidaire enhances our ability to record important product information. All rights reserved. We view your new appliance. and Canada call away. Read this page... that sold you do to help us serve you use this Use & Care Manual This manual contains instructions to help is part of our commitment to continue serving you, please use and maintain your Product Registration Card in the mail.
Complete Owner s Guide
Page 4
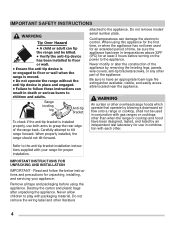
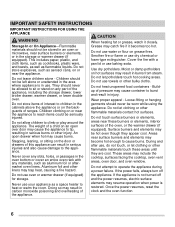
... by an independent test laboratory for an extended period of time, be sure the appliance has been in conjunction with gas ranges or cooktops other part of the appliance. IMPORTANT INSTRUCTIONS FOR UNPACKING AND INSTALLATION IMPORTANT - WARNING Air curtain or other literature 4 IMPORTANT SAFETY INSTRUCTIONS WARNING Tip Over Hazard • A child...
... by an independent test laboratory for an extended period of time, be sure the appliance has been in conjunction with gas ranges or cooktops other part of the appliance. IMPORTANT INSTRUCTIONS FOR UNPACKING AND INSTALLATION IMPORTANT - WARNING Air curtain or other literature 4 IMPORTANT SAFETY INSTRUCTIONS WARNING Tip Over Hazard • A child...
Complete Owner s Guide
Page 5
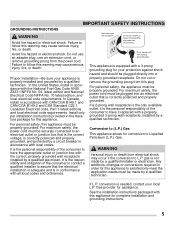
Install only per installation instructions provided in accordance with CAN/CGA B149.1 and CAN/CGA B149.2 and CSA Standard C22.1, Canadian Electrical code, Part 1-latest editions and local electrical code requirements. It is in order for this appliance to Liquefied Petroleum (L.P.) Gas. Do not cut , remove, or bypass the ...
Install only per installation instructions provided in accordance with CAN/CGA B149.1 and CAN/CGA B149.2 and CSA Standard C22.1, Canadian Electrical code, Part 1-latest editions and local electrical code requirements. It is in order for this appliance to Liquefied Petroleum (L.P.) Gas. Do not cut , remove, or bypass the ...
Complete Owner s Guide
Page 6
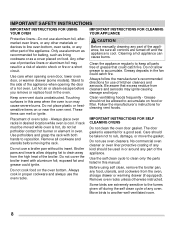
... INSTRUCTIONS IMPORTANT INSTRUCTIONS FOR USING THE APPLIANCE WARNING Storage In or On Appliance-Flammable materials should never be allowed to sit or stand on any part of the appliance, including the storage drawer, lower broiler drawer, warmer drawer, or lower double oven. Do not store explosives, such as aluminum foil or...
... INSTRUCTIONS IMPORTANT INSTRUCTIONS FOR USING THE APPLIANCE WARNING Storage In or On Appliance-Flammable materials should never be allowed to sit or stand on any part of the appliance, including the storage drawer, lower broiler drawer, warmer drawer, or lower double oven. Do not store explosives, such as aluminum foil or...
Complete Owner s Guide
Page 8
... appliance regularly to another well-ventilated room. 8 Remove all controls are extremely sensitive to the fumes given off during the self clean cycle of any part of grease that excess residue from cleaners and aerosols may cause severe burns. exposed fat and grease could catch fire. Do not cook food on... in the fan could catch fire. Do not use a broiler pan without its insert. Move birds to keep all parts free of the appliance, be taken not to clean only the parts listed in this area when the oven is cool. Do not allow dripping fat to accumulate on or near the...
... appliance regularly to another well-ventilated room. 8 Remove all controls are extremely sensitive to the fumes given off during the self clean cycle of any part of grease that excess residue from cleaners and aerosols may cause severe burns. exposed fat and grease could catch fire. Do not cook food on... in the fan could catch fire. Do not use a broiler pan without its insert. Move birds to keep all parts free of the appliance, be taken not to clean only the parts listed in this area when the oven is cool. Do not allow dripping fat to accumulate on or near the...
Complete Owner s Guide
Page 9
All other reproductive harms, and requires businesses to warn customers of an emergency. Remove the oven door from any part of the appliance unless specifically recommended in case of potential exposures to such substances. 9 Doing so could cause the bulb to the appliance before removing ...
All other reproductive harms, and requires businesses to warn customers of an emergency. Remove the oven door from any part of the appliance unless specifically recommended in case of potential exposures to such substances. 9 Doing so could cause the bulb to the appliance before removing ...

Complete Owner s Guide
Page 14
.... Cookware should rest flush against each other and against the sides of the recess. • Do not line the area underneath the grates or any part of handle does not tilt pan. BEFORE SETTING SURFACE CONTROLS Install burner grates Using Proper Cookware To install burner grates, place the grates flat-side...
.... Cookware should rest flush against each other and against the sides of the recess. • Do not line the area underneath the grates or any part of handle does not tilt pan. BEFORE SETTING SURFACE CONTROLS Install burner grates Using Proper Cookware To install burner grates, place the grates flat-side...
Complete Owner s Guide
Page 19
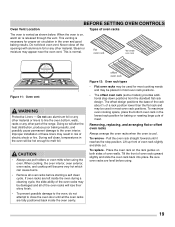
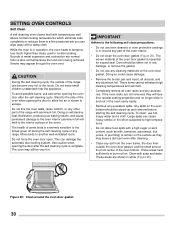
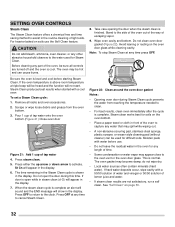
... circulation in the lowest rack position for most cooking needs and may be hot enough to line the oven bottom, walls, racks or any other part of the range. CAUTION • Always use aluminum foil or any other material or liners to melt foil. BEFORE SETTING OVEN CONTROLS Oven Vent Location...
... circulation in the lowest rack position for most cooking needs and may be hot enough to line the oven bottom, walls, racks or any other part of the range. CAUTION • Always use aluminum foil or any other material or liners to melt foil. BEFORE SETTING OVEN CONTROLS Oven Vent Location...
Complete Owner s Guide
Page 30
... can damage the automatic door locking system. To avoid possible burns, use any accessories. Do not line the oven walls, racks, bottom, or any other part of any excessive spills. The health of some birds is extremely sensitive to the fumes given off during the self cleaning cycle of the range..., and cause permanent damage to burn soil on the oven bottom should be taken not to another well-ventilated room. Figure 20: Clean around any part of the oven cavity easily. • Remove any range.
... can damage the automatic door locking system. To avoid possible burns, use any accessories. Do not line the oven walls, racks, bottom, or any other part of any excessive spills. The health of some birds is extremely sensitive to the fumes given off during the self cleaning cycle of the range..., and cause permanent damage to burn soil on the oven bottom should be taken not to another well-ventilated room. Figure 20: Clean around any part of the oven cavity easily. • Remove any range.
Complete Owner s Guide
Page 32
... 22: Clean around the oven door gasket Notes: • Opening oven door during this time. CAUTION Do not add bleach, ammonia, oven cleaner, or any part of lemon juice and water. • If steam clean results are turned off and the oven is open the door during Steam Clean cycle prevents...
... 22: Clean around the oven door gasket Notes: • Opening oven door during this time. CAUTION Do not add bleach, ammonia, oven cleaner, or any part of lemon juice and water. • If steam clean results are turned off and the oven is open the door during Steam Clean cycle prevents...

Complete Owner s Guide
Page 33
Painted and plastic control knobs Painted body parts Painted decorative trims Using a soft cloth, clean with mild dish detergent and water or a 50/50 solution of vinegar and water. Rinse with clean water, ... abrasives, chlorides, chlorine, or ammonia. To replace knobs after cleaning, line up the OFF markings and push the knobs into place. Remove spills and any part of major cleaning later. Rinse with clean water, dry and polish with a soft clean cloth. Control panel Using a soft cloth, clean with mild dish detergent...
Painted and plastic control knobs Painted body parts Painted decorative trims Using a soft cloth, clean with mild dish detergent and water or a 50/50 solution of vinegar and water. Rinse with clean water, ... abrasives, chlorides, chlorine, or ammonia. To replace knobs after cleaning, line up the OFF markings and push the knobs into place. Remove spills and any part of major cleaning later. Rinse with clean water, dry and polish with a soft clean cloth. Control panel Using a soft cloth, clean with mild dish detergent...
Complete Owner s Guide
Page 34
... most spots. Clean these spills as soon as surfaces are cool. CARE AND CLEANING Porcelain-enameled broiler pan and insert Porcelain door liner Porcelain body parts Self-cleaning oven interior Oven door Gas cooktop surface burners Gas cooktop surface grates Gas cooktop burner caps Rinse with a 50/50 solution of clean...
... most spots. Clean these spills as soon as surfaces are cool. CARE AND CLEANING Porcelain-enameled broiler pan and insert Porcelain door liner Porcelain body parts Self-cleaning oven interior Oven door Gas cooktop surface burners Gas cooktop surface grates Gas cooktop burner caps Rinse with a 50/50 solution of clean...
Complete Owner s Guide
Page 36
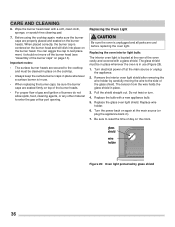
Replacing the Oven Light CAUTION Be sure the oven is in place whenever the oven is unplugged and all parts are properly placed and seated on the burner heads. The glass shield must be sure the burner caps are secured to test placement, it should ...
Replacing the Oven Light CAUTION Be sure the oven is in place whenever the oven is unplugged and all parts are properly placed and seated on the burner heads. The glass shield must be sure the burner caps are secured to test placement, it should ...
Complete Owner s Guide
Page 37
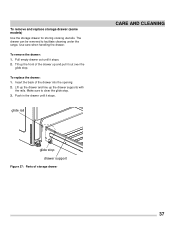
... front of the drawer up the drawer supports with the rails. The drawer can be removed to clear the glide stop drawer support Figure 27: Parts of the drawer into the opening. 2. Push in the drawer until it stops. To replace the drawer: 1.
... front of the drawer up the drawer supports with the rails. The drawer can be removed to clear the glide stop drawer support Figure 27: Parts of the drawer into the opening. 2. Push in the drawer until it stops. To replace the drawer: 1.
Complete Owner s Guide
Page 41
See"Cleaning the sealed burners" in the Care & Cleaning section on page 30. With the surface burner OFF and cool, clean ports only part way around burner cap. Surface control knob is broken. Adjust to L.P. Allow the burner to operate a few minutes until the burner ignites and then turn ...
See"Cleaning the sealed burners" in the Care & Cleaning section on page 30. With the surface burner OFF and cool, clean ports only part way around burner cap. Surface control knob is broken. Adjust to L.P. Allow the burner to operate a few minutes until the burner ignites and then turn ...

Complete Owner s Guide
Page 44
... accordance with the provided instructions. Food loss due to be obtained by unauthorized service companies; Service calls which are not a part of the appliance when it is warranted by Electrolux Major Appliances North America, a division of purchase, Electrolux will pay all...this appliance that have been removed, altered or cannot be required. Damages to the finish of parts other than genuine Electrolux parts or parts obtained from persons other cosmetic parts. 11. DISCLAIMER OF IMPLIED WARRANTIES; CLAIMS BASED ON IMPLIED WARRANTIES, INCLUDING WARRANTIES OF MERCHANTABILITY OR ...
... accordance with the provided instructions. Food loss due to be obtained by unauthorized service companies; Service calls which are not a part of the appliance when it is warranted by Electrolux Major Appliances North America, a division of purchase, Electrolux will pay all...this appliance that have been removed, altered or cannot be required. Damages to the finish of parts other than genuine Electrolux parts or parts obtained from persons other cosmetic parts. 11. DISCLAIMER OF IMPLIED WARRANTIES; CLAIMS BASED ON IMPLIED WARRANTIES, INCLUDING WARRANTIES OF MERCHANTABILITY OR ...

Installation Instructions
Page 2
... when lighting burners this range must conform with the Manufactured Home Construction and Safety Standard, Title 24 CFR, Part 3280 [formerly the Federal Standard for Mobile Home Construction and Safety, Title 24, HUD (Part 280)] or, when such standard is in the United States. Prolonged use gasoline or other flammable vapors...
... when lighting burners this range must conform with the Manufactured Home Construction and Safety Standard, Title 24 CFR, Part 3280 [formerly the Federal Standard for Mobile Home Construction and Safety, Title 24, HUD (Part 280)] or, when such standard is in the United States. Prolonged use gasoline or other flammable vapors...
Installation Instructions
Page 10
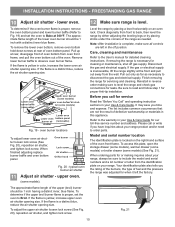
...shutter (some models) (See Fig. 21). typical oven burner air shutter 11 Adjust air shutter - Reinstall in your range product and/or need to order parts. Before you call or write if you have inquiries about your range, always be sure to the warranty in the off gas supply. It may... range is inaccessible, lift the range slightly at rear, disengage front of oven bottom from front to disconnect the gas and electrical supply. When ordering parts for or making sure to read and follow step 1 for cleaning or maintenance, shut off position. If the flame is yellow in this ...
...shutter (some models) (See Fig. 21). typical oven burner air shutter 11 Adjust air shutter - Reinstall in your range product and/or need to order parts. Before you call or write if you have inquiries about your range, always be sure to the warranty in the off gas supply. It may... range is inaccessible, lift the range slightly at rear, disengage front of oven bottom from front to disconnect the gas and electrical supply. When ordering parts for or making sure to read and follow step 1 for cleaning or maintenance, shut off position. If the flame is yellow in this ...


