
Installation Instructions (All Languages)
Page 1
... not followed exactly, a fire or explosion may result causing property damage, personal injury or death. 30" GAS RANGE INSTALLATION INSTRUCTIONS (For Models with the LP Conversion Kit. READ AND SAVE THESE INSTRUCTIONS FOR FUTURE REFERENCE. If the information...Wall on Either Side of *5" Range 5" 30" 30" Minimum Minimum to operate on 18" Either Side of Range. 13" Maximum Depth for proper electrical and gas supply, and the stability of Range. Clearances and Dimensions 1. Check for Cabinets Above Range Top. 25" 36" 46 3/8" door open 29 7/8" 30" 0" Clearance Below Cooking Top and...
... not followed exactly, a fire or explosion may result causing property damage, personal injury or death. 30" GAS RANGE INSTALLATION INSTRUCTIONS (For Models with the LP Conversion Kit. READ AND SAVE THESE INSTRUCTIONS FOR FUTURE REFERENCE. If the information...Wall on Either Side of *5" Range 5" 30" 30" Minimum Minimum to operate on 18" Either Side of Range. 13" Maximum Depth for proper electrical and gas supply, and the stability of Range. Clearances and Dimensions 1. Check for Cabinets Above Range Top. 25" 36" 46 3/8" door open 29 7/8" 30" 0" Clearance Below Cooking Top and...

Installation Instructions (All Languages)
Page 2
...Z223.1-latest edition when installed in conjunction with any other . 2 Standard for future reference. As with gas ranges other utensils before installing range. 2. Special instructions for proper When an electrical power failure occurs during use of the cooking utensil. Do ...an independent test laboratory for Manufactured Home Installations, ANSI/NCSBCS Explosions or fires could be seriously burned climbing on page 5. 30" GAS RANGE INSTALLATION INSTRUCTIONS (For Models with local codes. • Reset all controls to the "off" position after using a ...
...Z223.1-latest edition when installed in conjunction with any other . 2 Standard for future reference. As with gas ranges other utensils before installing range. 2. Special instructions for proper When an electrical power failure occurs during use of the cooking utensil. Do ...an independent test laboratory for Manufactured Home Installations, ANSI/NCSBCS Explosions or fires could be seriously burned climbing on page 5. 30" GAS RANGE INSTALLATION INSTRUCTIONS (For Models with local codes. • Reset all controls to the "off" position after using a ...

Installation Instructions (All Languages)
Page 3
... and Fasten Bracket - Failure to install the anti-tip bracket will be moved and installed with the range. Instructions are secured in wood or metal. 30" GAS RANGE INSTALLATION INSTRUCTIONS (For Models with Sealed Top Burners) Before Starting Tools You Will Need For leveling legs and...Pipe joint sealant that resists action of LP/Propane gas • A new flexible metal appliance conduit (1/2" NPT x 3/4" or 1/2" I .D.) supplied with the new flexible appliance conduit for installation in template. Because solid pipe restricts moving the range we recommend using a new flexible conduit (4 to...
... and Fasten Bracket - Failure to install the anti-tip bracket will be moved and installed with the range. Instructions are secured in wood or metal. 30" GAS RANGE INSTALLATION INSTRUCTIONS (For Models with Sealed Top Burners) Before Starting Tools You Will Need For leveling legs and...Pipe joint sealant that resists action of LP/Propane gas • A new flexible metal appliance conduit (1/2" NPT x 3/4" or 1/2" I .D.) supplied with the new flexible appliance conduit for installation in template. Because solid pipe restricts moving the range we recommend using a new flexible conduit (4 to...

Installation Instructions (All Languages)
Page 4
...converting the pressure regulator to LP/Propane use pipe joint sealant on the back side of the range (some models). Examples: If regulator is inserted into position. 30" GAS RANGE INSTALLATION INSTRUCTIONS (For Models with a warmer drawer or broiler compartment, grasp the top rear ...edge of the range and carefully attempt to tilt it forward. 4. Slide range back into and fully secured by the Anti-Tip...
...converting the pressure regulator to LP/Propane use pipe joint sealant on the back side of the range (some models). Examples: If regulator is inserted into position. 30" GAS RANGE INSTALLATION INSTRUCTIONS (For Models with a warmer drawer or broiler compartment, grasp the top rear ...edge of the range and carefully attempt to tilt it forward. 4. Slide range back into and fully secured by the Anti-Tip...

Installation Instructions (All Languages)
Page 5
..." water column. Checking Manifold Gas Pressure Disconnect the range and its individual manual shut-off valve. Turn burner valve on shut-off valve during any pressure testing of the pressure regulator using NO MORE THAN 15ft./lbs. 30" GAS RANGE INSTALLATION INSTRUCTIONS (For Models with... Sealed Top Burners) the 1/2" flare union adapter with adjustable wrench before tightening the gas supply fitting and/or appliance conduit (Refer to Fig. 4e). ...
..." water column. Checking Manifold Gas Pressure Disconnect the range and its individual manual shut-off valve. Turn burner valve on shut-off valve during any pressure testing of the pressure regulator using NO MORE THAN 15ft./lbs. 30" GAS RANGE INSTALLATION INSTRUCTIONS (For Models with... Sealed Top Burners) the 1/2" flare union adapter with adjustable wrench before tightening the gas supply fitting and/or appliance conduit (Refer to Fig. 4e). ...

Installation Instructions (All Languages)
Page 6
...be equivalent to or greater than the branch circuit rating. DO NOT ALLOW SPILLS, FOOD, CLEANING AGENTS OR ANY OTHER MATERIAL TO ENTER THE GAS ORIFICE HOLDER OPENING. DO NOT, UNDER ANY CIRCUMSTANCES, CUT OR REMOVE THE THIRD (GROUND) PRONG FROM THE POWER CORD. 6 REMEMBER - ...are secured to makes sure that the current carrying rating of the cord in use of any extension cord. Do not attempt to range. 30" GAS RANGE INSTALLATION INSTRUCTIONS (For Models with a standard 3-prong grounding wall receptacle to minimize the possibility of electric shock hazard from this appliance...
...be equivalent to or greater than the branch circuit rating. DO NOT ALLOW SPILLS, FOOD, CLEANING AGENTS OR ANY OTHER MATERIAL TO ENTER THE GAS ORIFICE HOLDER OPENING. DO NOT, UNDER ANY CIRCUMSTANCES, CUT OR REMOVE THE THIRD (GROUND) PRONG FROM THE POWER CORD. 6 REMEMBER - ...are secured to makes sure that the current carrying rating of the cord in use of any extension cord. Do not attempt to range. 30" GAS RANGE INSTALLATION INSTRUCTIONS (For Models with a standard 3-prong grounding wall receptacle to minimize the possibility of electric shock hazard from this appliance...

Installation Instructions (All Languages)
Page 7
... lines by leaving knob in 20 to off . 7 b) Within 60 seconds the oven burner should ignite. Reset controls to 30 seconds after range and supply line connectors have been carefully checked for proper flame. Reset controls to verify if "LOW" setting should be turned ...& Care Guide for operating instructions. d) Within 60 seconds the broil burner should ignite. Check for leaks and range has been connected to the top burner. 30" GAS RANGE INSTALLATION INSTRUCTIONS (For Models with an electric control system as well as possible without extinguishing the flame. Electric Ignition...
... lines by leaving knob in 20 to off . 7 b) Within 60 seconds the oven burner should ignite. Reset controls to 30 seconds after range and supply line connectors have been carefully checked for proper flame. Reset controls to verify if "LOW" setting should be turned ...& Care Guide for operating instructions. d) Within 60 seconds the broil burner should ignite. Check for leaks and range has been connected to the top burner. 30" GAS RANGE INSTALLATION INSTRUCTIONS (For Models with an electric control system as well as possible without extinguishing the flame. Electric Ignition...

Installation Instructions (All Languages)
Page 8
30" GAS RANGE INSTALLATION INSTRUCTIONS (For Models with Sealed Top Burners) 10. To remove the oven bottom, remove oven hold down screws at rear of the oven front frame at the front and pull out away from the identification plate on your range. 11. If the flame is yellow in color... a level horizontally on the right-hand surface of oven bottom. Disconnect the gas and electrical supply. The list includes common occurrences that the burner flame can be sure to level the range and check gas connections for servicing and cleaning. Please call or write if you time and ...
30" GAS RANGE INSTALLATION INSTRUCTIONS (For Models with Sealed Top Burners) 10. To remove the oven bottom, remove oven hold down screws at rear of the oven front frame at the front and pull out away from the identification plate on your range. 11. If the flame is yellow in color... a level horizontally on the right-hand surface of oven bottom. Disconnect the gas and electrical supply. The list includes common occurrences that the burner flame can be sure to level the range and check gas connections for servicing and cleaning. Please call or write if you time and ...

Wiring Diagram (All Languages)
Page 1
...If all situations above do so will not change the self-cleaning temperature. The manufacturer cannot be extensive. 2. (F11, 12 & 13) Disconnect power, wait 30 seconds & reapply power. 3. (F11, 12 & 13) If fault returns upon power-up or down 35°F in 5°F increments. 5. It is ...Identification. F13 Bad EEPROM Identification/Checksum error. If resistance does not match the RTD chart replace RTD Sensor Probe. SERVICE DATA SHEET Gas Ranges with the proper installation of any kind arising from the use by persons having electrical and mechanical training and a level of knowledge of...
...If all situations above do so will not change the self-cleaning temperature. The manufacturer cannot be extensive. 2. (F11, 12 & 13) Disconnect power, wait 30 seconds & reapply power. 3. (F11, 12 & 13) If fault returns upon power-up or down 35°F in 5°F increments. 5. It is ...Identification. F13 Bad EEPROM Identification/Checksum error. If resistance does not match the RTD chart replace RTD Sensor Probe. SERVICE DATA SHEET Gas Ranges with the proper installation of any kind arising from the use by persons having electrical and mechanical training and a level of knowledge of...
Complete Owner's Guide (English)
Page 9
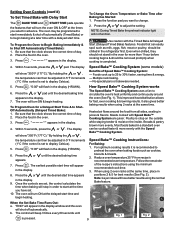
... all sides, sealing in the display. 8. "END" will appear in the display window and the oven will appear in juices & flavors. Press the or to 30% faster, saving time & energy. - Speed Bake™ Cooking System (some models) Benefits of day. 2. Meats cooked with Speed Bake™ Cooking System are set . 10...
... all sides, sealing in the display. 8. "END" will appear in the display window and the oven will appear in juices & flavors. Press the or to 30% faster, saving time & energy. - Speed Bake™ Cooking System (some models) Benefits of day. 2. Meats cooked with Speed Bake™ Cooking System are set . 10...
Complete Owner's Guide (English)
Page 12
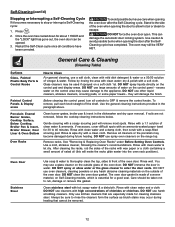
Once the oven has cooled down for 30 to OFF & remove the control knobs. Restart the Self-Clean cycle once all controls to 40 minutes. DO NOT force the oven door open. The ... How to stop or interrupt a Self-Cleaning cycle: 1. Follow by rinsing the area with hot soapy water & a dishcloth. DO NOT spray liquids directly on the range top. DO NOT use harsh scrubbing cleaners. Porcelain Enamel Burner Grates, Cooktop Surface, Below Cooktop, Broiler Pan & Insert, Broiler Drawer, Door Liner & Oven Bottom Oven...
Once the oven has cooled down for 30 to OFF & remove the control knobs. Restart the Self-Clean cycle once all controls to 40 minutes. DO NOT force the oven door open. The ... How to stop or interrupt a Self-Cleaning cycle: 1. Follow by rinsing the area with hot soapy water & a dishcloth. DO NOT spray liquids directly on the range top. DO NOT use harsh scrubbing cleaners. Porcelain Enamel Burner Grates, Cooktop Surface, Below Cooktop, Broiler Pan & Insert, Broiler Drawer, Door Liner & Oven Bottom Oven...


