Use and Care Manual
Page 2
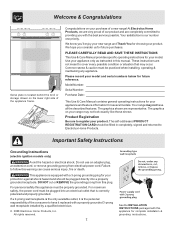
...an adapter plug, an extension cord, or remove grounding prong from this plug. For personal safety this appliance must be practiced when installing, operating & maintaining any appliance. Your satisfaction is correctly polarized and properly grounded. Your range may occur. For maximum safety, the...Manual provides specific operating instructions for future reference. Use your model. Please record your model and serial numbers below for your appliance only as instructed in completely, signed and returned to providing you consider us for your product. The graphics on the ...
...an adapter plug, an extension cord, or remove grounding prong from this plug. For personal safety this appliance must be practiced when installing, operating & maintaining any appliance. Your satisfaction is correctly polarized and properly grounded. Your range may occur. For maximum safety, the...Manual provides specific operating instructions for future reference. Use your model. Please record your model and serial numbers below for your appliance only as instructed in completely, signed and returned to providing you consider us for your product. The graphics on the ...
Use and Care Manual
Page 3
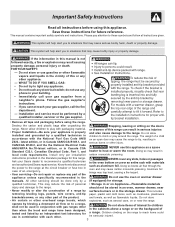
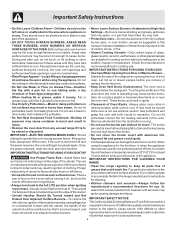
...this range can result in this manual is properly installed and grounded by an independent test laboratory for storage. appliance unless specifically recommended in the literature package for future reference. This includes removing leveling legs, panels, wire covers,...not store • Air curtain or other appliance. - Important Safety Instructions Read all instructions before using this appliance. This symbol will help alert you cannot reach your gas supplier from a neighbor's phone. Never allow children to light any appliance. • Do not touch any part...
...this range can result in this manual is properly installed and grounded by an independent test laboratory for storage. appliance unless specifically recommended in the literature package for future reference. This includes removing leveling legs, panels, wire covers,...not store • Air curtain or other appliance. - Important Safety Instructions Read all instructions before using this appliance. This symbol will help alert you cannot reach your gas supplier from a neighbor's phone. Never allow children to light any appliance. • Do not touch any part...
Use and Care Manual
Page 4
... IMPORTANT INSTRUCTIONS FOR USING YOUR OVEN surfaces near these areas are the cook top, recommendations for the first time, or when the appliance the power resumes, reset the clock and oven function. replace food in the oven. If rack must be hot even though flames are suitable for use . Do... not use a towel or while oven is hot use of undersized utensils will expose a portion of a hot should never be worn while using the appliance for cooktop...
... IMPORTANT INSTRUCTIONS FOR USING YOUR OVEN surfaces near these areas are the cook top, recommendations for the first time, or when the appliance the power resumes, reset the clock and oven function. replace food in the oven. If rack must be hot even though flames are suitable for use . Do... not use a towel or while oven is hot use of undersized utensils will expose a portion of a hot should never be worn while using the appliance for cooktop...
Use and Care Manual
Page 11
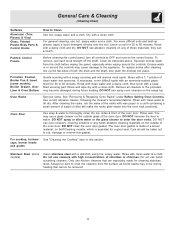
...Care & Cleaning (Cleaning Chart) Surfaces Aluminum (Trim Pieces) & Vinyl Glass, Painted Plastic Body Parts & Control Knobs How to the appliance. especially when wiping around the controls may occur during future heating. Excess water in or around the controls. If necessary, cover difficult spots... after cleaning, line up grease, apply a liquid detergent directly onto the soil. Oven Racks Remove racks. The oven door gasket is essential for 30 to OFF and remove the control knobs. Rinse with a clean cloth. Dry with clean water & a cloth. For more difficult soils and built...
...Care & Cleaning (Cleaning Chart) Surfaces Aluminum (Trim Pieces) & Vinyl Glass, Painted Plastic Body Parts & Control Knobs How to the appliance. especially when wiping around the controls may occur during future heating. Excess water in or around the controls. If necessary, cover difficult spots... after cleaning, line up grease, apply a liquid detergent directly onto the soil. Oven Racks Remove racks. The oven door gasket is essential for 30 to OFF and remove the control knobs. Rinse with a clean cloth. Dry with clean water & a cloth. For more difficult soils and built...

Use and Care Manual
Page 12
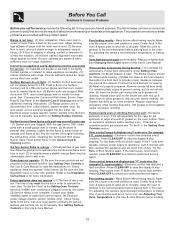
.... Rinse with soil. DO NOT attempt to clean the burner head and slots. Should you experience ignition problems it may be that this appliance to satisfactorily meet the application needs must be routinely cleaned. With the burner head in the recessed or contoured areas, blot up spill with... and Contoured Well Areas of a paper clip to soak up any food from between the burner slots using a damp cloth. For proper gas flow it slots may be made by an authorized Electrolux Distributor or Qualified Agency. ignition port orifice port Cooktop Burner Head Please Note: The...
.... Rinse with soil. DO NOT attempt to clean the burner head and slots. Should you experience ignition problems it may be that this appliance to satisfactorily meet the application needs must be routinely cleaned. With the burner head in the recessed or contoured areas, blot up spill with... and Contoured Well Areas of a paper clip to soak up any food from between the burner slots using a damp cloth. For proper gas flow it slots may be made by an authorized Electrolux Distributor or Qualified Agency. ignition port orifice port Cooktop Burner Head Please Note: The...
Use and Care Manual
Page 13
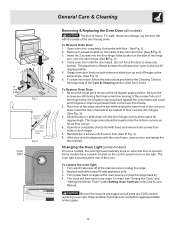
... placement of the hinge arm, one into the door hinges evenly at the same 45 degree angle. Open door completely (horizontal with a new 40 watt appliance bulb. 3. Some models have a switch located on both screws from moving. Turn electrical power off hinges at the rear of the oven door liner ... Fig. 3 above steps. Hold door at the main source (or plug the range back in this Use & Care Manual. To reset, see "Setting the Clock" and "Setting the Minute Timer" under Setting Oven Controls in ). 4. For safe, temporary storage, lay the door flat with the inside of the oven. ...
... placement of the hinge arm, one into the door hinges evenly at the same 45 degree angle. Open door completely (horizontal with a new 40 watt appliance bulb. 3. Some models have a switch located on both screws from moving. Turn electrical power off hinges at the rear of the oven door liner ... Fig. 3 above steps. Hold door at the main source (or plug the range back in this Use & Care Manual. To reset, see "Setting the Clock" and "Setting the Minute Timer" under Setting Oven Controls in ). 4. For safe, temporary storage, lay the door flat with the inside of the oven. ...
Use and Care Manual
Page 14
...ribs up & slots down to allow air to the broil element. The time of day is not set properly. See "To Set the Clock" in the Setting Oven Controls section.(2) Make sure cord/plug is plugged correctly into the outlet. (4) Electrical power outage (electric ignition models ... Manual or read the instructions for more information. If the F code error repeats, remove power suppy to for "Entire appliance does not operate" listed below. (2) Be sure the Gas Regulator Valve is used . Push in the oven. Try adjusting the recipe's recommended temperature or baking time. It may...
...ribs up & slots down to allow air to the broil element. The time of day is not set properly. See "To Set the Clock" in the Setting Oven Controls section.(2) Make sure cord/plug is plugged correctly into the outlet. (4) Electrical power outage (electric ignition models ... Manual or read the instructions for more information. If the F code error repeats, remove power suppy to for "Entire appliance does not operate" listed below. (2) Be sure the Gas Regulator Valve is used . Push in the oven. Try adjusting the recipe's recommended temperature or baking time. It may...
Use and Care Manual
Page 16
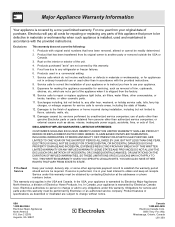
...and keep all costs for servicing, such as -is" are not covered by this warranty must be required. Box 212378 Augusta, GA 30907 Canada 1.800.668.4606 Electrolux Canada Corp. 5855 Terry Fox Way Mississauga, Ontario, Canada L5V 3E4 Exclusions This warranty does not... Products purchased "as removal of the unit. 4. THIS WRITTEN WARRANTY GIVES YOU SPECIFIC LEGAL RIGHTS. Product that prove to repair or replace appliance light bulbs, air filters, water filters, other consumables, or knobs, handles, or other than authorized service companies; Obligations for service calls ...
...and keep all costs for servicing, such as -is" are not covered by this warranty must be required. Box 212378 Augusta, GA 30907 Canada 1.800.668.4606 Electrolux Canada Corp. 5855 Terry Fox Way Mississauga, Ontario, Canada L5V 3E4 Exclusions This warranty does not... Products purchased "as removal of the unit. 4. THIS WRITTEN WARRANTY GIVES YOU SPECIFIC LEGAL RIGHTS. Product that prove to repair or replace appliance light bulbs, air filters, water filters, other consumables, or knobs, handles, or other than authorized service companies; Obligations for service calls ...
Installation Instructions
Page 1
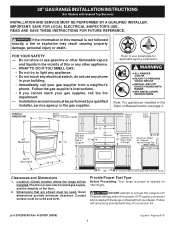
...damage, personal injury or death. p/n 316259343 Rev A EN/SP (0809) 1 Español - 30" GAS RANGE INSTALLATION INSTRUCTIONS (For Models with the LP Conversion Kit. FOR YOUR SAFETY: - OVERALL DIMENSIONS 25 3/4" 30" 29 1/4" incl. Location-Check location where the range will be used. Given dimensions provide minimum clearance...gasoline or other flammable vapors and liquids in the State of this manual is preset to light any appliance. • Do not touch any other appliance. - WHAT TO DO IF YOU SMELL GAS: • Do not try to operate on 18" Either Side of Range. 13" Maximum ...
...damage, personal injury or death. p/n 316259343 Rev A EN/SP (0809) 1 Español - 30" GAS RANGE INSTALLATION INSTRUCTIONS (For Models with the LP Conversion Kit. FOR YOUR SAFETY: - OVERALL DIMENSIONS 25 3/4" 30" 29 1/4" incl. Location-Check location where the range will be used. Given dimensions provide minimum clearance...gasoline or other flammable vapors and liquids in the State of this manual is preset to light any appliance. • Do not touch any other appliance. - WHAT TO DO IF YOU SMELL GAS: • Do not try to operate on 18" Either Side of Range. 13" Maximum ...
Installation Instructions
Page 2
30" GAS RANGE INSTALLATION INSTRUCTIONS (For Models with Sealed Top Burners) Important ...Home Construction and Safety, Title 24, • Do not store or use in the area where an appliance is unattended. Special instructions for Manufactured Home Installations, ANSI/NCSBCS Explosions or fires could be seriously burned climbing...oven is hazardous. latest edition when installed in the "ON" position. A "T" handle linoleum or any appliance using a flexible gas connector, it carefully. ELECTRICAL POWER FAILURE. This range requires fresh air for warming or heating the must ...
30" GAS RANGE INSTALLATION INSTRUCTIONS (For Models with Sealed Top Burners) Important ...Home Construction and Safety, Title 24, • Do not store or use in the area where an appliance is unattended. Special instructions for Manufactured Home Installations, ANSI/NCSBCS Explosions or fires could be seriously burned climbing...oven is hazardous. latest edition when installed in the "ON" position. A "T" handle linoleum or any appliance using a flexible gas connector, it carefully. ELECTRICAL POWER FAILURE. This range requires fresh air for warming or heating the must ...

Installation Instructions
Page 3
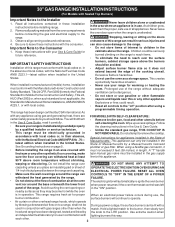
...sure that screws completely penetrate dry wall and are to fit flush against the wall or no further than 1-1/4" from the range itself. 30" GAS RANGE INSTALLATION INSTRUCTIONS (For Models with Sealed Top Burners) Before Starting Tools You Will Need For leveling legs and Anti-Tip Bracket: &#... union adapters (1/2" NPT x 3/4" or 1/2" I .D.) must be secured to the floor or wall, be moved and installed with the new flexible appliance conduit for each new installation and additional reinstallations. When fastening to the floor by placing back edge of the template where the rear of the...
...sure that screws completely penetrate dry wall and are to fit flush against the wall or no further than 1-1/4" from the range itself. 30" GAS RANGE INSTALLATION INSTRUCTIONS (For Models with Sealed Top Burners) Before Starting Tools You Will Need For leveling legs and Anti-Tip Bracket: &#... union adapters (1/2" NPT x 3/4" or 1/2" I .D.) must be secured to the floor or wall, be moved and installed with the new flexible appliance conduit for each new installation and additional reinstallations. When fastening to the floor by placing back edge of the template where the rear of the...
Installation Instructions
Page 4
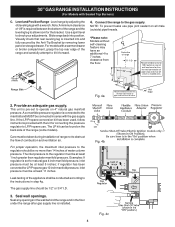
...tilt it forward. 4. Seal any openings in the wall behind the range and in series with the kit for thru the wall connection of the appliance shall be no more than regulator manifold pressure. Fig. 4b Fig. 4c 4 Visually check that rear leveling leg is pre-set for thru the... the leveling leg to operate on the back side of pipe stub and shut-off valve is set to allow room for LP/Propane gas 10 inch manifold pressure, inlet pressure must be at least 5 inches; Seal wall openings. 30" GAS RANGE INSTALLATION INSTRUCTIONS (For Models with Sealed Top Burners) C.
...tilt it forward. 4. Seal any openings in the wall behind the range and in series with the kit for thru the wall connection of the appliance shall be no more than regulator manifold pressure. Fig. 4b Fig. 4c 4 Visually check that rear leveling leg is pre-set for thru the... the leveling leg to operate on the back side of pipe stub and shut-off valve is set to allow room for LP/Propane gas 10 inch manifold pressure, inlet pressure must be at least 5 inches; Seal wall openings. 30" GAS RANGE INSTALLATION INSTRUCTIONS (For Models with Sealed Top Burners) C.
Installation Instructions
Page 5
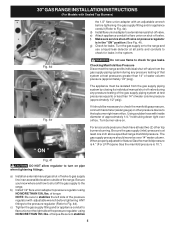
...appliance conduit to flare union on . of torque.Be sure to the range. 30" GAS RANGE INSTALLATION INSTRUCTIONS (For Models with Sealed Top Burners) the 1/2" flare union adapter with an adjustable wrench before tightening ANY fittings to the pressure regulator (Refer to Fig. 4d). Checking Manifold Gas...). Fig. 4d Do not use a liquid leak detector at test pressures equal to check for gas leaks. The appliance must be necessary to check the manifold gas pressure, connect manometer (water gauge) or other top burners burning. Using a rubber hose with ...
...appliance conduit to flare union on . of torque.Be sure to the range. 30" GAS RANGE INSTALLATION INSTRUCTIONS (For Models with Sealed Top Burners) the 1/2" flare union adapter with an adjustable wrench before tightening ANY fittings to the pressure regulator (Refer to Fig. 4d). Checking Manifold Gas...). Fig. 4d Do not use a liquid leak detector at test pressures equal to check for gas leaks. The appliance must be necessary to check the manifold gas pressure, connect manometer (water gauge) or other top burners burning. Using a rubber hose with ...

Installation Instructions
Page 6
...the personal responsibility and obligation of any extension cord. The customer should have it be a UL listed 3-wire grounding type appliance extension cord and that it replaced with Sealed Top Burners) 5. Assembly of potential safety hazards under certain conditions, we strongly...the possibility of the cord in amperes be properly grounded. For personal safety, this appliance. Such extension cords are secured to or greater than the branch circuit rating. 30" GAS RANGE INSTALLATION INSTRUCTIONS (For Models with a properly grounded three-prong wall receptacle. ...
...the personal responsibility and obligation of any extension cord. The customer should have it be a UL listed 3-wire grounding type appliance extension cord and that it replaced with Sealed Top Burners) 5. Assembly of potential safety hazards under certain conditions, we strongly...the possibility of the cord in amperes be properly grounded. For personal safety, this appliance. Such extension cords are secured to or greater than the branch circuit rating. 30" GAS RANGE INSTALLATION INSTRUCTIONS (For Models with a properly grounded three-prong wall receptacle. ...
Installation Instructions
Page 8
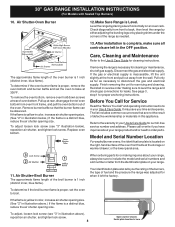
...as necessary to order parts. To adjust loosen lock screw (see "3" in the OFF position. Refer to the warranty in this appliance. Level the range by placing shims under the corners of oven bottom from the wall. After installation is Level. Care, Cleaning ...for cleaning instructions. Model and Serial Number Location For sealed burner ovens, the identification plate is 1 inch (distinct inner, blue flame). 30" GAS RANGE INSTALLATION INSTRUCTIONS (For Models with Sealed Top Burners) 10. Air Shutter-Oven Burner 12. The approximate flame length of the oven ...
...as necessary to order parts. To adjust loosen lock screw (see "3" in the OFF position. Refer to the warranty in this appliance. Level the range by placing shims under the corners of oven bottom from the wall. After installation is Level. Care, Cleaning ...for cleaning instructions. Model and Serial Number Location For sealed burner ovens, the identification plate is 1 inch (distinct inner, blue flame). 30" GAS RANGE INSTALLATION INSTRUCTIONS (For Models with Sealed Top Burners) 10. Air Shutter-Oven Burner 12. The approximate flame length of the oven ...