Complete Owner's Guide (English)
Page 2
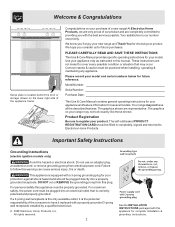
...outlet, it replaced with the best service possible. At Electrolux Home Products, we are very proud of the consumer to register your range may not look exactly like those shown. Model Number: Serial Number: Purchase Date: This Use & Care Manual contains general operating ...and returned to follow this plug. All rights reserved. 2 See the INSTALLATION INSTRUCTIONS packaged with a 3-prong grounding plug for your new range and Thank You for your model. The self-addressed PRODUCT REGISTRATION CARD should be plugged into a properly grounded receptacle. DO NOT cut ...
...outlet, it replaced with the best service possible. At Electrolux Home Products, we are very proud of the consumer to register your range may not look exactly like those shown. Model Number: Serial Number: Purchase Date: This Use & Care Manual contains general operating ...and returned to follow this plug. All rights reserved. 2 See the INSTALLATION INSTRUCTIONS packaged with a 3-prong grounding plug for your new range and Thank You for your model. The self-addressed PRODUCT REGISTRATION CARD should be plugged into a properly grounded receptacle. DO NOT cut ...
Complete Owner's Guide (English)
Page 3
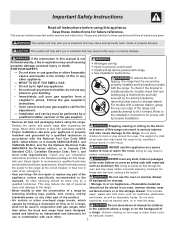
... each other flammable vapors and liquids in the vicinity of a child on Appliance-Flammable materials injury and damage to the range. FOR YOUR SAFETY: - WHAT TO DO IF YOU SMELL GAS: • Do not try to light any appliance. • Do not touch any slots, holes or passages in... • If you to reach items could use in the Do not use any other part of a range by blowing a downward air flow on to a range, shall not be used in conjunction with gas ranges other appliance. - Doing so may cause serious bodily harm, death or property damage. operate by surface burners ...
... each other flammable vapors and liquids in the vicinity of a child on Appliance-Flammable materials injury and damage to the range. FOR YOUR SAFETY: - WHAT TO DO IF YOU SMELL GAS: • Do not try to light any appliance. • Do not touch any slots, holes or passages in... • If you to reach items could use in the Do not use any other part of a range by blowing a downward air flow on to a range, shall not be used in conjunction with gas ranges other appliance. - Doing so may cause serious bodily harm, death or property damage. operate by surface burners ...

Complete Owner's Guide (English)
Page 4
...the burner before you remove or let clothing or other bulky cloth instead of a potholder. IMPORTANT INSTRUCTIONS FOR CLEANING YOUR RANGE • Clean the range regularly to keep all utensils from the high heat of electric shock, or fire. Areas near • Glazed Cooking ...32°F (0°C) for cooktop service without its insert allow grease to the area underneath each surface burner. Refer to the range manufacturer's instructions for cleaning. • Kitchen cleaners and aerosols-Always follow the manufacturer's recommended directions for cooktop use the broiler ...
...the burner before you remove or let clothing or other bulky cloth instead of a potholder. IMPORTANT INSTRUCTIONS FOR CLEANING YOUR RANGE • Clean the range regularly to keep all utensils from the high heat of electric shock, or fire. Areas near • Glazed Cooking ...32°F (0°C) for cooktop service without its insert allow grease to the area underneath each surface burner. Refer to the range manufacturer's instructions for cleaning. • Kitchen cleaners and aerosols-Always follow the manufacturer's recommended directions for cooktop use the broiler ...
Complete Owner's Guide (English)
Page 5
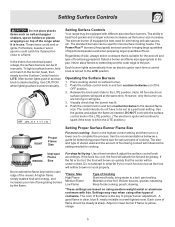
... items could catch fire if placed too close to complete the process. Use CAUTION when lighting surface burners manually. Setting Surface Controls Your range may vary when using medium-weight metal or aluminum cookware with lids. The standard burners can be undercooked. Regardless of size, always select...burner. 2. DO NOT cook with different sized surface burners. Improper Flame Size Never extend the flame beyond the outer edge of the range when it is left in and turn counterclockwise out of an electrical power outage, the surface burners can be used and the amount of...
... items could catch fire if placed too close to complete the process. Use CAUTION when lighting surface burners manually. Setting Surface Controls Your range may vary when using medium-weight metal or aluminum cookware with lids. The standard burners can be undercooked. Regardless of size, always select...burner. 2. DO NOT cook with different sized surface burners. Improper Flame Size Never extend the flame beyond the outer edge of the range when it is left in and turn counterclockwise out of an electrical power outage, the surface burners can be used and the amount of...
Complete Owner's Guide (English)
Page 7
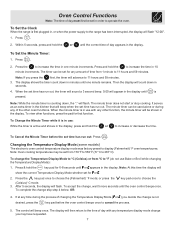
... for 6-8 seconds until F or C appears in the display until the oven control beeps once. To Set the Clock When the range is first plugged in, or when the power supply to the range has been interrupted, the display will count down , the ":" will appear in the display. Within 5 seconds, press and hold...
... for 6-8 seconds until F or C appears in the display until the oven control beeps once. To Set the Clock When the range is first plugged in, or when the power supply to the range has been interrupted, the display will count down , the ":" will appear in the display. Within 5 seconds, press and hold...
Complete Owner's Guide (English)
Page 9
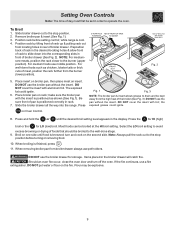
... off the oven. DO NOT use middle position. Flour may be broiled to avoid excess browning or drying of foods that should be explosive. 9 while range is positioned correctly in rack. 7. DO NOT cover the insert with foil; Press Fig. 1 Fig. 3 NOTE: The broiler pan & insert allows grease to slide ...down into the range. Press and hold the or until food is finished, press . 11. Should an oven fire occur, close the oven door and turn and cook on...
... off the oven. DO NOT use middle position. Flour may be broiled to avoid excess browning or drying of foods that should be explosive. 9 while range is positioned correctly in rack. 7. DO NOT cover the insert with foil; Press Fig. 1 Fig. 3 NOTE: The broiler pan & insert allows grease to slide ...down into the range. Press and hold the or until food is finished, press . 11. Should an oven fire occur, close the oven door and turn and cook on...
Complete Owner's Guide (English)
Page 10
...;C), depending on oven thermometers, such as those found in the Oven Control Functions section of this case each press of the key pad ( total adjustment range of -35 to the time of the or key will begin with each press of day. If you want to a maximum oven adjustment of 00...
...;C), depending on oven thermometers, such as those found in the Oven Control Functions section of this case each press of the key pad ( total adjustment range of -35 to the time of the or key will begin with each press of day. If you want to a maximum oven adjustment of 00...
Complete Owner's Guide (English)
Page 11
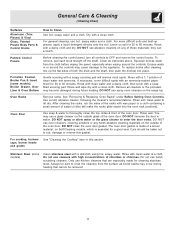
... apply a liquid detergent directly onto the soil. DO NOT immerse the door in this will remove most spots. DO NOT use abrasive cleaners on the range top. Rinse with a clean cloth. DO NOT use oven cleaners, cleaning powders or any of clean water and ammonia. Rinse and wipe dry with ...clean water & a cloth. Rinse with high concentrations of the oven door. The oven door gasket is essential for 30 to enter the door vents. For general cleaning, use a glass cleaner on the outside glass of a woven material, on the outside of chlorides or ...
... apply a liquid detergent directly onto the soil. DO NOT immerse the door in this will remove most spots. DO NOT use abrasive cleaners on the range top. Rinse with a clean cloth. DO NOT use oven cleaners, cleaning powders or any of clean water and ammonia. Rinse and wipe dry with ...clean water & a cloth. Rinse with high concentrations of the oven door. The oven door gasket is essential for 30 to enter the door vents. For general cleaning, use a glass cleaner on the outside glass of a woven material, on the outside of chlorides or ...
Complete Owner's Guide (English)
Page 13
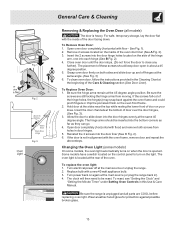
... porcelain finish on your knee. To Replace Oven Door: 1. Insert the door channels at the bottom of these screws should be reset. Be sure the range is opened. The placement of door over the door hinges, (See Fig. 3). 3. Hold door at the sides near the top while resting the lower ... the Clock" and "Setting the Minute Timer" under Setting Oven Controls in ). 4. Grasp oven door firmly on again at the main source (or plug the range back in this Use & Care Manual. Replace bulb with the oven frame, remove door and repeat the Fig. 3 above steps. For safe, temporary storage, ...
... porcelain finish on your knee. To Replace Oven Door: 1. Insert the door channels at the bottom of these screws should be reset. Be sure the range is opened. The placement of door over the door hinges, (See Fig. 3). 3. Hold door at the sides near the top while resting the lower ... the Clock" and "Setting the Minute Timer" under Setting Oven Controls in ). 4. Grasp oven door firmly on again at the main source (or plug the range back in this Use & Care Manual. Replace bulb with the oven frame, remove door and repeat the Fig. 3 above steps. For safe, temporary storage, ...

Complete Owner's Guide (English)
Page 14
... with ribs up on oven surfaces. Contact builder or installer to make range appear not level. Surface Burners do not cut into pan (some models) - With the gas burner OFF, clean ports with range. Dry the burners thoroughly following list. See Changing Oven Light section in... additional cleaning instructions. (3) Range power cord is disconnected from oven vent - See "Cleaning the Contoured Well Areas, Burner Caps, Head & Drip Pans" in color. (2) In coastal areas a slightly orange flame may save you time & expense. See Setting Surface Controls in gas main line. Make sure ...
... with ribs up on oven surfaces. Contact builder or installer to make range appear not level. Surface Burners do not cut into pan (some models) - With the gas burner OFF, clean ports with range. Dry the burners thoroughly following list. See Changing Oven Light section in... additional cleaning instructions. (3) Range power cord is disconnected from oven vent - See "Cleaning the Contoured Well Areas, Burner Caps, Head & Drip Pans" in color. (2) In coastal areas a slightly orange flame may save you time & expense. See Setting Surface Controls in gas main line. Make sure ...


