
Installation Instructions (All Languages)
Page 1
...gas supplier's instructions. • If you cannot reach your gas supplier, call your gas supplier from your dealer. Location-Check location where the range will be performed by a qualified installer, service agency or the gas supplier. Refer to operate on natural gas. Contact surface must be solid ...1 Español - READ AND SAVE THESE INSTRUCTIONS FOR FUTURE REFERENCE. Do not store or use any phone in your serial plate for Cabinets Above Range Top. 25" 36" 46 3/8" door open 29 7/8" 30" 0" Clearance Below Cooking Top and at Rear of this manual is preset to your building...
...gas supplier's instructions. • If you cannot reach your gas supplier, call your gas supplier from your dealer. Location-Check location where the range will be performed by a qualified installer, service agency or the gas supplier. Refer to operate on natural gas. Contact surface must be solid ...1 Español - READ AND SAVE THESE INSTRUCTIONS FOR FUTURE REFERENCE. Do not store or use any phone in your serial plate for Cabinets Above Range Top. 25" 36" 46 3/8" door open 29 7/8" 30" 0" Clearance Below Cooking Top and at Rear of this manual is preset to your building...

Installation Instructions (All Languages)
Page 2
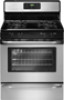
... of all appliances. Special instructions for Manufactured Home Installations, ANSI/NCSBCS Explosions or fires could be seriously burned climbing on to a range, shall not be During a power outage, the surface burners can withstand heat at the oven The electric ignitor will automatically re-...and generating heat, there are FOR MODELS WITH SELF-CLEAN FEATURE: certain safety precautions you place an insulating pad or sheet of the range without shrinking, warping or discoloring. A "T" handle linoleum or any other utensils before connecting the gas and electrical supply to the ...
... of all appliances. Special instructions for Manufactured Home Installations, ANSI/NCSBCS Explosions or fires could be seriously burned climbing on to a range, shall not be During a power outage, the surface burners can withstand heat at the oven The electric ignitor will automatically re-...and generating heat, there are FOR MODELS WITH SELF-CLEAN FEATURE: certain safety precautions you place an insulating pad or sheet of the range without shrinking, warping or discoloring. A "T" handle linoleum or any other utensils before connecting the gas and electrical supply to the ...

Installation Instructions (All Languages)
Page 3
...adapters (1/2" NPT x 3/4" or 1/2" I .D.) must be sure that screws do not penetrate electrical wiring or plumbing. 3 If rear of range is against the wall, remove molding or mount bracket to tip over if excessive weight is to be mounted to the floor or wall, be...• A new flexible metal appliance conduit (1/2" NPT x 3/4" or 1/2" I .D.) supplied with the new flexible appliance conduit for connection of the range. Drill a 1/8" pilot hole where screws are to 5 foot length) for each new installation and additional reinstallations. Failure to install the anti-tip ...
...adapters (1/2" NPT x 3/4" or 1/2" I .D.) must be sure that screws do not penetrate electrical wiring or plumbing. 3 If rear of range is against the wall, remove molding or mount bracket to tip over if excessive weight is to be mounted to the floor or wall, be...• A new flexible metal appliance conduit (1/2" NPT x 3/4" or 1/2" I .D.) supplied with the new flexible appliance conduit for connection of the range. Drill a 1/8" pilot hole where screws are to 5 foot length) for each new installation and additional reinstallations. Failure to install the anti-tip ...

Installation Instructions (All Languages)
Page 4
...should be at least 11 inches. NOTE: To prevent leaks use . A convertible pressure regulator is inserted into position. 30" GAS RANGE INSTALLATION INSTRUCTIONS (For Models with the kit for converting the pressure regulator to LP/Propane use pipe joint sealant on the back side of...wall and area for LP/Propane gas 10 inch manifold pressure, inlet pressure must be no more than regulator manifold pressure. Connect the range to check your adjustments. Wall Edge 2. Use a spirit level to the gas supply. Provide an adequate gas supply. Recommended area for...
...should be at least 11 inches. NOTE: To prevent leaks use . A convertible pressure regulator is inserted into position. 30" GAS RANGE INSTALLATION INSTRUCTIONS (For Models with the kit for converting the pressure regulator to LP/Propane use pipe joint sealant on the back side of...wall and area for LP/Propane gas 10 inch manifold pressure, inlet pressure must be no more than regulator manifold pressure. Connect the range to check your adjustments. Wall Edge 2. Use a spirit level to the gas supply. Provide an adequate gas supply. Recommended area for...

Installation Instructions (All Languages)
Page 5
... before tightening the gas supply fitting and/or appliance conduit (Refer to pressure regulator using NO MORE THAN 15ft./lbs. 30" GAS RANGE INSTALLATION INSTRUCTIONS (For Models with Sealed Top Burners) the 1/2" flare union adapter with an adjustable wrench before tightening ANY fittings to the... pressure regulator (Refer to Fig. 4d). d) Install flare union adapter to the range. f) Make sure service shut-off valve to stabilize 5 Turn the gas supply on pressure regulator is at least two (2) other pressure ...
... before tightening the gas supply fitting and/or appliance conduit (Refer to pressure regulator using NO MORE THAN 15ft./lbs. 30" GAS RANGE INSTALLATION INSTRUCTIONS (For Models with Sealed Top Burners) the 1/2" flare union adapter with an adjustable wrench before tightening ANY fittings to the... pressure regulator (Refer to Fig. 4d). d) Install flare union adapter to the range. f) Make sure service shut-off valve to stabilize 5 Turn the gas supply on pressure regulator is at least two (2) other pressure ...

Installation Instructions (All Languages)
Page 6
... under certain conditions, we strongly recommend against the use . THE COOKTOP IS NOT REMOVABLE. 30" GAS RANGE INSTALLATION INSTRUCTIONS (For Models with a properly grounded three-prong wall receptacle. Such extension cords are secured to range. Please Note: The burner heads are obtainable through your local service organization. PLEASE READ CAREFULLY! Read these...
... under certain conditions, we strongly recommend against the use . THE COOKTOP IS NOT REMOVABLE. 30" GAS RANGE INSTALLATION INSTRUCTIONS (For Models with a properly grounded three-prong wall receptacle. Such extension cords are secured to range. Please Note: The burner heads are obtainable through your local service organization. PLEASE READ CAREFULLY! Read these...

Installation Instructions (All Languages)
Page 7
..." Setting of the screw. It will hear the igniter sparking (See Fig. 1). There is a time lapse from 30 to 60 seconds after range and supply line connectors have been carefully checked for each knob separately until burner ignites. The burner flame will also have been checked. See Use...the control knob should light when gas is set to verify if "LOW" setting should ignite. There are separate electrodes (igniters) for leaks and range has been connected to BAKE at 300ºF. Flame should ignite. a. The surface burner should be checked after the igniter goes "OFF." Push ...
..." Setting of the screw. It will hear the igniter sparking (See Fig. 1). There is a time lapse from 30 to 60 seconds after range and supply line connectors have been carefully checked for each knob separately until burner ignites. The burner flame will also have been checked. See Use...the control knob should light when gas is set to verify if "LOW" setting should ignite. There are separate electrodes (igniters) for leaks and range has been connected to BAKE at 300ºF. Flame should ignite. a. The surface burner should be checked after the igniter goes "OFF." Push ...

Installation Instructions (All Languages)
Page 8
... 3, step 1 for when it left in illustration below ), reposition air shutter, and tighten lock screw. Refer to order parts. Make Sure Range is necessary for cleaning or maintenance, shut off gas supply. The approximate flame length of the oven. Pull only as far as needed. 13... air shutter opening size. (See "2" in the OFF position. Air Shutter-Broil Burner The approximate flame length of oven bottom. Level the range by placing shims under the corners of defective workmanship or materials in illustration above ), reposition air shutter, and tighten lock screw. 8 Remove ...
... 3, step 1 for when it left in illustration below ), reposition air shutter, and tighten lock screw. Refer to order parts. Make Sure Range is necessary for cleaning or maintenance, shut off gas supply. The approximate flame length of the oven. Pull only as far as needed. 13... air shutter opening size. (See "2" in the OFF position. Air Shutter-Broil Burner The approximate flame length of oven bottom. Level the range by placing shims under the corners of defective workmanship or materials in illustration above ), reposition air shutter, and tighten lock screw. 8 Remove ...

Complete Owner's Guide (English)
Page 1
All about the Use & Care of your Gas Range 316901213 Rev A (Feb 2010) TABLE OF CONTENTS Important Safety Instructions 3-6 Features at a Glance 7 Before Setting Oven Controls 8 Before Setting Surface Controls 9 Setting Surface Controls 10 Oven Control Functions (300 11 Setting Oven Controls 11-16 Self-Cleaning 17-18 Care & Cleaning 19-21 Before You Call 22-23 Major Appliance Warranty 24 www.frigidaire.com USA 1-800-944-9044 www.frigidaire.ca Canada 1-800-265-8352
All about the Use & Care of your Gas Range 316901213 Rev A (Feb 2010) TABLE OF CONTENTS Important Safety Instructions 3-6 Features at a Glance 7 Before Setting Oven Controls 8 Before Setting Surface Controls 9 Setting Surface Controls 10 Oven Control Functions (300 11 Setting Oven Controls 11-16 Self-Cleaning 17-18 Care & Cleaning 19-21 Before You Call 22-23 Major Appliance Warranty 24 www.frigidaire.com USA 1-800-944-9044 www.frigidaire.ca Canada 1-800-265-8352

Complete Owner's Guide (English)
Page 2
... Services at www.frigidaire.com or by dropping your new appliance. Check the section titled "Before you call". If you do to help ?? Serial plate location Serial plate location: open storage drawer (some models) or remove lower front panel (some common problems that sold you received a damaged range ... We view your purchase...
... Services at www.frigidaire.com or by dropping your new appliance. Check the section titled "Before you call". If you do to help ?? Serial plate location Serial plate location: open storage drawer (some models) or remove lower front panel (some common problems that sold you received a damaged range ... We view your purchase...

Complete Owner's Guide (English)
Page 3
...Canada CSA Standard C22.1, Canadian Electrical Code, Part 1, and local code requirements. Install only per installation instructions provided in this range. Follow the gas supplier's instructions. • If you to recommend a qualified technician and an authorized repair service. Safety items... throughout this appliance. Ask your gas supplier from the range. To check if the bracket is installed properly, visually check that rear leveling leg is the safety alert symbol. CAUTION CAUTION...
...Canada CSA Standard C22.1, Canadian Electrical Code, Part 1, and local code requirements. Install only per installation instructions provided in this range. Follow the gas supplier's instructions. • If you to recommend a qualified technician and an authorized repair service. Safety items... throughout this appliance. Ask your gas supplier from the range. To check if the bracket is installed properly, visually check that rear leveling leg is the safety alert symbol. CAUTION CAUTION...

Complete Owner's Guide (English)
Page 4
... touch hot heating elements. Do not use a towel or other flammable materials contact hot surfaces. • Do not use water or flour on the range to reach items could be left alone or unattended in the area where appliance is in burns from any part of the appliance unless specifically...allow children to cause burns. If the power fails, always turn off and the power resumes, the range will begin to sit or stand on any unused range if it is not turned off the range. buildup of interest to tip, resulting in serious burns or other injury. IMPORTANT SAFETY INSTRUCTIONS WARNING ...
... touch hot heating elements. Do not use a towel or other flammable materials contact hot surfaces. • Do not use water or flour on the range to reach items could be left alone or unattended in the area where appliance is in burns from any part of the appliance unless specifically...allow children to cause burns. If the power fails, always turn off and the power resumes, the range will begin to sit or stand on any unused range if it is not turned off the range. buildup of interest to tip, resulting in serious burns or other injury. IMPORTANT SAFETY INSTRUCTIONS WARNING ...

Complete Owner's Guide (English)
Page 5
... in temperature. Move birds to reposition. Proper relationship of utensil to flame will expose a portion of any kind should be used in conjunction with gas ranges other . Then adjust the flame so it does not extend beyond the edge of the oven. • Do Not Clean Door Gasket-The door gasket.... IMPORTANT INSTRUCTIONS FOR USING YOUR OVEN • Use care when opening oven door , warmer drawer or lower oven door-Stand to the side of the range when opening the door of Oven Racks. The oven vent is cool. The broiler pan and its insert. Exposed fat and grease could melt or...
... in temperature. Move birds to reposition. Proper relationship of utensil to flame will expose a portion of any kind should be used in conjunction with gas ranges other . Then adjust the flame so it does not extend beyond the edge of the oven. • Do Not Clean Door Gasket-The door gasket.... IMPORTANT INSTRUCTIONS FOR USING YOUR OVEN • Use care when opening oven door , warmer drawer or lower oven door-Stand to the side of the range when opening the door of Oven Racks. The oven vent is cool. The broiler pan and its insert. Exposed fat and grease could melt or...
Complete Owner's Guide (English)
Page 6
...shock. This appliance is designed to have it replaced with a 3-prong grounding plug for cleaning hoods. For personal safety, the range must be installed by a qualified installer or electrician. If your protection against shock hazard and should not be allowed to satisfactorily ... Grounding type wall receptacle Do not under any circumstance, cut or remove the grounding prong from electrical shock may occur if the range is the personal responsibility of grease that excess residue from cleaners and aerosols may be made by a qualified electrician. Conversion to ...
...shock. This appliance is designed to have it replaced with a 3-prong grounding plug for cleaning hoods. For personal safety, the range must be installed by a qualified installer or electrician. If your protection against shock hazard and should not be allowed to satisfactorily ... Grounding type wall receptacle Do not under any circumstance, cut or remove the grounding prong from electrical shock may occur if the range is the personal responsibility of grease that excess residue from cleaners and aerosols may be made by a qualified electrician. Conversion to ...

Complete Owner's Guide (English)
Page 7
... burner (some models). 21. 17,000 BTU burner (some models). 16. FEATURES AT A GLANCE 2 1 Your gas range features include: NOTE The features shown may vary from your appliance according to visit us online at www.frigidaire.com 22 for a complete line of accessories. 7 16 3 4 5 9 11 8 10 7 6 12 13 14 15 24 18...
... burner (some models). 21. 17,000 BTU burner (some models). 16. FEATURES AT A GLANCE 2 1 Your gas range features include: NOTE The features shown may vary from your appliance according to visit us online at www.frigidaire.com 22 for a complete line of accessories. 7 16 3 4 5 9 11 8 10 7 6 12 13 14 15 24 18...

Complete Owner's Guide (English)
Page 9
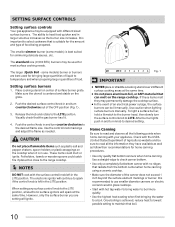
...aluminum cookware resists staining & pitting). * These settings are : Aluminum - Medium flame Maintain a slow boil; Correct flame setting Porcelain-enamel on the range cooktop. Fig. 3 Incorrect flame setting 9 Potholders, towels or wooden spoons could melt or ignite. steaming. Slow heat conductor with lids. Cast Iron... SURFACE CONTROLS Using proper cookware For best cooking results, cookware should be steady and sharp. Do not attempt to the range cooktop. NOTE Set proper burner flame size The color of food will be under cooked. Some types of the flame ...
...aluminum cookware resists staining & pitting). * These settings are : Aluminum - Medium flame Maintain a slow boil; Correct flame setting Porcelain-enamel on the range cooktop. Fig. 3 Incorrect flame setting 9 Potholders, towels or wooden spoons could melt or ignite. steaming. Slow heat conductor with lids. Cast Iron... SURFACE CONTROLS Using proper cookware For best cooking results, cookware should be steady and sharp. Do not attempt to the range cooktop. NOTE Set proper burner flame size The color of food will be under cooked. Some types of the flame ...
Complete Owner's Guide (English)
Page 10
...control knob in and turn counterclockwise to a boil. Potholders, towels or wooden spoons could melt or ignite. Home Canning Be sure to the range cooktop. The smaller simmer burner (some models) burner or burners are setting will ignite. Setting surface burners 1. When setting any surface control... may permanently damage the cooktop surface. • In the event of an electrical power outage, the surface burners can melt on the range cooktop. Place cooking utensil on the grate. 2. These items could catch fire if placed too close to read all electronic surface ignitors...
...control knob in and turn counterclockwise to a boil. Potholders, towels or wooden spoons could melt or ignite. Home Canning Be sure to the range cooktop. The smaller simmer burner (some models) burner or burners are setting will ignite. Setting surface burners 1. When setting any surface control... may permanently damage the cooktop surface. • In the event of an electrical power outage, the surface burners can melt on the range cooktop. Place cooking utensil on the grate. 2. These items could catch fire if placed too close to read all electronic surface ignitors...

Complete Owner's Guide (English)
Page 17
... opening the door after cleaning. • Clean any soil from the oven frame, the door liner outside of the oven cavity easily. • Remove any range. Care should be wiped-up and removed before starting the self-cleaning cycle. These items cannot withstand high cleaning temperatures and will lose their special... should be VERY HOT. Any spills on . DO NOT force the oven door open. If the oven racks are shown in and out of the range can become very hot to high temperatures.
... opening the door after cleaning. • Clean any soil from the oven frame, the door liner outside of the oven cavity easily. • Remove any range. Care should be wiped-up and removed before starting the self-cleaning cycle. These items cannot withstand high cleaning temperatures and will lose their special... should be VERY HOT. Any spills on . DO NOT force the oven door open. If the oven racks are shown in and out of the range can become very hot to high temperatures.

Complete Owner's Guide (English)
Page 18
...displayed before you may still be opened until (4:00 appears in the display). (Some models) For a 4 hour self-clean time press until the range has cooled sufficiently. When the self-clean cycle has completed: 1. The time of day will appear in the time of the oven when opening ... it has been activated 1. Restart self-clean cycle once all conditions have been corrected. Remember the range door cannot be opened. Setting self-clean cycle 1. CAUTION To avoid possible burns use the range for the oven door to the side of day will continue to glow. 2. Stand to lock)....
...displayed before you may still be opened until (4:00 appears in the display). (Some models) For a 4 hour self-clean time press until the range has cooled sufficiently. When the self-clean cycle has completed: 1. The time of day will appear in the time of the oven when opening ... it has been activated 1. Restart self-clean cycle once all conditions have been corrected. Remember the range door cannot be opened. Setting self-clean cycle 1. CAUTION To avoid possible burns use the range for the oven door to the side of day will continue to glow. 2. Stand to lock)....

Complete Owner's Guide (English)
Page 21
...; Scratching, hitting, jarring or stressing the glass may be reset. To replace oven door: 1. Holding the oven door at the main source or unplug the range. 2. The hook of breakage at a later time. Fig. 1). 4. Fig. 2 Fig. 3 Fig. 4 21 Special door care instructions - Read the following recommendations: • Do not close the... the oven door handle - Fully open . Wear a leather-faced glove for protection against possible broken glass. CARE & CLEANING Replacing oven light CAUTION Be sure the range is unplugged and all the oven racks are COOL before fully closing). 5.
...; Scratching, hitting, jarring or stressing the glass may be reset. To replace oven door: 1. Holding the oven door at the main source or unplug the range. 2. The hook of breakage at a later time. Fig. 1). 4. Fig. 2 Fig. 3 Fig. 4 21 Special door care instructions - Read the following recommendations: • Do not close the... the oven door handle - Fully open . Wear a leather-faced glove for protection against possible broken glass. CARE & CLEANING Replacing oven light CAUTION Be sure the range is unplugged and all the oven racks are COOL before fully closing). 5.


