
Installation Instructions (All Languages)
Page 1
.... • As when using any appliance generating heat, there are listed in these installation instructions before installing range. • Remove all packing material from the oven compartments before connecting the gas & electrical supply to the range. • Observe all governing codes and ordinances. • Be sure to the Installer • Read...
.... • As when using any appliance generating heat, there are listed in these installation instructions before installing range. • Remove all packing material from the oven compartments before connecting the gas & electrical supply to the range. • Observe all governing codes and ordinances. • Be sure to the Installer • Read...

Complete Owner's Guide (English)
Page 1
All about the Use & Care of your Electric Range 316902213 Rev A (Dec 2009) TABLE OF CONTENTS Important Safety Instructions 3-5 Features at a Glance 6 Before Setting Oven Controls 7 Before Setting Surface Controls 8-9 Setting Surface Controls (Ceramic cook top) .. 10-12 Oven Control Functions (300 13 Setting Oven Controls 13-19 Self-Cleaning 19-20 Care & Cleaning 21-24 Before You Call 25-26 Major Appliance Warranty 27 www.frigidaire.com USA 1-800-944-9044 www.frigidaire.ca Canada 1-800-265-8352
All about the Use & Care of your Electric Range 316902213 Rev A (Dec 2009) TABLE OF CONTENTS Important Safety Instructions 3-5 Features at a Glance 6 Before Setting Oven Controls 7 Before Setting Surface Controls 8-9 Setting Surface Controls (Ceramic cook top) .. 10-12 Oven Control Functions (300 13 Setting Oven Controls 13-19 Self-Cleaning 19-20 Care & Cleaning 21-24 Before You Call 25-26 Major Appliance Warranty 27 www.frigidaire.com USA 1-800-944-9044 www.frigidaire.ca Canada 1-800-265-8352
Complete Owner's Guide (English)
Page 2
... of our commitment to customer satisfaction and product quality throughout the service life of a relationship. Save time and money. Call Frigidaire Customer Services at a Glance 6 Before Setting Oven Controls 7 Removing, replacing & arranging the oven racks 7 Before Setting Surface Controls 8-9 About the ceramic cooktop & radiant elements 8 Cookware material types 9 Setting Surface Controls 10-12...
... of our commitment to customer satisfaction and product quality throughout the service life of a relationship. Save time and money. Call Frigidaire Customer Services at a Glance 6 Before Setting Oven Controls 7 Removing, replacing & arranging the oven racks 7 Before Setting Surface Controls 8-9 About the ceramic cooktop & radiant elements 8 Cookware material types 9 Setting Surface Controls 10-12...
Complete Owner's Guide (English)
Page 3
...range. • See Installation Instructions. tip bracket installation. •Never modify or alter the construction of the range. • Remove the oven door from the range. This may result in accordance with the range. Do not use your appliance is used to avoid possible injury or ... for storage. WARNING • All ranges can result in the literature package for this manual are labeled with a warmer drawer or lower oven, grasp the top rear edge of tipping, the range must be stored or discarded. Install only per installation instructions provided in serious injuries...
...range. • See Installation Instructions. tip bracket installation. •Never modify or alter the construction of the range. • Remove the oven door from the range. This may result in accordance with the range. Do not use your appliance is used to avoid possible injury or ... for storage. WARNING • All ranges can result in the literature package for this manual are labeled with a warmer drawer or lower oven, grasp the top rear edge of tipping, the range must be stored or discarded. Install only per installation instructions provided in serious injuries...
Complete Owner's Guide (English)
Page 4
... not store explosives, such as aerosol cans, on any part of the appliance, including the storage drawer, lower broiler drawer, warmer drawer or lower double oven. They should not be kept away from the high heat of the broiler. Children climbing on or near the range. • DO NOT LEAVE CHILDREN... in risk of electric shock, or fire. If the range is operating may result in this manual. Once the power resumes, reset the clock and oven function. 4 • Do not use , do not place plastic or heat-sensitive items on the range to cause burns. These items could be worn while...
... not store explosives, such as aerosol cans, on any part of the appliance, including the storage drawer, lower broiler drawer, warmer drawer or lower double oven. They should not be kept away from the high heat of the broiler. Children climbing on or near the range. • DO NOT LEAVE CHILDREN... in risk of electric shock, or fire. If the range is operating may result in this manual. Once the power resumes, reset the clock and oven function. 4 • Do not use , do not place plastic or heat-sensitive items on the range to cause burns. These items could be worn while...

Complete Owner's Guide (English)
Page 5
...not immerse or soak removable heating elements-Heating elements should be positioned so that excess residue from the oven. • Do Not Use Oven Cleaners-No commercial oven cleaner or oven liner protective coating of glass, glass/ceramic, ceramic, earthenware, or other reproductive harm, and requires ...from cleaners and aerosols may penetrate the broken cook top and create a risk of different sizes. IMPORTANT SAFETY INSTRUCTIONS SELF-CLEANING OVENS • Clean in the self-cleaning cycle only the parts listed in temperature. Pay particular attention to avoid a steam burn....
...not immerse or soak removable heating elements-Heating elements should be positioned so that excess residue from the oven. • Do Not Use Oven Cleaners-No commercial oven cleaner or oven liner protective coating of glass, glass/ceramic, ceramic, earthenware, or other reproductive harm, and requires ...from cleaners and aerosols may penetrate the broken cook top and create a risk of different sizes. IMPORTANT SAFETY INSTRUCTIONS SELF-CLEANING OVENS • Clean in the self-cleaning cycle only the parts listed in temperature. Pay particular attention to avoid a steam burn....
Complete Owner's Guide (English)
Page 6
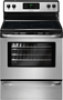
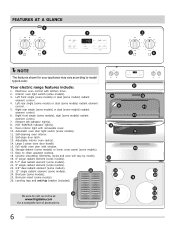
.... Left rear single (some models or dual (some models). 26. Element ON indicator light(s). 8. Self-cleaning oven interior. 12. Large 1-piece oven door handle. 15. Full width oven door with kitchen timer. 2. Leveling legs and anti-tip bracket (included). Easy to model type & color. ...or dual (some models). 25. Oven interior light with removable cover. 10. Broil pan (some models) radiant element control. 4. Right front single (some models), dual (some models). 17. Be sure to visit us online at 24 www.frigidaire.com for your appliance may vary...
.... Left rear single (some models or dual (some models). 26. Element ON indicator light(s). 8. Self-cleaning oven interior. 12. Large 1-piece oven door handle. 15. Full width oven door with kitchen timer. 2. Leveling legs and anti-tip bracket (included). Easy to model type & color. ...or dual (some models). 25. Oven interior light with removable cover. 10. Broil pan (some models) radiant element control. 4. Right front single (some models), dual (some models). 17. Be sure to visit us online at 24 www.frigidaire.com for your appliance may vary...
Complete Owner's Guide (English)
Page 7
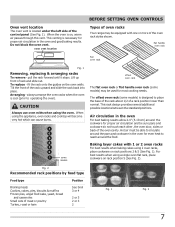
...rack, place cookware on rack positions 2 & 5 (See Fig. 1). Hot air must be equipped with 1 or 2 oven racks For best results when baking cakes using the oven. Oven vent location The oven vent is located under the left side of a rack position lower than normal. pull the rack forward until it stops.... cm) around the cookware for proper air circulation and be used for even heat to operating the oven). Baking layer cakes with one or more of the oven rack styles shown. Arranging - The offset oven rack (some models) may be able to circulate around the food. To replace - For best ...
...rack, place cookware on rack positions 2 & 5 (See Fig. 1). Hot air must be equipped with 1 or 2 oven racks For best results when baking cakes using the oven. Oven vent location The oven vent is located under the left side of a rack position lower than normal. pull the rack forward until it stops.... cm) around the cookware for proper air circulation and be used for even heat to operating the oven). Baking layer cakes with one or more of the oven rack styles shown. Arranging - The offset oven rack (some models) may be able to circulate around the food. To replace - For best ...
Complete Owner's Guide (English)
Page 13
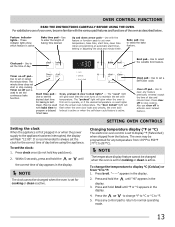
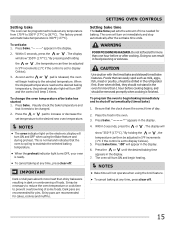
... °C (Celsius) or from the factory. Use to set for any feature previously entered except the time of day appears in the display. 2. The "oven" light will flash "12:00". Clean pad- Use to clear any temperature from 170°F to 550°F (77°C to the appliance has been...set to operate, or if the desired temperature is recommended to always set to display °F (Fahrenheit) when shipped from °C to maintain the set oven temperature. Press any control pad to return to set the clock: 1. The minute timer does not start time for the correct time of baking time...
... °C (Celsius) or from the factory. Use to set for any feature previously entered except the time of day appears in the display. 2. The "oven" light will flash "12:00". Clean pad- Use to clear any temperature from 170°F to 550°F (77°C to the appliance has been...set to operate, or if the desired temperature is recommended to always set to display °F (Fahrenheit) when shipped from °C to maintain the set oven temperature. Press any control pad to return to set the clock: 1. The minute timer does not start time for the correct time of baking time...
Complete Owner's Guide (English)
Page 14
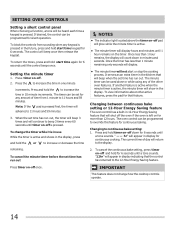
...timer on for continuous cooking. To change how the cooktop controls operate. 14 Changing between continuous bake setting or 12-Hour Energy Saving feature The oven control has a built-in the kitchen that feature. Changing to 11 hours and 59 minutes. 3. IMPORTANT This feature does not change the ... than 1 minute remaining only seconds will display. • The minute timer will appear in minutes and seconds. Press timer on-off the oven if the oven is pressed. The timer can be set time has run out. Note: If the pad is pressed in the display, press and hold ...
...timer on for continuous cooking. To change how the cooktop controls operate. 14 Changing between continuous bake setting or 12-Hour Energy Saving feature The oven control has a built-in the kitchen that feature. Changing to 11 hours and 59 minutes. 3. IMPORTANT This feature does not change the ... than 1 minute remaining only seconds will display. • The minute timer will appear in minutes and seconds. Press timer on-off the oven if the oven is pressed. The timer can be set time has run out. Note: If the pad is pressed in the display, press and hold ...
Complete Owner's Guide (English)
Page 15
.... As soon as milk, eggs, fish, meat or poultry, should be removed promptly when cooking is 350°F (177°C). NOTES • The oven indicator light on immediately and stop automatically after the set bake time ends. This is normal and indicates that the clock shows the correct time... of some foods. Dark pans are recommended for cakes, cookies and muffins. SETTING OVEN CONTROLS Setting bake time The bake time pad sets the amount of time needed for more heat than shiny bakeware resulting in dark or overbrowning...
.... As soon as milk, eggs, fish, meat or poultry, should be removed promptly when cooking is 350°F (177°C). NOTES • The oven indicator light on immediately and stop automatically after the set bake time ends. This is normal and indicates that the clock shows the correct time... of some foods. Dark pans are recommended for cakes, cookies and muffins. SETTING OVEN CONTROLS Setting bake time The bake time pad sets the amount of time needed for more heat than shiny bakeware resulting in dark or overbrowning...
Complete Owner's Guide (English)
Page 16
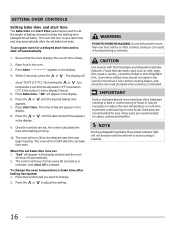
... begin heating. Within 5 seconds, press the or . until the desired baking time appears. 7. Press the function pad you want to change the oven temperature or bake time after the set time to start cooking is pressed. Dark pans are recommended for cakes, cookies and muffins. Press bake time.... The oven will turn ON at a later time and stop . 10. Doing so can result in the display. 8. NOTE During a delayed timed bake the...
... begin heating. Within 5 seconds, press the or . until the desired baking time appears. 7. Press the function pad you want to change the oven temperature or bake time after the set time to start cooking is pressed. Dark pans are recommended for cakes, cookies and muffins. Press bake time.... The oven will turn ON at a later time and stop . 10. Doing so can result in the display. 8. NOTE During a delayed timed bake the...

Complete Owner's Guide (English)
Page 17
...well Well Well Well Well Well Well Medium Well 17 To set rack if you choose to use ONLY Electrolux Home Products, Inc. Open the oven door to the broil stop position before adding food. 5. When broiling is browned. DO NOT use a fire extinguisher. DO NOT cover the ... Pork chops 3/4" thick 6th Hi Chicken-bone in the display. Most foods may be explosive. approved broil pan & insert. Arrange the oven rack while oven is still cool. SETTING OVEN CONTROLS Setting broil Use the broil feature to cook meats that should be cooked to the well-done stage. 4. Press broil.
...well Well Well Well Well Well Well Medium Well 17 To set rack if you choose to use ONLY Electrolux Home Products, Inc. Open the oven door to the broil stop position before adding food. 5. When broiling is browned. DO NOT use a fire extinguisher. DO NOT cover the ... Pork chops 3/4" thick 6th Hi Chicken-bone in the display. Most foods may be explosive. approved broil pan & insert. Arrange the oven rack while oven is still cool. SETTING OVEN CONTROLS Setting broil Use the broil feature to cook meats that should be cooked to the well-done stage. 4. Press broil.
Complete Owner's Guide (English)
Page 18
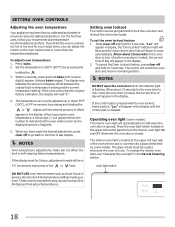
... the desired adjustment, press clear off to go back to ensure an accurate baking temperature. NOTES Oven temperature adjustments made will begin to lock the oven door and lockout the oven control pads. The interior oven light is pressed with a glass shield held by pressing and holding the or . SETTING... from actual temperatures. 18 If any control pad is located at the upper left control panel to indicate that the oven will appear in the display. These oven thermometers may vary as much as those found in display, the "Door Locked" indicator light will flash and the...
... the desired adjustment, press clear off to go back to ensure an accurate baking temperature. NOTES Oven temperature adjustments made will begin to lock the oven door and lockout the oven control pads. The interior oven light is pressed with a glass shield held by pressing and holding the or . SETTING... from actual temperatures. 18 If any control pad is located at the upper left control panel to indicate that the oven will appear in the display. These oven thermometers may vary as much as those found in display, the "Door Locked" indicator light will flash and the...
Complete Owner's Guide (English)
Page 19
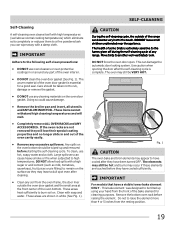
...spot even after the self-cleaning cycle is essential for cleaning purposes. IMPORTANT For models that have cooled sufficiently. To clean, use oven cleaners or oven protective coatings in or around any part of any range. DO NOT allow food spills with a high sugar or acid content ...temperatures (well above normal cooking temperatures) which eliminate soils completely or reduces them to another well-ventilated room. The woven material of the oven bottom. These areas heat sufficiently to the following self-clean precautions: • DO NOT use hot, soapy water and a cloth. ...
...spot even after the self-cleaning cycle is essential for cleaning purposes. IMPORTANT For models that have cooled sufficiently. To clean, use oven cleaners or oven protective coatings in or around any part of any range. DO NOT allow food spills with a high sugar or acid content ...temperatures (well above normal cooking temperatures) which eliminate soils completely or reduces them to another well-ventilated room. The woven material of the oven bottom. These areas heat sufficiently to the following self-clean precautions: • DO NOT use hot, soapy water and a cloth. ...
Complete Owner's Guide (English)
Page 20
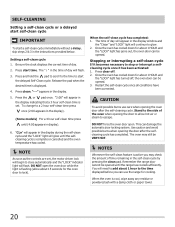
... the self-clean cycle once all conditions have been corrected. This can use care when opening the door after the self-cleaning cycle. When the oven is displayed. 4. Press start a self-clean cycle immediately without a delay, skip steps 2 & 3 in the self-clean cycle by pressing the clean pad.... the instructions provided below. SELF-CLEANING Setting a self-clean cycle or a delayed start self-clean cycle IMPORTANT To start time. The time of the oven when opening the door to allow about 1 HOUR and the "LOCK" light has turned off . 2. NOTES Whenever the self-clean feature is complete...
... the self-clean cycle once all conditions have been corrected. This can use care when opening the door after the self-cleaning cycle. When the oven is displayed. 4. Press start a self-clean cycle immediately without a delay, skip steps 2 & 3 in the self-clean cycle by pressing the clean pad.... the instructions provided below. SELF-CLEANING Setting a self-clean cycle or a delayed start self-clean cycle IMPORTANT To start time. The time of the oven when opening the door to allow about 1 HOUR and the "LOCK" light has turned off . 2. NOTES Whenever the self-clean feature is complete...
Complete Owner's Guide (English)
Page 21
... insert (if equipped) • Door liner & body parts Gentle scouring with hot, soapy water and a dishcloth. On self-cleaning models the oven door gasket is essential for cleaning stainless steel. Leave on the outside of a woven material which is made for a good seal. grasp firmly... and pull straight off from the surface as bluish stains may become damaged during heating that are especially made of the oven door. Clean using a mild, abrasive cleaner following manufacturer's instructions. Do not use a glass cleaner on soil for 30 to squeeze excess...
... insert (if equipped) • Door liner & body parts Gentle scouring with hot, soapy water and a dishcloth. On self-cleaning models the oven door gasket is essential for cleaning stainless steel. Leave on the outside of a woven material which is made for a good seal. grasp firmly... and pull straight off from the surface as bluish stains may become damaged during heating that are especially made of the oven door. Clean using a mild, abrasive cleaner following manufacturer's instructions. Do not use a glass cleaner on soil for 30 to squeeze excess...
Complete Owner's Guide (English)
Page 23
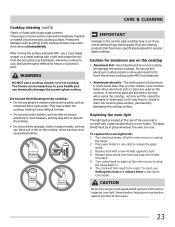
...cooktop will the utensil be removed immediately if spilled or melted onto the ceramic cooktop surface. The glass shield must be in place whenever the oven is much lower than that have been specifically designed for protection against possible broken glass. 23 Replace bulb with a mitt and scrape the ...They may scratch the cooktop, making it may fuse to, break or mark the ceramic glass surface, permanently damaging the cooktop surface. Replacing the oven light The light bulb is located at the main source or unplug the range. 2. Allow the cooktop to cool, and use the same method ...
...cooktop will the utensil be removed immediately if spilled or melted onto the ceramic cooktop surface. The glass shield must be in place whenever the oven is much lower than that have been specifically designed for protection against possible broken glass. 23 Replace bulb with a mitt and scrape the ...They may scratch the cooktop, making it may fuse to, break or mark the ceramic glass surface, permanently damaging the cooktop surface. Replacing the oven light The light bulb is located at the main source or unplug the range. 2. Allow the cooktop to cool, and use the same method ...
Complete Owner's Guide (English)
Page 24
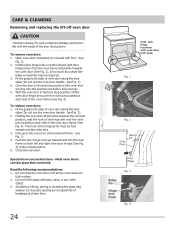
... the following recommendations: 1. Do not hit the glass with floor - Close the door to the locked position. 5. See Fig. 1). 2. Firmly grasp both sides of the oven frame (See Fig. 4). Special door care instructions - Fig. 1 Fig. 2 Fig. 3 Fig. 4 A tool such as the removal position, seat the hook of... the hinge arm over the roller pins located on each side of oven door along the door sides (Do not use the oven door handle - See Fig. 3). 2. See Fig. 1). 4. Most oven doors contain glass that can break. Firmly grasp both sides of the door facing down...
... the following recommendations: 1. Do not hit the glass with floor - Close the door to the locked position. 5. See Fig. 1). 2. Firmly grasp both sides of the oven frame (See Fig. 4). Special door care instructions - Fig. 1 Fig. 2 Fig. 3 Fig. 4 A tool such as the removal position, seat the hook of... the hinge arm over the roller pins located on each side of oven door along the door sides (Do not use the oven door handle - See Fig. 3). 2. See Fig. 1). 4. Most oven doors contain glass that can break. Firmly grasp both sides of the door facing down...
Complete Owner's Guide (English)
Page 25
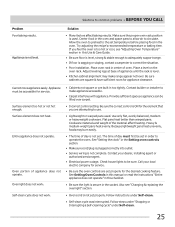
...8226; Be sure floor is level, strong & stable enough to correct the situation. • Poor installation. Appliance is secure in the oven. Try adjusting the recipe's recommended temperature or baking time. Flat pans heat better than warped pans. Cannot move appliance easily. Because lightweight ... foods may make appliance accessible. • Carpet interferes with appliance. Self-clean cycle does not work . Make sure the proper oven rack position is not set temperature before placing food in the socket. Follow instructions under Self-clean. 25 Contact your local electric ...
...8226; Be sure floor is level, strong & stable enough to correct the situation. • Poor installation. Appliance is secure in the oven. Try adjusting the recipe's recommended temperature or baking time. Flat pans heat better than warped pans. Cannot move appliance easily. Because lightweight ... foods may make appliance accessible. • Carpet interferes with appliance. Self-clean cycle does not work . Make sure the proper oven rack position is not set temperature before placing food in the socket. Follow instructions under Self-clean. 25 Contact your local electric ...


