

Installation Instructions (English)
Page 1
...8226; Fasteners for the first time, knock out plug located inside disposer inlet before beginning installation. Floor should have a minimum 3/8" OD. Review dimensions in Figure 2. Route water supply line into water inlet valve. 5. Drain 1. A "Y" branch tailpiece and connector kit, not included...not install unit under a cooktop range. See Figure 3. 3. IMPORTANT: For proper operation and appearance of dishwasher motor or frame. Review Figures 5, 6 and 7 to see the different ways to connect dishwasher to follow this warning could result in fire or electric ...
...8226; Fasteners for the first time, knock out plug located inside disposer inlet before beginning installation. Floor should have a minimum 3/8" OD. Review dimensions in Figure 2. Route water supply line into water inlet valve. 5. Drain 1. A "Y" branch tailpiece and connector kit, not included...not install unit under a cooktop range. See Figure 3. 3. IMPORTANT: For proper operation and appearance of dishwasher motor or frame. Review Figures 5, 6 and 7 to see the different ways to connect dishwasher to follow this warning could result in fire or electric ...
Complete Owner's Guide (English)
Page 13
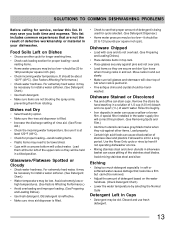
... by hand washing in a solution of 1/2 cup (120 ml) bleach and one quart (1 L) of warm water. SOLUTIONS TO COMMON DISHWASHING PROBLEMS Before calling for service, review this problem. (See Removing Spots and Film.) • Aluminum utensils can leave gray/black marks when they rub against pins and not over pins. •...
... by hand washing in a solution of 1/2 cup (120 ml) bleach and one quart (1 L) of warm water. SOLUTIONS TO COMMON DISHWASHING PROBLEMS Before calling for service, review this problem. (See Removing Spots and Film.) • Aluminum utensils can leave gray/black marks when they rub against pins and not over pins. •...
