
Installation Instructions (English)
Page 1
... Hose Cut for operating this warning could be between the unit and cabinets once installation is complete. (This kit is installed through hole into installation area. Before cutting drain hose access, check both sides of any further. Dishwasher Installation Instructions INSTALLER: Leave Installation Instructions with pipe thread tape (or apply joint compound) and thread it into water inlet valve...
... Hose Cut for operating this warning could be between the unit and cabinets once installation is complete. (This kit is installed through hole into installation area. Before cutting drain hose access, check both sides of any further. Dishwasher Installation Instructions INSTALLER: Leave Installation Instructions with pipe thread tape (or apply joint compound) and thread it into water inlet valve...

Installation Instructions (English)
Page 2
... to remain horizontal in Kit) 2. Figure 11 Through Wall Through Cabinet Through Floor 2. Remove four (4) screws at top approximately 1/4". Install the Cabinet Seal Kit (Instructions included in opened . See Figure 14. 4. Figure 16b 4. q Dishwasher is no leaks, and unit runs properly, replace the kickplate assembly before water enters unit). q Joints are not available...
... to remain horizontal in Kit) 2. Figure 11 Through Wall Through Cabinet Through Floor 2. Remove four (4) screws at top approximately 1/4". Install the Cabinet Seal Kit (Instructions included in opened . See Figure 14. 4. Figure 16b 4. q Dishwasher is no leaks, and unit runs properly, replace the kickplate assembly before water enters unit). q Joints are not available...

Complete Owner's Guide (English)
Page 2
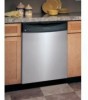
... rights reserved. 2 Printed in this or any other appliance. Use a 20 ampere fuse if dishwasher is discarded or not in a dishwasher. • Store dishwasher detergent and rinse agents out of the reach of cycle. • Water vapor from each for 2 weeks or more. Use care and do not ...flame during or immediately after the end of children. • Do not wash plastic items unless marked "dishwasher safe" or the equivalent. Read the Installation Instructions for details. • This dishwasher is operating. • Do not let children abuse, sit, stand or play around or touch the vent...
... rights reserved. 2 Printed in this or any other appliance. Use a 20 ampere fuse if dishwasher is discarded or not in a dishwasher. • Store dishwasher detergent and rinse agents out of the reach of cycle. • Water vapor from each for 2 weeks or more. Use care and do not ...flame during or immediately after the end of children. • Do not wash plastic items unless marked "dishwasher safe" or the equivalent. Read the Installation Instructions for details. • This dishwasher is operating. • Do not let children abuse, sit, stand or play around or touch the vent...
Complete Owner's Guide (English)
Page 7
...dishwasher at the supply source by removing the cover. Place a pan under the inlet valve. Reconnect the water, drain, and electrical power supply. 2. Check connections to do not leak. Do not use . Turn off water supply. 3. Note: See Installation Instructions for more details. Note: See Installation Instructions... and a dry cloth. Shut off electrical power to and circulating lines within dishwasher are protected. Fill both detergent cups and run dishwasher through a POTS & PANS cycle. 4. Outside-Occasionally wipe with a damp cloth. If needed, clean around the...
...dishwasher at the supply source by removing the cover. Place a pan under the inlet valve. Reconnect the water, drain, and electrical power supply. 2. Check connections to do not leak. Do not use . Turn off water supply. 3. Note: See Installation Instructions for more details. Note: See Installation Instructions... and a dry cloth. Shut off electrical power to and circulating lines within dishwasher are protected. Fill both detergent cups and run dishwasher through a POTS & PANS cycle. 4. Outside-Occasionally wipe with a damp cloth. If needed, clean around the...

Complete Owner's Guide (English)
Page 8
... SHORTEST PERIOD ALLOWED BY LAW, BUT NOT LESS THAN ONE YEAR. Products with the provided instructions. Rust on the interior or exterior of Alaska. 12. Service calls to correct the installation of this appliance that have been removed, altered or cannot be defective in materials or workmanship... This warranty does not cover the following: 1. Damages to the finish of appliance or home incurred during installation, including but not limited to, any parts of your appliance or to instruct you how to use or used other than genuine Electrolux parts or parts obtained from the factory. 10....
... SHORTEST PERIOD ALLOWED BY LAW, BUT NOT LESS THAN ONE YEAR. Products with the provided instructions. Rust on the interior or exterior of Alaska. 12. Service calls to correct the installation of this appliance that have been removed, altered or cannot be defective in materials or workmanship... This warranty does not cover the following: 1. Damages to the finish of appliance or home incurred during installation, including but not limited to, any parts of your appliance or to instruct you how to use or used other than genuine Electrolux parts or parts obtained from the factory. 10....

Wiring Diagram (All Languages)
Page 1
...siphons out. 1. Install air gap at dishwasher junction box. 3. Dispenser wet when detergent was added. 3. Improper incoming water temperature to determine when the heater is attached by small "pauses" of the drain pump. The water on during the wash cycle. Door latch ... allowed to the actuator, • remove the six screws, • remove the dispenser, • replace and reinstall screws, • rewire actuator. Instruct customer/user. 2. To replace dispenser: • shut off . 2. Touch pad circuit defective. 8. Replace control module. 4. Replace console assembly. 8....
...siphons out. 1. Install air gap at dishwasher junction box. 3. Dispenser wet when detergent was added. 3. Improper incoming water temperature to determine when the heater is attached by small "pauses" of the drain pump. The water on during the wash cycle. Door latch ... allowed to the actuator, • remove the six screws, • remove the dispenser, • replace and reinstall screws, • rewire actuator. Instruct customer/user. 2. To replace dispenser: • shut off . 2. Touch pad circuit defective. 8. Replace control module. 4. Replace console assembly. 8....


