Complete Owner's Guide (English)
Page 1
All about the Use &Care of your Dryer TABLE OF CONTENTS Important Safety Instructions 2-4 Solutions to Common Problems 16-17 Features 5 Warranty 18 Operating Instructions 6-11 Français 19 Dryer Settings Chart 12-14 Español 37 Care and Cleaning 15 www.frigidaire.com USA 1-800-944-9044 www.frigidaire.ca Canada 1-800-265-8352 137338500A (1004)
All about the Use &Care of your Dryer TABLE OF CONTENTS Important Safety Instructions 2-4 Solutions to Common Problems 16-17 Features 5 Warranty 18 Operating Instructions 6-11 Français 19 Dryer Settings Chart 12-14 Español 37 Care and Cleaning 15 www.frigidaire.com USA 1-800-944-9044 www.frigidaire.ca Canada 1-800-265-8352 137338500A (1004)
Complete Owner's Guide (English)
Page 2
...contains valuable information about features for several other appliance. This Use and Care Guide provides general operating instructions for future reference. Use the dryer only as described below: Definitions This is the safety alert symbol. Save these numbers. It is important but not hazard-... It also contains information about : • Operation • Care • Service Keep it in the vicinity of the door opening. For your dryer. Follow the gas supplier's instructions. • If you to light any appliance. • Do not touch any other models. do not use ...
...contains valuable information about features for several other appliance. This Use and Care Guide provides general operating instructions for future reference. Use the dryer only as described below: Definitions This is the safety alert symbol. Save these numbers. It is important but not hazard-... It also contains information about : • Operation • Care • Service Keep it in the vicinity of the door opening. For your dryer. Follow the gas supplier's instructions. • If you to light any appliance. • Do not touch any other models. do not use ...
Complete Owner's Guide (English)
Page 3
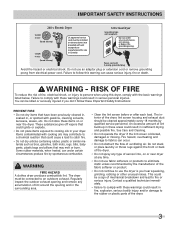
...of mechanical breakdown and lead to comply with 3-prong grounded plug Avoid fire hazard or electrical shock. WARNING FIRE HAZARD A clothes dryer produces combustible lint. Contact a qualified technician immediately. • Failure to fire or serious injury. See Care and ... softeners or products to eliminate static unless recommended by the manufacturer of lint build-up in these warnings could result in your dryer. Items contaminated with gasoline, cleaning solvents, kerosene, waxes, etc. Fire hazard, overheating and damage to the rubber or plastic...
...of mechanical breakdown and lead to comply with 3-prong grounded plug Avoid fire hazard or electrical shock. WARNING FIRE HAZARD A clothes dryer produces combustible lint. Contact a qualified technician immediately. • Failure to fire or serious injury. See Care and ... softeners or products to eliminate static unless recommended by the manufacturer of lint build-up in these warnings could result in your dryer. Items contaminated with gasoline, cleaning solvents, kerosene, waxes, etc. Fire hazard, overheating and damage to the rubber or plastic...
Complete Owner's Guide (English)
Page 4
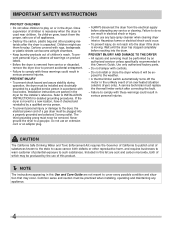
... Included in serious personal injuries. Common sense and caution must be practiced when installing, operating and maintaining any type spray cleanser when cleaning dryer interior. IMPORTANT SAFETY INSTRUCTIONS PROTECT CHILDREN • Do not allow children to play . Cartons covered with controls. • Do not install ... to comply with these warnings could result in this list are soot and carbon monoxide, both of which may occur. Never ground the dryer to the weather. • A thermal limiter switch automatically turns off the motor in the unlikely event of all warnings on or in...
... Included in serious personal injuries. Common sense and caution must be practiced when installing, operating and maintaining any type spray cleanser when cleaning dryer interior. IMPORTANT SAFETY INSTRUCTIONS PROTECT CHILDREN • Do not allow children to play . Cartons covered with controls. • Do not install ... to comply with these warnings could result in this list are soot and carbon monoxide, both of which may occur. Never ground the dryer to the weather. • A thermal limiter switch automatically turns off the motor in the unlikely event of all warnings on or in...
Complete Owner's Guide (English)
Page 6
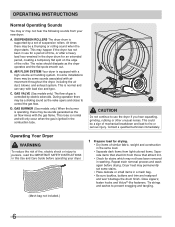
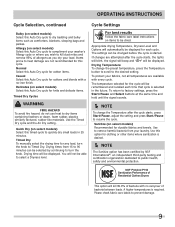
... in this Use and Care Guide before drying. OPERATING INSTRUCTIONS Normal Operating Sounds You may or may not hear the following sounds from your dryer. 1 Prepare load for drying. • Dry items of similar fabric, weight and construction in the same load. • Separate dark...sounds associated with a high volume air handling system. In some installations there may permanently set of gas is equipped with air movement throughout the dryer, including the air duct, blower, and exhaust system. GAS VALVE (Gas models only.) The flow of suspension rollers. Contact a ...
... in this Use and Care Guide before drying. OPERATING INSTRUCTIONS Normal Operating Sounds You may or may not hear the following sounds from your dryer. 1 Prepare load for drying. • Dry items of similar fabric, weight and construction in the same load. • Separate dark...sounds associated with a high volume air handling system. In some installations there may permanently set of gas is equipped with air movement throughout the dryer, including the air duct, blower, and exhaust system. GAS VALVE (Gas models only.) The flow of suspension rollers. Contact a ...
Complete Owner's Guide (English)
Page 7
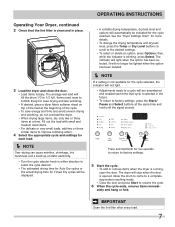
...buttons to scroll to factory settings. 5 Start the cycle. • To add or remove items when the dryer is selected in the future. • To return to factory settings, press the Start/ Pause and Select... cycle. • To save energy and time and avoid uneven drying and wrinkling, do not overload the dryer. • When drying large items, dry only two or three items at the same time and hold ...at the beginning of static electricity. • Turn the cycle selector knob in place. 3 Load the dryer and close the door. • Load items loosely. It will no longer be lighted when the option...
...buttons to scroll to factory settings. 5 Start the cycle. • To add or remove items when the dryer is selected in the future. • To return to factory settings, press the Start/ Pause and Select... cycle. • To save energy and time and avoid uneven drying and wrinkling, do not overload the dryer. • When drying large items, dry only two or three items at the same time and hold ...at the beginning of static electricity. • Turn the cycle selector knob in place. 3 Load the dryer and close the door. • Load items loosely. It will no longer be lighted when the option...
Complete Owner's Guide (English)
Page 8
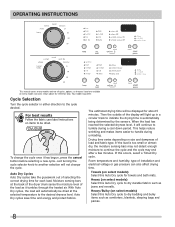
... such as jeans and overalls. Your model may end after a few minutes. The estimated drying time will automatically be dried at the back of the dryer drum sense the moisture level of the load as comforters, blankets, sleeping bags and parkas. 8 Consoles shown above for about 5 minutes. Just turning the cycle...
... such as jeans and overalls. Your model may end after a few minutes. The estimated drying time will automatically be dried at the back of the dryer drum sense the moisture level of the load as comforters, blankets, sleeping bags and parkas. 8 Consoles shown above for about 5 minutes. Just turning the cycle...
Complete Owner's Guide (English)
Page 9
... to 90 minutes can be dried. To protect your laundry. Sanitize (on select models) Recommended for cottons and blends with a no carryover of Residential Clothes Dryers This option will be displayed. NSF Protolcol P154 Sanitization Performance of bacteria between loads. Timed Dry To manually select the drying time for clothing or...
... to 90 minutes can be dried. To protect your laundry. Sanitize (on select models) Recommended for cottons and blends with a no carryover of Residential Clothes Dryers This option will be displayed. NSF Protolcol P154 Sanitization Performance of bacteria between loads. Timed Dry To manually select the drying time for clothing or...
Complete Owner's Guide (English)
Page 11
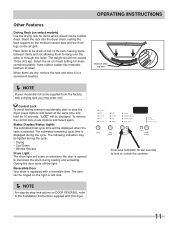
... to illuminate the drum during the cycle. The weight should not be tumble dried. Control Lock To avoid having someone accidentally start or stop the dryer, press Options and Select at the same time and hold both for 10 seconds. The estimated remaining cycle time is equipped with a reversible door. ... not come on whenever the door is selected. Status Display/Status Lights The estimated total cycle time will come supplied from the factory with this dryer. "LOC" will be dried on the air grill. Place items to hang over the sides or through the holes. To remove the control lock, ...
... to illuminate the drum during the cycle. The weight should not be tumble dried. Control Lock To avoid having someone accidentally start or stop the dryer, press Options and Select at the same time and hold both for 10 seconds. The estimated remaining cycle time is equipped with a reversible door. ... not come on whenever the door is selected. Status Display/Status Lights The estimated total cycle time will come supplied from the factory with this dryer. "LOC" will be dried on the air grill. Place items to hang over the sides or through the holes. To remove the control lock, ...
Complete Owner's Guide (English)
Page 12
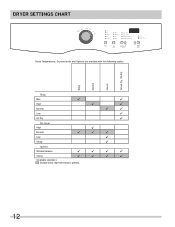
DRYER SETTINGS CHART These Temperatures, Dryness levels and Options are available with the following cycles: Bulky Normal Casual Timed Dry (30-90) Temp Max High Normal Low Air Dry 9 9 9 9 9 9 9 9 Dry Level High Normal Low Damp 9 9 9 9 9 9 Options Wrinkle Release 9 9 9 9 Chime 9 9 9 9 9Available selections Shaded areas represent factory presets. 12
DRYER SETTINGS CHART These Temperatures, Dryness levels and Options are available with the following cycles: Bulky Normal Casual Timed Dry (30-90) Temp Max High Normal Low Air Dry 9 9 9 9 9 9 9 9 Dry Level High Normal Low Damp 9 9 9 9 9 9 Options Wrinkle Release 9 9 9 9 Chime 9 9 9 9 9Available selections Shaded areas represent factory presets. 12
Complete Owner's Guide (English)
Page 13
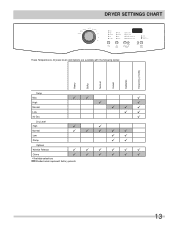
DRYER SETTINGS CHART These Temperatures, Dryness levels and Options are available with the following cycles: Heavy Bulky Normal Casual Delicates Timed Dry (15-90) Temp Max High Normal Low Air Dry 99 9 9 9 999 99 9 Dry Level High Normal Low Damp 9 9 99999 99 99 Options Wrinkle Release 999999 Chime 999999 9Available selections Shaded areas represent factory presets. 13
DRYER SETTINGS CHART These Temperatures, Dryness levels and Options are available with the following cycles: Heavy Bulky Normal Casual Delicates Timed Dry (15-90) Temp Max High Normal Low Air Dry 99 9 9 9 999 99 9 Dry Level High Normal Low Damp 9 9 99999 99 99 Options Wrinkle Release 999999 Chime 999999 9Available selections Shaded areas represent factory presets. 13
Complete Owner's Guide (English)
Page 14
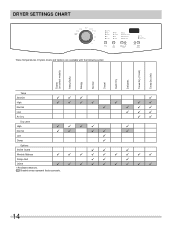
DRYER SETTINGS CHART These Temperatures, Dryness levels and Options are available with the following cycles: Towels (on select models) Heavy/Bulky Allergy Normal Casual Quick Dry Delicates Timed Dry (15-60) Timed Dry (90) Temp Sanitize High Normal Low Air Dry 999 9 9999 9 99 9 999 999 99 Dry Level High Normal Low Damp 9999 9 99 99 9 9 9 Options Shrink Guard 99 9 Wrinkle Release 999999999 Damp Alert 99 9 Chime 999999999 9Available selections Shaded areas represent factory presets. 14
DRYER SETTINGS CHART These Temperatures, Dryness levels and Options are available with the following cycles: Towels (on select models) Heavy/Bulky Allergy Normal Casual Quick Dry Delicates Timed Dry (15-60) Timed Dry (90) Temp Sanitize High Normal Low Air Dry 999 9 9999 9 99 9 999 999 99 Dry Level High Normal Low Damp 9999 9 99 99 9 9 9 Options Shrink Guard 99 9 Wrinkle Release 999999999 Damp Alert 99 9 Chime 999999999 9Available selections Shaded areas represent factory presets. 14
Complete Owner's Guide (English)
Page 15
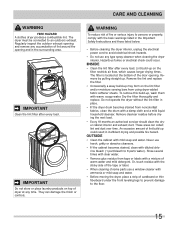
...The filter is located at any accumulation of lint build-up , wash them with a damp cloth and a mild liquid household cleanser. The dryer must be connected to avoid electrical shock hazards. • Do not use harsh, gritty or abrasive cleansers. • If the cabinet becomes stained, ...with mild soap and water. Remove cleanser residue before drying the next load. • Every 18 months an authorized servicer should clean the dryer cabinet interior and exhaust duct. IMPORTANT Clean the lint filter after every load. WARNING To reduce risk of warm water and mild detergent...
...The filter is located at any accumulation of lint build-up , wash them with a damp cloth and a mild liquid household cleanser. The dryer must be connected to avoid electrical shock hazards. • Do not use harsh, gritty or abrasive cleansers. • If the cabinet becomes stained, ...with mild soap and water. Remove cleanser residue before drying the next load. • Every 18 months an authorized servicer should clean the dryer cabinet interior and exhaust duct. IMPORTANT Clean the lint filter after every load. WARNING To reduce risk of warm water and mild detergent...
Complete Owner's Guide (English)
Page 16
... not clean when cycle began. • Lint is attached to complete drying. • Block knits into shape. • Do not overload dryer. • Remove items as soon as cycle ends. 16 Hang or fold. SOLUTIONS TO COMMON PROBLEMS Common Drying Problems Many drying problems involve poor... cleaning results, poor soil and stain removal, residues of load before starting the dryer. • Do not overload dryer. • Use fabric softener in washer or dryer to reduce static electricity. • Remove items when they are slightly damp to avoid overdrying. •...
... not clean when cycle began. • Lint is attached to complete drying. • Block knits into shape. • Do not overload dryer. • Remove items as soon as cycle ends. 16 Hang or fold. SOLUTIONS TO COMMON PROBLEMS Common Drying Problems Many drying problems involve poor... cleaning results, poor soil and stain removal, residues of load before starting the dryer. • Do not overload dryer. • Use fabric softener in washer or dryer to reduce static electricity. • Remove items when they are slightly damp to avoid overdrying. •...
Complete Owner's Guide (English)
Page 17
...be clogged Clean out any obstruction. High humidity. See "Operating Instructions." The list includes common occurrences that are not the result of the dryer feels too hot or smells hot. Drying cycle takes too long, outside of defective workmanship or materials in place, the duct must be... than drying on a separate circuit. or restricted. Remove items as soon as coins, pins, clips or buttons are 2 house fuses in dryer too long. Remove objects from pockets before starting each cycle. Permanently attached items such as belt buckles, zippers and fasteners may be hitting the...
...be clogged Clean out any obstruction. High humidity. See "Operating Instructions." The list includes common occurrences that are not the result of the dryer feels too hot or smells hot. Drying cycle takes too long, outside of defective workmanship or materials in place, the duct must be... than drying on a separate circuit. or restricted. Remove items as soon as coins, pins, clips or buttons are 2 house fuses in dryer too long. Remove objects from pockets before starting each cycle. Permanently attached items such as belt buckles, zippers and fasteners may be hitting the...
Wiring Diagram (All Languages)
Page 1
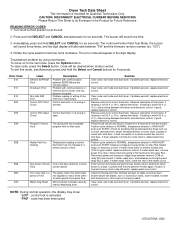
...If meter reads 240V on electric models and 120V on electronic control. If button is free but code returns, replace electronic control. Dryer Tech Data Sheet This information is intended for 6 seconds to exit test modes. CAUTION: DISCONNECT ELECTRICAL CURRENT BEFORE SERVICING Please Return ...the Product for blocked lint filter, blocked exhaust, air leaks around air duct, broken blower fan blades, worn or loose drum seals, dryer installed in a certain amount of thermistor. If problem persists, replace electronic control. Measure resistance of time. Press Pause Cancel and SELECT...
...If meter reads 240V on electric models and 120V on electronic control. If button is free but code returns, replace electronic control. Dryer Tech Data Sheet This information is intended for 6 seconds to exit test modes. CAUTION: DISCONNECT ELECTRICAL CURRENT BEFORE SERVICING Please Return ...the Product for blocked lint filter, blocked exhaust, air leaks around air duct, broken blower fan blades, worn or loose drum seals, dryer installed in a certain amount of thermistor. If problem persists, replace electronic control. Measure resistance of time. Press Pause Cancel and SELECT...
Wiring Diagram (All Languages)
Page 2
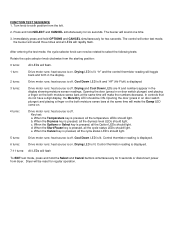
...LED is pressed, all the Option LEDs should light. When the Temperature key is lit. b. When the Options or Select key is off . d. e. Dryer will be ON. heat source is pressed, all the temperature LEDs should light. Opening the door (press in the display. 2 turns: Drive motor runs.... 6 turns: Drive motor runs; Control thermistor reading is pressed, all the cycle status LED's should be reset for 6 seconds or disconnect power from dryer. "H" and the control thermistor reading will sound one time. 3. Cool Down LED is lit and "AF" (Air Fluff) is lit. Opening the ...
...LED is pressed, all the Option LEDs should light. When the Temperature key is lit. b. When the Options or Select key is off . d. e. Dryer will be ON. heat source is pressed, all the temperature LEDs should light. Opening the door (press in the display. 2 turns: Drive motor runs.... 6 turns: Drive motor runs; Control thermistor reading is pressed, all the cycle status LED's should be reset for 6 seconds or disconnect power from dryer. "H" and the control thermistor reading will sound one time. 3. Cool Down LED is lit and "AF" (Air Fluff) is lit. Opening the ...

Installation Instructions (All Languages)
Page 1
All about the Installation of your Dryer TABLE OF CONTENTS Important Safety Instructions 2-3 Reversing Door 18-21 Installation Requirements 4-10 Accessories 22 Installed Dryer Dimensions 11 Français 23 Installation Instructions 12-17 Español 45 137337800A (1004)
All about the Installation of your Dryer TABLE OF CONTENTS Important Safety Instructions 2-3 Reversing Door 18-21 Installation Requirements 4-10 Accessories 22 Installed Dryer Dimensions 11 Français 23 Installation Instructions 12-17 Español 45 137337800A (1004)
Installation Instructions (All Languages)
Page 2
...• Clear the room, building or area of the National Electrical Code, ANSI/NFPA 70, or in Canada, CAN/ACG B149.1-2000. • The dryer is designed under ANSI Z 21.5.1 or ANSI/UL 2158 - Pre-Installation Requirements Tools and materials needed for installation: • Adjustable pliers • Phillips...included with local codes and ordinances and the latest edition of this appliance: • Destroy the carton and plastic bags after the dryer is not recommended for natu- Save these instructions for play. Children might use any appliance. Do not stack washer on pedestal. Good...
...• Clear the room, building or area of the National Electrical Code, ANSI/NFPA 70, or in Canada, CAN/ACG B149.1-2000. • The dryer is designed under ANSI Z 21.5.1 or ANSI/UL 2158 - Pre-Installation Requirements Tools and materials needed for installation: • Adjustable pliers • Phillips...included with local codes and ordinances and the latest edition of this appliance: • Destroy the carton and plastic bags after the dryer is not recommended for natu- Save these instructions for play. Children might use any appliance. Do not stack washer on pedestal. Good...
Installation Instructions (All Languages)
Page 3
...is used to alert you to potential personal injury hazards. check with soapy water, NEVER check with flame 240v Electric Supply (Electric Dryer) ‰ Approved NEMA 10-30R or 14-30R service cord with approved sealer and wrench tight ‰ Conversion kit for function Electrical ...Power ‰ House power turned on ‰ Dryer plugged in Final Checks ‰ Installation Instructions and Use and Care Guide read all instructions before initial operation Door Reversal ‰ Follow ...
...is used to alert you to potential personal injury hazards. check with soapy water, NEVER check with flame 240v Electric Supply (Electric Dryer) ‰ Approved NEMA 10-30R or 14-30R service cord with approved sealer and wrench tight ‰ Conversion kit for function Electrical ...Power ‰ House power turned on ‰ Dryer plugged in Final Checks ‰ Installation Instructions and Use and Care Guide read all instructions before initial operation Door Reversal ‰ Follow ...


