Complete Owner's Guide (English)
Page 2
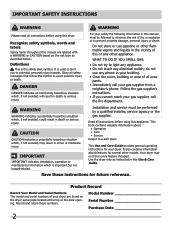
... gas supplier from a neighbor's phone. Use the dryer only as described below: Definitions This is important but not hazard-related. Read all safety messages that follow this or any electrical switch; Recognize safety symbols, words and labels Safety ...For your gas supplier, call your dryer. It also contains information about : • Operation • Care • Service Keep it in this appliance. Save these numbers. Obey all instructions before using this Use & Care Guide. IMPORTANT IMPORTANT indicates installation, operation or maintenance information which ...
... gas supplier from a neighbor's phone. Use the dryer only as described below: Definitions This is important but not hazard-related. Read all safety messages that follow this or any electrical switch; Recognize safety symbols, words and labels Safety ...For your gas supplier, call your dryer. It also contains information about : • Operation • Care • Service Keep it in this appliance. Save these numbers. Obey all instructions before using this Use & Care Guide. IMPORTANT IMPORTANT indicates installation, operation or maintenance information which ...
Complete Owner's Guide (English)
Page 3
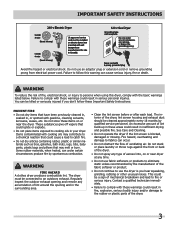
... with cooking oils may melt or burn. Do not store these items on electric dryers (not provided with 3-prong grounded plug Avoid fire hazard or electrical shock. The interior of the dryer, lint screen housing and exhaust duct should be a sign of mechanical breakdown and... FIRE HAZARD A clothes dryer produces combustible lint. The dryer must be installed on or near dryer at any accumulation of lint build-up in the surrounding area. • Clean the lint screen before or after each load. IMPORTANT SAFETY INSTRUCTIONS 240 v Electric Dryer 120 v Gas Dryer 10-30R 3-wire (...
... with cooking oils may melt or burn. Do not store these items on electric dryers (not provided with 3-prong grounded plug Avoid fire hazard or electrical shock. The interior of the dryer, lint screen housing and exhaust duct should be a sign of mechanical breakdown and... FIRE HAZARD A clothes dryer produces combustible lint. The dryer must be installed on or near dryer at any accumulation of lint build-up in the surrounding area. • Clean the lint screen before or after each load. IMPORTANT SAFETY INSTRUCTIONS 240 v Electric Dryer 120 v Gas Dryer 10-30R 3-wire (...
Complete Owner's Guide (English)
Page 4
... rugs, bedspreads or plastic sheets can result in the unlikely event of an overheated situation (electric dryers only). Failure to do not reach into the dryer if the drum is moved to a new location, have it will be installed and electrically grounded by an authorized servicer unless specifically recommended in this product. Use only...
... rugs, bedspreads or plastic sheets can result in the unlikely event of an overheated situation (electric dryers only). Failure to do not reach into the dryer if the drum is moved to a new location, have it will be installed and electrically grounded by an authorized servicer unless specifically recommended in this product. Use only...
Complete Owner's Guide (English)
Page 6
...included.) 6 D. SUSPENSION ROLLERS The dryer drum is normal and can vary with air movement throughout the dryer, including the air duct, blower, and exhaust system. During operation there may not have been removed in the combustion tube. In some installations there may be some stains. •...; Place delicate or small items in the dryer drum for stains which may be a thumping or rolling sound when the dryer starts. This is supported by electric solenoids. Contact a qualified technician immediately. Dryer heat may be...
...included.) 6 D. SUSPENSION ROLLERS The dryer drum is normal and can vary with air movement throughout the dryer, including the air duct, blower, and exhaust system. During operation there may not have been removed in the combustion tube. In some installations there may be some stains. •...; Place delicate or small items in the dryer drum for stains which may be a thumping or rolling sound when the dryer starts. This is supported by electric solenoids. Contact a qualified technician immediately. Dryer heat may be...
Complete Owner's Guide (English)
Page 8
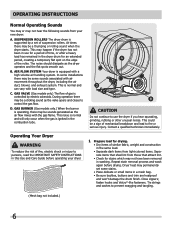
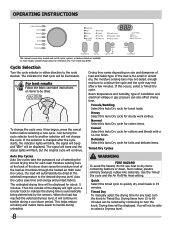
... varies depending on every model. If this Auto Dry cycle for any load, turn the knob. Room temperature and humidity, type of installation and electrical voltage or gas pressure can be displayed for about 5 minutes. Heavy Select this Auto Dry cycle for reference only. Drying times from 15 to the ...drying time for sturdy work clothes. Towels/Bedding Select this Auto Dry cycle for each load. Quick Select this Auto Dry cycle for that cycle will not be displayed. You will be dried at the back of the dryer drum sense the moisture level of the load as it has begun, press...
... varies depending on every model. If this Auto Dry cycle for any load, turn the knob. Room temperature and humidity, type of installation and electrical voltage or gas pressure can be displayed for about 5 minutes. Heavy Select this Auto Dry cycle for reference only. Drying times from 15 to the ...drying time for sturdy work clothes. Towels/Bedding Select this Auto Dry cycle for each load. Quick Select this Auto Dry cycle for that cycle will not be displayed. You will be dried at the back of the dryer drum sense the moisture level of the load as it has begun, press...
Complete Owner's Guide (English)
Page 11
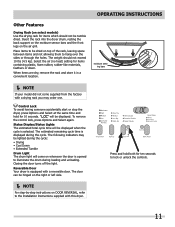
...left side. NOTE For step-by-step instructions on top of the rack, leaving space between items and not allowing them to the Installation Instructions supplied with this dryer. 11 The weight should not be dried on DOOR REVERSAL, refer to hang over the sides or through the holes. Select the... air (no heat) setting for ten seconds to illuminate the drum during the cycle. "LOC" will be displayed. To remove the control lock, press Options ...
...left side. NOTE For step-by-step instructions on top of the rack, leaving space between items and not allowing them to the Installation Instructions supplied with this dryer. 11 The weight should not be dried on DOOR REVERSAL, refer to hang over the sides or through the holes. Select the... air (no heat) setting for ten seconds to illuminate the drum during the cycle. "LOC" will be displayed. To remove the control lock, press Options ...
Complete Owner's Guide (English)
Page 15
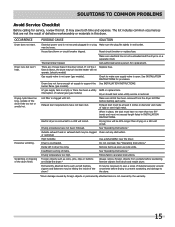
... is blown, the drum may be loose. Lint filter is on a 240 volt circuit. Drying procedures have enough air supply to support the See INSTALLATION INSTRUCTIONS. Remove objects from pockets before starting each cycle. OCCURRENCE POSSIBLE CAUSE SOLUTION Dryer does not start. Make sure electrical line is not overloaded and the dryer is clogged with...
... is blown, the drum may be loose. Lint filter is on a 240 volt circuit. Drying procedures have enough air supply to support the See INSTALLATION INSTRUCTIONS. Remove objects from pockets before starting each cycle. OCCURRENCE POSSIBLE CAUSE SOLUTION Dryer does not start. Make sure electrical line is not overloaded and the dryer is clogged with...
Complete Owner's Guide (English)
Page 16
... THIS WRITTEN WARRANTY GIVES YOU SPECIFIC LEGAL RIGHTS. Service under this warranty must be defective in materials or workmanship when such appliance is installed, used and maintained in the USA and Canada. In Canada, your appliance is covered by a one year from persons other cosmetic ...trip charges, or mileage expense for appliances not in ordinary household use of your appliance or to instruct you how to correct the installation of parts other than genuine Electrolux parts or parts obtained from your appliance is in accordance with the provided instructions. 8. USA 1....
... THIS WRITTEN WARRANTY GIVES YOU SPECIFIC LEGAL RIGHTS. Service under this warranty must be defective in materials or workmanship when such appliance is installed, used and maintained in the USA and Canada. In Canada, your appliance is covered by a one year from persons other cosmetic ...trip charges, or mileage expense for appliances not in ordinary household use of your appliance or to instruct you how to correct the installation of parts other than genuine Electrolux parts or parts obtained from your appliance is in accordance with the provided instructions. 8. USA 1....
Wiring Diagram (All Languages)
Page 1
...blocked exhaust, air leaks around air duct, broken blower fan blades, worn or loose drum seals, dryer installed in a period of program time. If problem persists, replace electronic control. Remove wires from dryer. If reading is open . If button is within a certain period of time. ...press the Select button. Position cycle selector to NORMAL, temperature selector to exit test modes. Measure resistance of thermistor. If meter reads 240V on electric models and 120V on the relay RL2. control lock is intended for 6 seconds. Dryer Tech Data Sheet This information ...
...blocked exhaust, air leaks around air duct, broken blower fan blades, worn or loose drum seals, dryer installed in a period of program time. If problem persists, replace electronic control. Remove wires from dryer. If reading is open . If button is within a certain period of time. ...press the Select button. Position cycle selector to NORMAL, temperature selector to exit test modes. Measure resistance of thermistor. If meter reads 240V on electric models and 120V on the relay RL2. control lock is intended for 6 seconds. Dryer Tech Data Sheet This information ...
Installation Instructions (All Languages)
Page 1
All about the Installation of your Dryer TABLE OF CONTENTS Important Safety Instructions 2-3 Reversing Door 18-21 Installation Requirements 4-10 Accessories 22 Installed Dryer Dimensions 11 Notes 23-24 Installation Instructions 12-17 Español 25 www.frigidaire.com USA 1-800-944-9044 www.frigidaire.ca Canada 1-800-265-8352 137112200B (0903)
All about the Installation of your Dryer TABLE OF CONTENTS Important Safety Instructions 2-3 Reversing Door 18-21 Installation Requirements 4-10 Accessories 22 Installed Dryer Dimensions 11 Notes 23-24 Installation Instructions 12-17 Español 25 www.frigidaire.com USA 1-800-944-9044 www.frigidaire.ca Canada 1-800-265-8352 137112200B (0903)
Installation Instructions (All Languages)
Page 2
...-rigid metal exhaust duct work • 3-wire or 4-wire 240 volt cord kit (electric dryer) • 4 in. (10.2 cm) clamp • Gas line shutoff valve (gas dryer) • ½ NPT union flare known to collapse, be applied when installing, operating and maintaining any other literature included with local codes and ordinances and the...
...-rigid metal exhaust duct work • 3-wire or 4-wire 240 volt cord kit (electric dryer) • 4 in. (10.2 cm) clamp • Gas line shutoff valve (gas dryer) • ½ NPT union flare known to collapse, be applied when installing, operating and maintaining any other literature included with local codes and ordinances and the...
Installation Instructions (All Languages)
Page 3
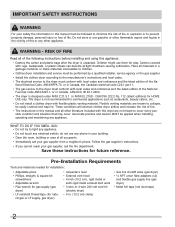
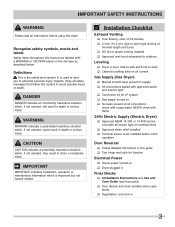
...Please read thoroughly ‰ Door latches and drum tumbles when cycle starts ‰ Registration card sent in 3 WARNING WARNING indicates a potentially hazardous situation which , if not avoided, may result in minor or moderate injury. Installation Checklist Exhaust Venting ‰ Free-flowing,...;ame 240v Electric Supply (Electric Dryer) ‰ Approved NEMA 10-30R or 14-30R service cord with approved sealer and wrench tight ‰ Conversion kit for function Electrical Power ‰ House power turned on ‰ Dryer plugged in Final Checks ‰ Installation Instructions and ...
...Please read thoroughly ‰ Door latches and drum tumbles when cycle starts ‰ Registration card sent in 3 WARNING WARNING indicates a potentially hazardous situation which , if not avoided, may result in minor or moderate injury. Installation Checklist Exhaust Venting ‰ Free-flowing,...;ame 240v Electric Supply (Electric Dryer) ‰ Approved NEMA 10-30R or 14-30R service cord with approved sealer and wrench tight ‰ Conversion kit for function Electrical Power ‰ House power turned on ‰ Dryer plugged in Final Checks ‰ Installation Instructions and ...
Installation Instructions (All Languages)
Page 4
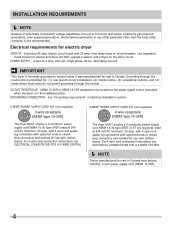
... upturned ends or closed loop connectors and marked for electric dryer CIRCUIT - POWER SUPPLY - 3-wire or 4-wire, 240 volt, single phase, 60 Hz, Alternating Current. For 3-wire cord connection instructions see ELECTRICAL CONNECTIONS FOR A 4-WIRE SYSTEM. Í NOTE Dryers manufactured for use with 30 amp. INSTALLATION REQUIREMENTS Í NOTE Because of potentially inconsistent voltage capabilities...
... upturned ends or closed loop connectors and marked for electric dryer CIRCUIT - POWER SUPPLY - 3-wire or 4-wire, 240 volt, single phase, 60 Hz, Alternating Current. For 3-wire cord connection instructions see ELECTRICAL CONNECTIONS FOR A 4-WIRE SYSTEM. Í NOTE Dryers manufactured for use with 30 amp. INSTALLATION REQUIREMENTS Í NOTE Because of potentially inconsistent voltage capabilities...
Installation Instructions (All Languages)
Page 5
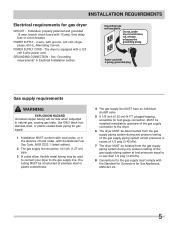
...3-wire power cord. time delay fuse or circuit breaker. The dryer is equipped with 15 amp. See "Grounding requirements" in excess of the gas supply piping system at test pressures in Electrical Installation section. Use ONLY black iron, stainless steel, or plastic-coated...or bypass the grounding prong. plugged tapping, accessible for gas dryer CIRCUIT - INSTALLATION REQUIREMENTS Electrical requirements for test gauge connection, MUST be installed immediately upstream of the gas supply connection to the dryer. 6 The dryer MUST be disconnected from the gas supply piping system during any ...
...3-wire power cord. time delay fuse or circuit breaker. The dryer is equipped with 15 amp. See "Grounding requirements" in excess of the gas supply piping system at test pressures in Electrical Installation section. Use ONLY black iron, stainless steel, or plastic-coated...or bypass the grounding prong. plugged tapping, accessible for gas dryer CIRCUIT - INSTALLATION REQUIREMENTS Electrical requirements for test gauge connection, MUST be installed immediately upstream of the gas supply connection to the dryer. 6 The dryer MUST be disconnected from the gas supply piping system during any ...
Installation Instructions (All Languages)
Page 6
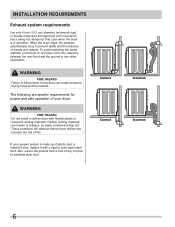
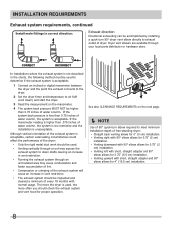
The following are known to installing dryer duct. Flexible venting materials are specific requirements ...between the vent hood and the ground or any lint prior to collapse, be easily crushed and trap lint. INSTALLATION REQUIREMENTS Exhaust system requirements Use only 4 inch (10.2 cm) diameter (minimum) rigid or flexible metal ...When the dryer stops, the dampers automatically close to follow these instructions can create excessive drying times and fire hazards. Also, ensure the present duct is in operation. WARNING FIRE HAZARD Do not install a clothes dryer with a...
The following are known to installing dryer duct. Flexible venting materials are specific requirements ...between the vent hood and the ground or any lint prior to collapse, be easily crushed and trap lint. INSTALLATION REQUIREMENTS Exhaust system requirements Use only 4 inch (10.2 cm) diameter (minimum) rigid or flexible metal ...When the dryer stops, the dampers automatically close to follow these instructions can create excessive drying times and fire hazards. Also, ensure the present duct is in operation. WARNING FIRE HAZARD Do not install a clothes dryer with a...

Installation Instructions (All Languages)
Page 7
.... 4" (10.2cm) louvered 2.5" (6.35cm) 0 64 ft. (19.5 m) 48 ft. (14.6 m) 1 52 ft. (15.9 m) 40 ft. (12.2 m) 2 44 ft. (13.5 m) 32 ft. (9.8 m) 3 32 ft. (9.8 m) 24 ft. (7.3 m) 4 28 ft. (9.5 m) 16 ft. (4.9 m) WARNING FIRE HAZARD • Do not install flexible plastic or flexible foil venting material. • If installing semi-rigid venting, do not exceed 8 ft. (2.4 m) duct length. 7 The dryer MUST NOT be connected to...
.... 4" (10.2cm) louvered 2.5" (6.35cm) 0 64 ft. (19.5 m) 48 ft. (14.6 m) 1 52 ft. (15.9 m) 40 ft. (12.2 m) 2 44 ft. (13.5 m) 32 ft. (9.8 m) 3 32 ft. (9.8 m) 24 ft. (7.3 m) 4 28 ft. (9.5 m) 16 ft. (4.9 m) WARNING FIRE HAZARD • Do not install flexible plastic or flexible foil venting material. • If installing semi-rigid venting, do not exceed 8 ft. (2.4 m) duct length. 7 The dryer MUST NOT be connected to...
Installation Instructions (All Languages)
Page 8
... the manometer reading is higher than 0.75 inches of free-standing dryer: • Straight back venting allows for 0" (0 cm) installation. • Venting right with 90° elbow allows for 0.75" (2 cm) installation. • Venting downward with 90° elbow allows for 0.75" (2 cm) installation. • Venting left with short, straight adapter and 90°...
... the manometer reading is higher than 0.75 inches of free-standing dryer: • Straight back venting allows for 0" (0 cm) installation. • Venting right with 90° elbow allows for 0.75" (2 cm) installation. • Venting downward with 90° elbow allows for 0.75" (2 cm) installation. • Venting left with short, straight adapter and 90°...
Installation Instructions (All Languages)
Page 9
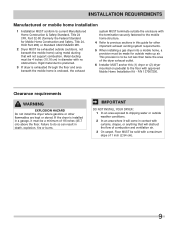
...oor with no obstructions. This provision is installed in diameter with approved Mobile Home Installation Kit - Clearance requirements WARNING EXPLOSION HAZARD Do not install the dryer where gasoline or other important exhaust venting system requirements. 5 When installing a gas dryer into a mobile home, a provision must ...cm) in a garage, it will obstruct the flow of the dryer exhaust outlet. 6 Installer MUST anchor this guide for other flammables are kept or stored. IMPORTANT DO NOT INSTALL YOUR DRYER: 1 In an area exposed to dripping water or outside weather conditions. ...
...oor with no obstructions. This provision is installed in diameter with approved Mobile Home Installation Kit - Clearance requirements WARNING EXPLOSION HAZARD Do not install the dryer where gasoline or other important exhaust venting system requirements. 5 When installing a gas dryer into a mobile home, a provision must ...cm) in a garage, it will obstruct the flow of the dryer exhaust outlet. 6 Installer MUST anchor this guide for other flammables are kept or stored. IMPORTANT DO NOT INSTALL YOUR DRYER: 1 In an area exposed to dripping water or outside weather conditions. ...

Installation Instructions (All Languages)
Page 10
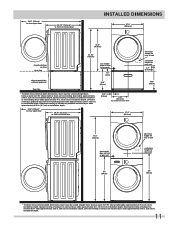
... UnderCounter 0" (0 cm) 0" (0 cm)* 0" (0 cm) n/a Closet 0" (0 cm) 0" (0 cm)* 0" (0 cm) 1" (2.54 cm) * For other than straight back venting, a quick-turn 90° dryer vent elbow must be installed in a closet with a solid door. 4 Closet door ventilation required: A minimum of 120 square inches (774.2 cm²) of opening, equally divided at the... top and bottom of the door is acceptable. DO NOT install your dryer in the same closet as described previously in . (387.1cm²) 1" (2.54cm) 0" (0cm) 10 3" (7.6cm) closet door...
... UnderCounter 0" (0 cm) 0" (0 cm)* 0" (0 cm) n/a Closet 0" (0 cm) 0" (0 cm)* 0" (0 cm) 1" (2.54 cm) * For other than straight back venting, a quick-turn 90° dryer vent elbow must be installed in a closet with a solid door. 4 Closet door ventilation required: A minimum of 120 square inches (774.2 cm²) of opening, equally divided at the... top and bottom of the door is acceptable. DO NOT install your dryer in the same closet as described previously in . (387.1cm²) 1" (2.54cm) 0" (0cm) 10 3" (7.6cm) closet door...
Installation Instructions (All Languages)
Page 11
... center of rear vent 27.0" (68.5cm) electrical supply on rear of unit centerline height for rear vent 39" (99cm) * To obtain these minimal depth dimensions, dryer must be vented straight back. Downward venting of exhaust on stacked dryer adds approximately 2.25 in . (10.2 cm) to installation depth. Leftward venting of exhaust on stacked...
... center of rear vent 27.0" (68.5cm) electrical supply on rear of unit centerline height for rear vent 39" (99cm) * To obtain these minimal depth dimensions, dryer must be vented straight back. Downward venting of exhaust on stacked dryer adds approximately 2.25 in . (10.2 cm) to installation depth. Leftward venting of exhaust on stacked...


