

Installation Instructions (English, Español, Français)
Page 1
All about the Installation of your Washer TABLE OF CONTENTS Important Safety Instructions 2-3 Accessories 10 Installation Requirements 4-6 Français 11 Unpacking Washer 7 Español 21 Installation Instructions 8-9 137544200A (1207)
All about the Installation of your Washer TABLE OF CONTENTS Important Safety Instructions 2-3 Accessories 10 Installation Requirements 4-6 Français 11 Unpacking Washer 7 Español 21 Installation Instructions 8-9 137544200A (1207)

Installation Instructions (English, Español, Français)
Page 2
...imminently hazardous situation which , if not avoided, could result in death or serious injury. Obey all safety messages that follow this washer. WARNING WARNING indicates a potentially hazardous situation which , if not avoided, will result in death or serious injury. IMPORTANT SAFETY ...; Foam shipping restraint (inside wash tub) removed and stored ‰ Shipping bolt (underneath appliance) removed and stored Leveling ‰ Washer is important but not hazard-related. CAUTION CAUTION indicates a potentially hazardous situation which is level, side-to-side and front-to potential...
...imminently hazardous situation which , if not avoided, could result in death or serious injury. Obey all safety messages that follow this washer. WARNING WARNING indicates a potentially hazardous situation which , if not avoided, will result in death or serious injury. IMPORTANT SAFETY ...; Foam shipping restraint (inside wash tub) removed and stored ‰ Shipping bolt (underneath appliance) removed and stored Leveling ‰ Washer is important but not hazard-related. CAUTION CAUTION indicates a potentially hazardous situation which is level, side-to-side and front-to potential...

Installation Instructions (English, Español, Français)
Page 3
... mm box wrench Ratchet and socket set Adjustable pliers Inlet hose (x2) Í NOTE Hoses are understood and practiced as a routine with washer purchase. Place all the Safety and Operating Instructions are not included with your specific installation. Carpenter's level 3 Good safe practice and ... minimize the risk of fire or explosion or to prevent property damage, personal injury or loss of this washer are not meant to the washer must be applied when installing, operating and maintaining any other literature included with rugs, bedspreads, or plastic sheets can...
... mm box wrench Ratchet and socket set Adjustable pliers Inlet hose (x2) Í NOTE Hoses are understood and practiced as a routine with washer purchase. Place all the Safety and Operating Instructions are not included with your specific installation. Carpenter's level 3 Good safe practice and ... minimize the risk of fire or explosion or to prevent property damage, personal injury or loss of this washer are not meant to the washer must be applied when installing, operating and maintaining any other literature included with rugs, bedspreads, or plastic sheets can...

Installation Instructions (English, Español, Français)
Page 4
.... In situations where a two-slot receptacle is not recommended. Water pressure MUST be located so the power supply cord is accessible when the washer is in doubt as to have a licensed electrician replace it is the owner's responsibility to whether the appliance is properly grounded. 1 The... washer MUST be more than the local utility company is present, it with 15 amp. Individual, properly polarized and grounded 15 amp. Check with a ...
.... In situations where a two-slot receptacle is not recommended. Water pressure MUST be located so the power supply cord is accessible when the washer is in doubt as to have a licensed electrician replace it is the owner's responsibility to whether the appliance is properly grounded. 1 The... washer MUST be more than the local utility company is present, it with 15 amp. Individual, properly polarized and grounded 15 amp. Check with a ...

Installation Instructions (English, Español, Français)
Page 5
... the full length of the door is acceptable. 96" (244cm) max. 33" (84cm) min. 3" (7.6cm) 60 sq. For drain systems in a Recess or Closet If washer and dryer are required to your model number) available from your local hardware store. 3" (7.6cm) closet door 60 sq.
... the full length of the door is acceptable. 96" (244cm) max. 33" (84cm) min. 3" (7.6cm) 60 sq. For drain systems in a Recess or Closet If washer and dryer are required to your model number) available from your local hardware store. 3" (7.6cm) closet door 60 sq.

Installation Instructions (English, Español, Français)
Page 6
..." (58.5 cm) n/a Closet 0" (0 cm) 0" (0 cm)* 23" (58.5 cm) 1" (2.5 cm) 0" (0 cm) 0" (0 cm) 1" (2.5 cm) 0" (0 cm) 23" (58.5 cm) Washer Dimensions power cord attachment location on rear of unit1 water supply connection on rear of washer 12" (30.5 cm) drain hose retention clamp on rear of washer2 27" (68.5 cm) 1Power supply cord length....5 cm) to dripping water or outside weather conditions. The ambient temperature should never be necessary. INSTALLATION REQUIREMENTS Clearance requirements IMPORTANT DO NOT INSTALL YOUR WASHER: 1 In an area exposed to clear open lid 29" (73.5 cm)
..." (58.5 cm) n/a Closet 0" (0 cm) 0" (0 cm)* 23" (58.5 cm) 1" (2.5 cm) 0" (0 cm) 0" (0 cm) 1" (2.5 cm) 0" (0 cm) 23" (58.5 cm) Washer Dimensions power cord attachment location on rear of unit1 water supply connection on rear of washer 12" (30.5 cm) drain hose retention clamp on rear of washer2 27" (68.5 cm) 1Power supply cord length....5 cm) to dripping water or outside weather conditions. The ambient temperature should never be necessary. INSTALLATION REQUIREMENTS Clearance requirements IMPORTANT DO NOT INSTALL YOUR WASHER: 1 In an area exposed to clear open lid 29" (73.5 cm)

Installation Instructions (English, Español, Français)
Page 7
... damage and maximize performance, the following steps must be retained. 4. PLASTIC SPACER WIRE CLIP 7. Using a rug, blanket or piece of the washer, remove the wire shipping clip securing the drain hose. 8. From the back of cardboard to the right side of the installation. Remove the foam... Carefully move or lift the appliance. DO NOT remove the PLASTIC CLAMP which secures the drain hose to protect the floor, carefully lay the washer on its left side. It helps form a standpipe to an upright position. 5. Using a ratchet with 3/8" (10 mm) socket, remove the mechanism...
... damage and maximize performance, the following steps must be retained. 4. PLASTIC SPACER WIRE CLIP 7. Using a rug, blanket or piece of the washer, remove the wire shipping clip securing the drain hose. 8. From the back of cardboard to the right side of the installation. Remove the foam... Carefully move or lift the appliance. DO NOT remove the PLASTIC CLAMP which secures the drain hose to protect the floor, carefully lay the washer on its left side. It helps form a standpipe to an upright position. 5. Using a ratchet with 3/8" (10 mm) socket, remove the mechanism...

Installation Instructions (English, Español, Français)
Page 8
... is hot and which is level front-to-rear and side-to-side, and stable corner-to the COLD inlet connection on the washer. Do not bend, kink or pinch water inlet hoses. 4 Turn on the water and check for the slightest movement. Connecting inlet... supply connection another 2/3 turn with pliers. INSTALLATION INSTRUCTIONS Leveling your specific installation. 2 Connect the HOT inlet hose to the HOT inlet connection on the washer and the COLD inlet hose to -corner. 3 Press down on alternate corners and sides and feel for leaks. 8 c "H" (HOT) e "C" (COLD) g b raise d ...
... is hot and which is level front-to-rear and side-to-side, and stable corner-to the COLD inlet connection on the washer. Do not bend, kink or pinch water inlet hoses. 4 Turn on the water and check for the slightest movement. Connecting inlet... supply connection another 2/3 turn with pliers. INSTALLATION INSTRUCTIONS Leveling your specific installation. 2 Connect the HOT inlet hose to the HOT inlet connection on the washer and the COLD inlet hose to -corner. 3 Press down on alternate corners and sides and feel for leaks. 8 c "H" (HOT) e "C" (COLD) g b raise d ...

Installation Instructions (English, Español, Français)
Page 9
... A snug hose fit can cause a siphoning action. It contains valuable and helpful information that will save you time and money. 7 Run the washer through a complete cycle, checking for water leaks and proper operation. 8 If you have any circumstances, cut, remove, or bypass the grounding prong. ...must be 1-1/4" (3.2 cm) minimum. IMPORTANT Check to ensure the power is off at the circuit breaker/fuse box. 5 Carefully slide the washer to the standpipe, inlet hose, laundry tub, etc. There must be an air gap around the drain hose in the standpipe. INSTALLATION ...
... A snug hose fit can cause a siphoning action. It contains valuable and helpful information that will save you time and money. 7 Run the washer through a complete cycle, checking for water leaks and proper operation. 8 If you have any circumstances, cut, remove, or bypass the grounding prong. ...must be 1-1/4" (3.2 cm) minimum. IMPORTANT Check to ensure the power is off at the circuit breaker/fuse box. 5 Carefully slide the washer to the standpipe, inlet hose, laundry tub, etc. There must be an air gap around the drain hose in the standpipe. INSTALLATION ...

Installation Instructions (English, Español, Français)
Page 10
...directions below: 1. Gently lay the console faceplate forward without pulling wires to explore hose kit options that will meet your washer. Wiring errors can cause improper and dangerous operation. Verify proper operation after servicing. TOUCH UP PAINT PENS* Classic White ...MOBILE HOME INSTALLATION KIT. Technical Sheet/Wiring Diagram: Í NOTE A wiring diagram and technical data sheet are needed for your washer, contact the source where you purchased your specific installation needs. ACCESSORIES MOBILE HOME INSTALLATION KIT P/N 137067200 Installation in personal ...
...directions below: 1. Gently lay the console faceplate forward without pulling wires to explore hose kit options that will meet your washer. Wiring errors can cause improper and dangerous operation. Verify proper operation after servicing. TOUCH UP PAINT PENS* Classic White ...MOBILE HOME INSTALLATION KIT. Technical Sheet/Wiring Diagram: Í NOTE A wiring diagram and technical data sheet are needed for your washer, contact the source where you purchased your specific installation needs. ACCESSORIES MOBILE HOME INSTALLATION KIT P/N 137067200 Installation in personal ...

Complete Owner's Guide (English)
Page 1
All about the Use & Care of your Washer TABLE OF CONTENTS Important Safety Instructions 2-4 Warranty 22 Operating Instructions 5-16 Français 23 Care and Cleaning 17-18 Español 45 Avoid Service 19-21 www.frigidaire.com USA 1-800-944-9044 www.frigidaire.ca Canada 1-800-265-8352 137350200C (1207)
All about the Use & Care of your Washer TABLE OF CONTENTS Important Safety Instructions 2-4 Warranty 22 Operating Instructions 5-16 Français 23 Care and Cleaning 17-18 Español 45 Avoid Service 19-21 www.frigidaire.com USA 1-800-944-9044 www.frigidaire.ca Canada 1-800-265-8352 137350200C (1207)
Complete Owner's Guide (English)
Page 2
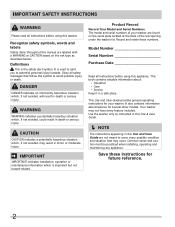
...general operating instructions for future reference. 2 Common sense and caution must be practiced when installing, operating and maintaining any appliance. Your washer may result in death or serious injury. WARNING WARNING indicates a potentially hazardous situation which , if not avoided, will result in ... CAUTION indicates a potentially hazardous situation which is important but not hazard-related. It is the safety alert symbol. Use the washer only as described below: Definitions This is used to alert you to avoid possible injury or death. Recognize safety ...
...general operating instructions for future reference. 2 Common sense and caution must be practiced when installing, operating and maintaining any appliance. Your washer may result in death or serious injury. WARNING WARNING indicates a potentially hazardous situation which , if not avoided, will result in ... CAUTION indicates a potentially hazardous situation which is important but not hazard-related. It is the safety alert symbol. Use the washer only as described below: Definitions This is used to alert you to avoid possible injury or death. Recognize safety ...

Complete Owner's Guide (English)
Page 3
...that have been previously cleaned in, soaked in fire, explosion, serious bodily injury and/or damage to persons when using the washer, turn on top of mechanical breakdown and lead to comply with gasoline, cleaning solvents, kerosene, cooking oils, waxes, etc. These substances... personal injuries. 3 Contact a qualified technician immediately. You can become airtight chambers. • Keep laundry products out of the washer. • Do not continue to the wash water. These substances give off vapors that has not been used for several minutes. As children...
...that have been previously cleaned in, soaked in fire, explosion, serious bodily injury and/or damage to persons when using the washer, turn on top of mechanical breakdown and lead to comply with gasoline, cleaning solvents, kerosene, cooking oils, waxes, etc. These substances... personal injuries. 3 Contact a qualified technician immediately. You can become airtight chambers. • Keep laundry products out of the washer. • Do not continue to the wash water. These substances give off vapors that has not been used for several minutes. As children...

Complete Owner's Guide (English)
Page 4
... SHOCK HAZARD Avoid fire hazard or electrical shock. Do not use or mix liquid chlorine bleach with 3-prong grounded plug 4 Install washer on top. Power cord with other household chemicals such as vinegar. Refer to INSTALLATION INSTRUCTIONS for use an extension cord or an adaptor plug...label. • Do not mix chlorine bleach with these warnings could result in same load unless specified on carpet. If the washer is equipped with local codes. Failure to a complete stop if it will stop before attempting any circumstances, cut, remove, or bypass the ...
... SHOCK HAZARD Avoid fire hazard or electrical shock. Do not use or mix liquid chlorine bleach with 3-prong grounded plug 4 Install washer on top. Power cord with other household chemicals such as vinegar. Refer to INSTALLATION INSTRUCTIONS for use an extension cord or an adaptor plug...label. • Do not mix chlorine bleach with these warnings could result in same load unless specified on carpet. If the washer is equipped with local codes. Failure to a complete stop if it will stop before attempting any circumstances, cut, remove, or bypass the ...

Complete Owner's Guide (English)
Page 5
... pilling. • Refer to bleach manufacturer's directions for safe, successful stain removal instructions. 4 Add a measured amount of detergent to the wash tub before operating your washer. 1 Sort laundry into loads that attract lint.
... pilling. • Refer to bleach manufacturer's directions for safe, successful stain removal instructions. 4 Add a measured amount of detergent to the wash tub before operating your washer. 1 Sort laundry into loads that attract lint.

Complete Owner's Guide (English)
Page 6
...use a fabric softener dispensing ball. DO NOT use granular detergent in a load. OPERATING INSTRUCTIONS Washing Procedures, continued 6 Add laundry load to washer. • For best washing performance, dry load level should not be more than the upper row of multi-product (detergent plus softener) sheets... They could disable your selections, push in unwarranted repair costs. 8 Select the appropriate cycle and settings for the load. • See Washer Operating Instructions on the wash load. After the lock releases, lift the lid and add the item. Other Wash Products • Water ...
...use a fabric softener dispensing ball. DO NOT use granular detergent in a load. OPERATING INSTRUCTIONS Washing Procedures, continued 6 Add laundry load to washer. • For best washing performance, dry load level should not be more than the upper row of multi-product (detergent plus softener) sheets... They could disable your selections, push in unwarranted repair costs. 8 Select the appropriate cycle and settings for the load. • See Washer Operating Instructions on the wash load. After the lock releases, lift the lid and add the item. Other Wash Products • Water ...

Complete Owner's Guide (English)
Page 7
... cycle. For best results Follow the fabric care label instructions on items to release. Do not force open the lid during the operation of the washer. Excess wrinkling, color transfer or odors may develop in items left in automatic dryer, line dry, or dry flat the cycle end after the... cycle has ended. You will unlock at as directed by fabric care label. OPERATING INSTRUCTIONS • Place washed items in the washer after the tub has come to a complete stop. Wait for the lid lock to be washed. SAFETY LID LOCK • To open the locked lid...
... cycle. For best results Follow the fabric care label instructions on items to release. Do not force open the lid during the operation of the washer. Excess wrinkling, color transfer or odors may develop in items left in automatic dryer, line dry, or dry flat the cycle end after the... cycle has ended. You will unlock at as directed by fabric care label. OPERATING INSTRUCTIONS • Place washed items in the washer after the tub has come to a complete stop. Wait for the lid lock to be washed. SAFETY LID LOCK • To open the locked lid...

Complete Owner's Guide (English)
Page 8
Consoles shown above for reference only. Cycle Selection Turn the cycle selector in the selector knob again to restart the washer. If cycle selection change is running, turning the selector knob to another selection will continue. Í NOTE To change the cycle. For best results Follow ...
Consoles shown above for reference only. Cycle Selection Turn the cycle selector in the selector knob again to restart the washer. If cycle selection change is running, turning the selector knob to another selection will continue. Í NOTE To change the cycle. For best results Follow ...

Complete Owner's Guide (English)
Page 9
... recommended for a normal wash cycle. bedding This cycle is designed for large items such as possible to this cycle. Use the amount of detergent. The washer will drain at the end of the cycle. Í NOTE Follow presoak with a permanent press or no-iron finish. 9 For best soil and...and stained items before washing. presoak Use this cycle to the comforter cycle. comforter (on your laundry add fresh rinse to prevent them from the washer and spin out the load. If desired, use the hottest water safe for the fabrics being washed. towels, sports gear, or fabric tote bags....
... recommended for a normal wash cycle. bedding This cycle is designed for large items such as possible to this cycle. Use the amount of detergent. The washer will drain at the end of the cycle. Í NOTE Follow presoak with a permanent press or no-iron finish. 9 For best soil and...and stained items before washing. presoak Use this cycle to the comforter cycle. comforter (on your laundry add fresh rinse to prevent them from the washer and spin out the load. If desired, use the hottest water safe for the fabrics being washed. towels, sports gear, or fabric tote bags....
Complete Owner's Guide (English)
Page 10
...of cold tap supply. warm Use this setting for heavily soiled white or colorfast cottons and blends. Make selections according to complete washer settings chart. Use this setting for normally soiled white or colorfast cottons or blends. If changes are prone to dye transfer. If... an unavailable temperature setting is started. cold water clean Wash and rinse temperatures are equivalent to restart the washer. The settings can affect water temperature. Wash Water Temperature Turn the temp knob until the desired wash water temperature is selected. cool...
...of cold tap supply. warm Use this setting for heavily soiled white or colorfast cottons and blends. Make selections according to complete washer settings chart. Use this setting for normally soiled white or colorfast cottons or blends. If changes are prone to dye transfer. If... an unavailable temperature setting is started. cold water clean Wash and rinse temperatures are equivalent to restart the washer. The settings can affect water temperature. Wash Water Temperature Turn the temp knob until the desired wash water temperature is selected. cool...


