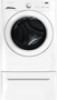
Installation Instructions (All Languages)
Page 3
... of all the Safety and Operating Instructions are not meant to light any appliance. • Do not touch any appliance. Do not stack washer on pedestal. Do not store or use them for play. Maximum benefits and enjoyment are achieved when all occupants. • Immediately call the fire...
Installation Instructions (All Languages)
Page 6
...90° elbow (right or down on freestanding dryer) adds approximately 0.75 in. (2.0 cm) to installation depth. Downward venting of exhaust on pedestal-mounted dryer adds approximately 2.25 in. (5.7 cm) to installation depth. 1Hot and cold inlet hose length approximately 43 inches (109cm). 2Power supply...Upward venting of unit2 freestand washer on floor floor line 51.25" (130cm) 36.0" (91.5cm) washer mounted on optional pedestal floor line * To obtain these minimal depth dimensions, dryer must be vented straight back. Using a quick-turn 90° elbow (right...
Installation Instructions (All Languages)
Page 9
... located in the drum of the washer and install the rubber washers in each end of the washer. Í NOTE For pedestal installations, see additional installation instructions included with the pedestal. Then tighten each supply connection HOT COLD another 2/3 turn with pliers. Do not bend, kink or pinch water inlet hoses. 5 Turn...
Installation Instructions (All Languages)
Page 11
... elevate the washer for this washer may order one. P/N 5304471228 Classic Black Touch Up Pen - ACCESSORIES MATCHING STORAGE PEDESTAL* Classic White Pedestal - P/N CFPWD15N Classic Red Pedestal - DRYER STACKING KIT P/N 134700400 Depending on top of this washer may be available. If your washer or refer to... aid in dryer/ washer/pedestal feet adjustment. MOBILE HOME INSTALLATION KIT P/N 137067200 Installation in a mobile home requires the use accessories manufactured by (or approved...